


1 min read
|
03-30-2026
How to Set Up Magento 2 Top Navigation Menu [No code required]
Vinh Jacker
|
03-17-2025
![How to Set Up Magento 2 Top Navigation Menu [No code required] - Mageplaza](https://placehold.co/874x291?text=Loading)
![How to Set Up Magento 2 Top Navigation Menu [No code required] - Mageplaza](https://cdn2.mageplaza.com/media/blog/magento-2-navigation-menu/new-images/set-up-magento-top-navigation-menu-cover.webp)
The top navigation menu in Magento 2 is the bar that lets customers explore your store’s main product categories quickly. A well-structured navigation not only improves user experience but also helps search engines understand your site hierarchy and structure.
In this guide, you’ll learn how to create and customize your Magento 2 top navigation menu, no coding required.
💡 Key Takeaways:
- Understand how the Magento 2 top navigation menu improves user experience by helping customers find products faster and easier.
- Follow a simple, no-code setup to create and organize your top navigation menu directly from the Magento backend.
- Get practical tips to keep your menu clear, mobile-friendly, and aligned with your store’s best-selling categories.
Understanding Category Tiers in Magento 2
First of all, it’s important to understand how Magento 2 organizes categories. Each level determines how your products appear in the navigation menu and storefront:
Level 1: Root Category
This is the foundation of your store’s catalog.
Magento includes one root category by default, called “Default Category.” It acts as the parent of all other categories but doesn’t appear on the storefront menu.
Think of it as the invisible container that holds every product category in your store.
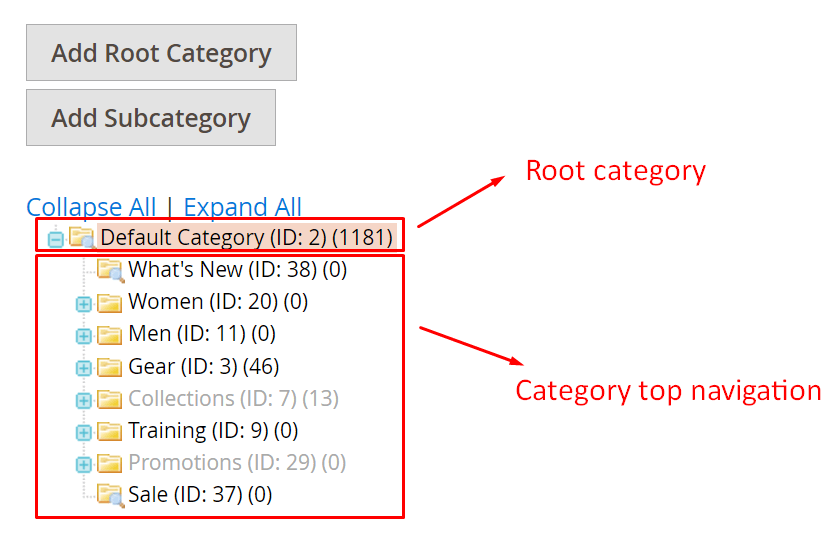
Level 2: Top-Level Categories
In Magento, the top navigation is typically an unresponsive main menu bar that spans the entire page, located just below the logo and site slogan on the frontend. When you hover or click on it, another menu slides down.
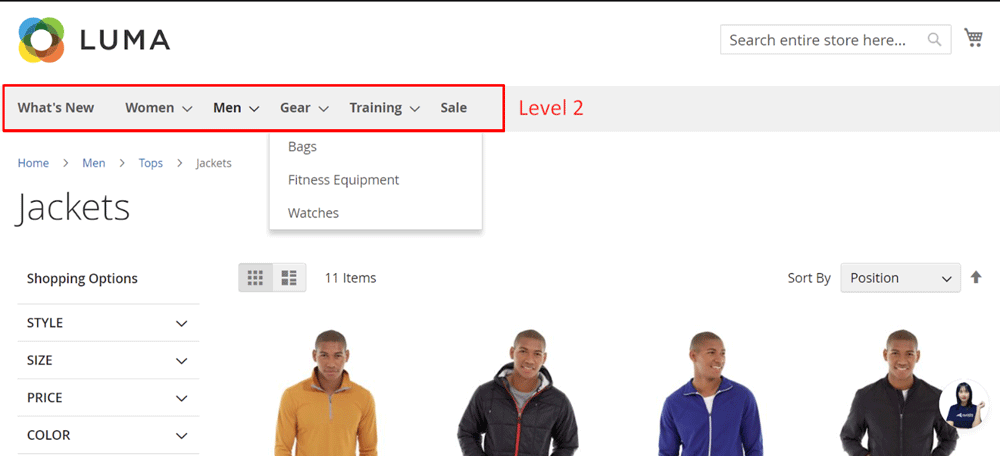
Each top-level category in this navigation usually includes one or more subcategories. However, some top-level categories might not have any subcategories, such as “What’s New” or “Sale.”
In the Luma theme, the top-level categories include:
- What’s New
- Women
- Men
- Gear
- Training
- Sale
These categories are displayed in a line and may or may not have lower-tier categories under them.
💡 Tip: Keep your top-level categories short and intuitive to make browsing easier for customers.
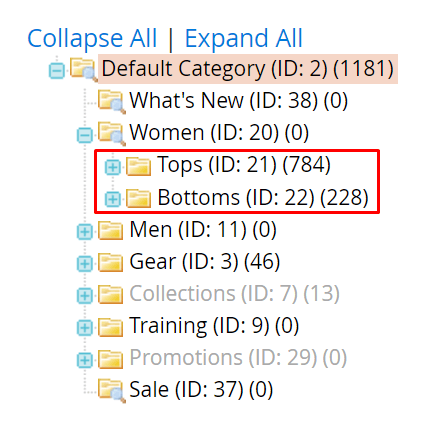
Level 3: Subcategories
Subcategories appear as dropdowns when users hover or click on a top-level category.
They help group related products under a broader section, for instance: Women → Tops → Hoodies & Sweatshirts
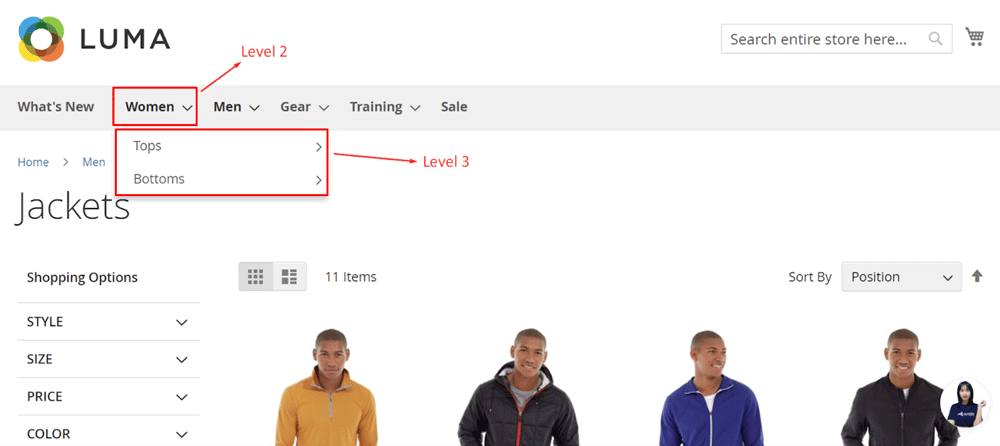
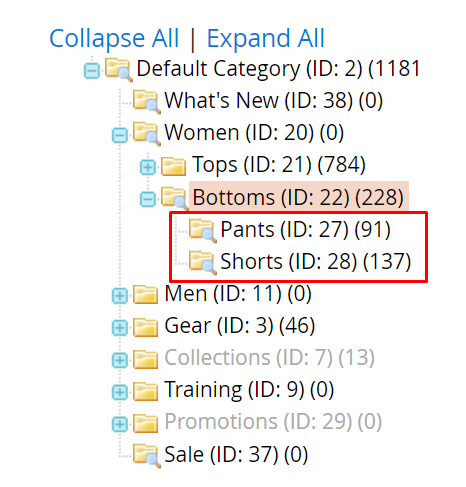
In the backend, Level 3 categories are shown indented under their parent category to indicate hierarchy.
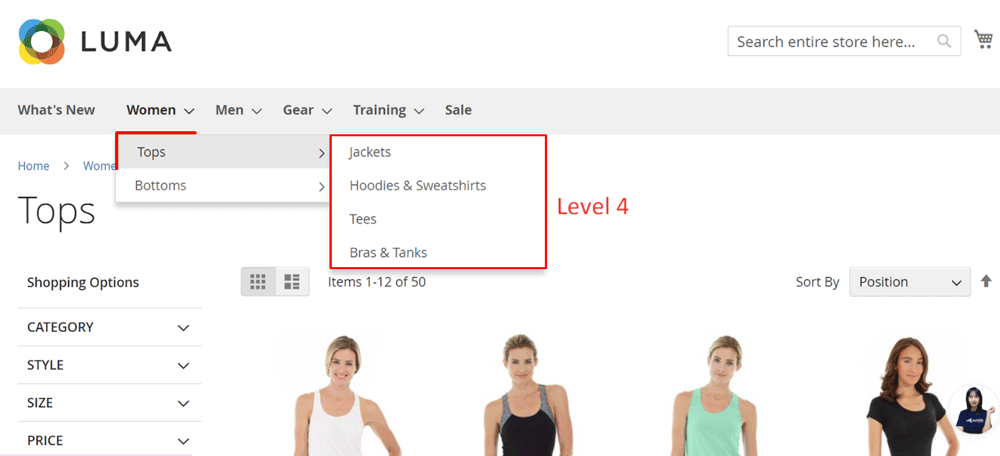
Level 4: Deeper subcategories
In Magento, Level 4 categories go one step deeper, allowing for more granular organization (e.g., “Tops → Hoodies → Zip-Up”).
In some themes, these appear as a secondary dropdown or right-side column when hovering over a Level 3 item.
In the backend, Level 4 categories are displayed with an even greater indentation compared to Level 3 categories, indicating their subordinate position.
💡 Tip: If your store uses multi-level categories, make it easier to browse by adding product filters.
How to Set Up Magento 2 Top Navigation Menu?
Step 1: Create a category
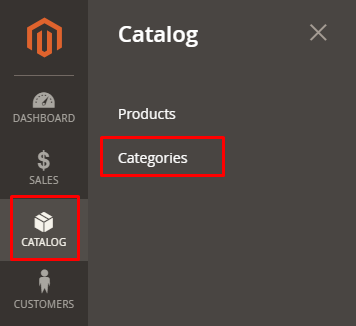
- In your Magento admin, go to
Catalog > Categories - Select
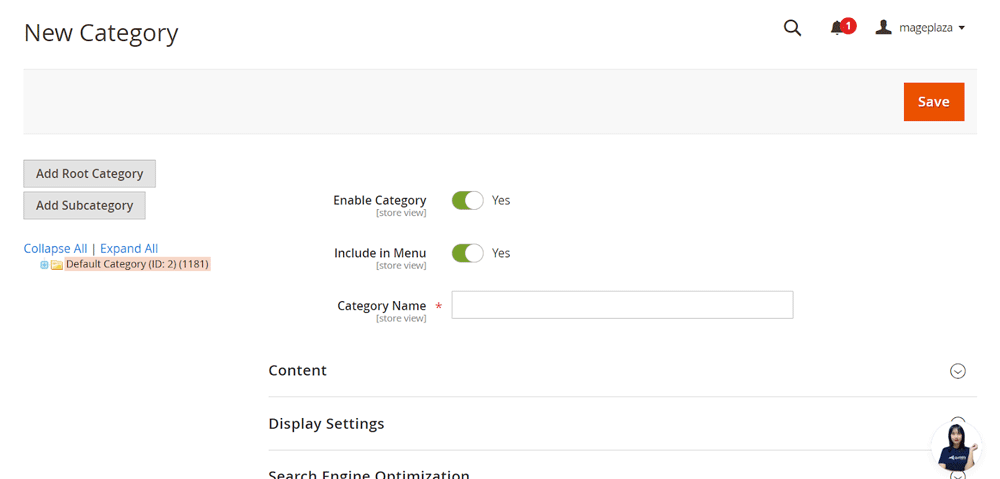
Default Category(your Level 1 root) and it will be highlighted in orange - Click
Add Subcategoryand and fill out the necessary fields to create new top-level (Level 2) or nested (Level 3/4) categories. - Press
Save
After that, you can drag and drop new categories to set their display orders. Then, confirm your changes and go to the frontend to check again.
💡 Tip: Only add categories that make sense for browsing. Too many menu items can overwhelm users and slow down navigation.
Step 2: Setting top navigation depth
Next, decide how many category levels you want to show in the top menu.
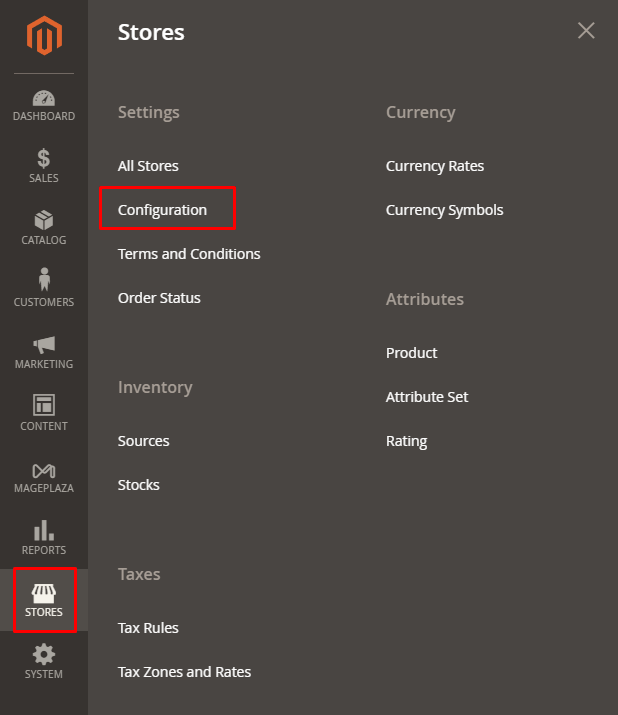
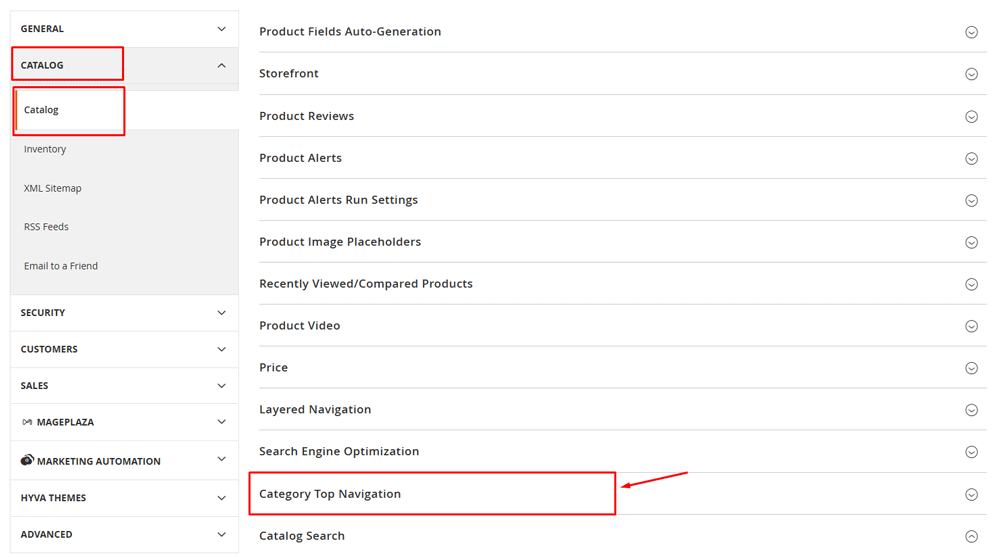
- Go to
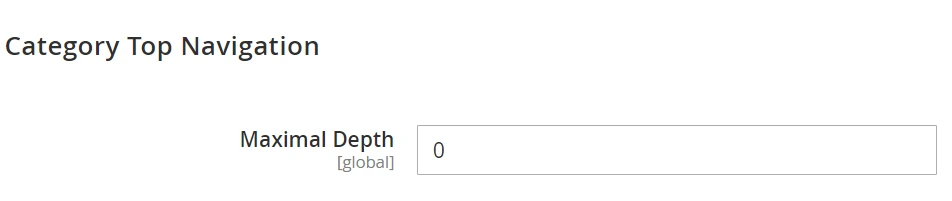
Stores > Settings > Configuration > Catalog > Catalog > Category Top Navigation - Fill in
Maximal Depth: leave it 0 if you don’t want to restrict navigation depth.
Step 3: Save & check storefront
After saving your configuration:
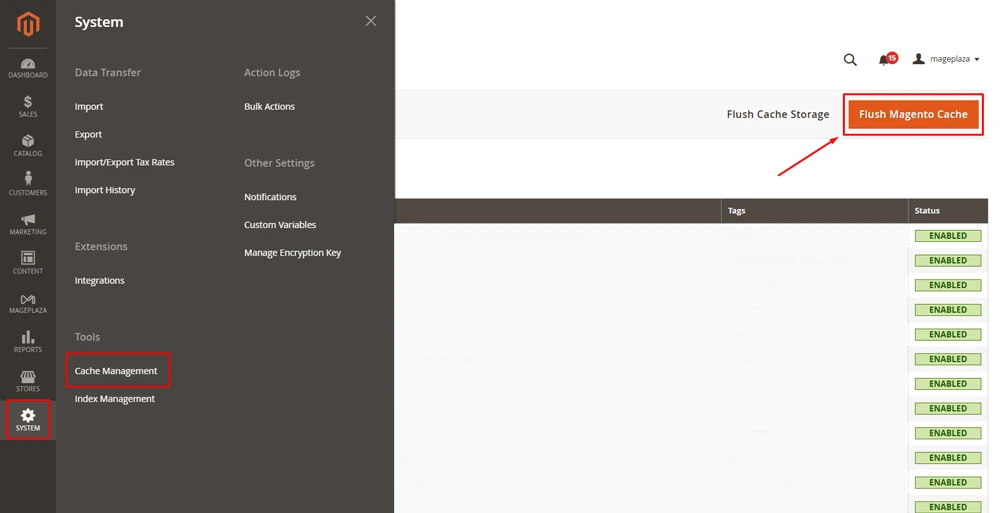
- Navigate to
System > Cache Managementand clickFlush Magento Cacheto update the changes.
-
Visit your storefront and hover over your top categories to confirm the dropdown structure.
-
If your store uses a responsive theme (like Hyvä or Luma), check the navigation on both desktop and mobile devices.
💡 Tip: If categories don’t appear immediately, double-check:
- “Include in Menu” is Enabled.
- The category status is Active.
- Cache is cleared and indexes are up to date.
Common Problems When Setting Up Magento 2 Top Navigation Menu
The top navigation menu doesn’t show up
Why it happens:
- Your categories aren’t set to “Include in Menu.”
- The wrong root category is assigned to your store view.
How to fix it:
- Go to
Catalog > Categories. - Select your root category and ensure Enable Category = Yes and Include in Menu = Yes.
- Add subcategories if your root is empty; Magento won’t display an empty menu.
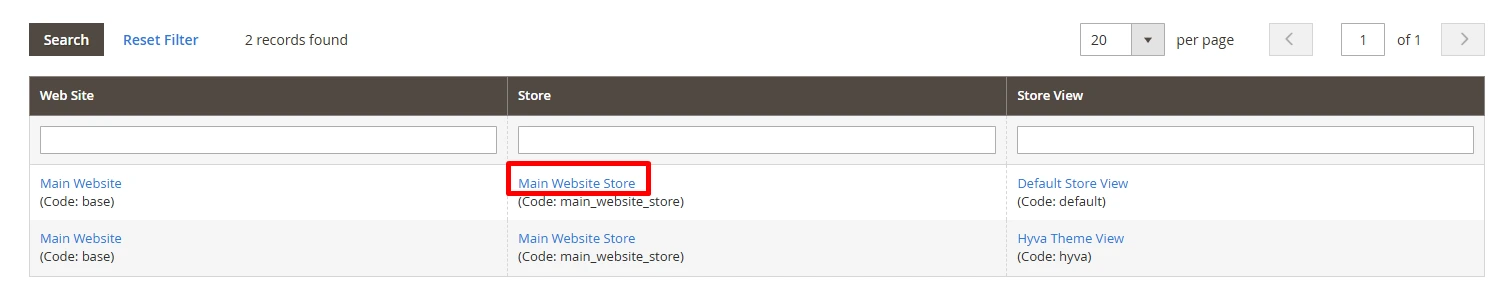
- Then go to
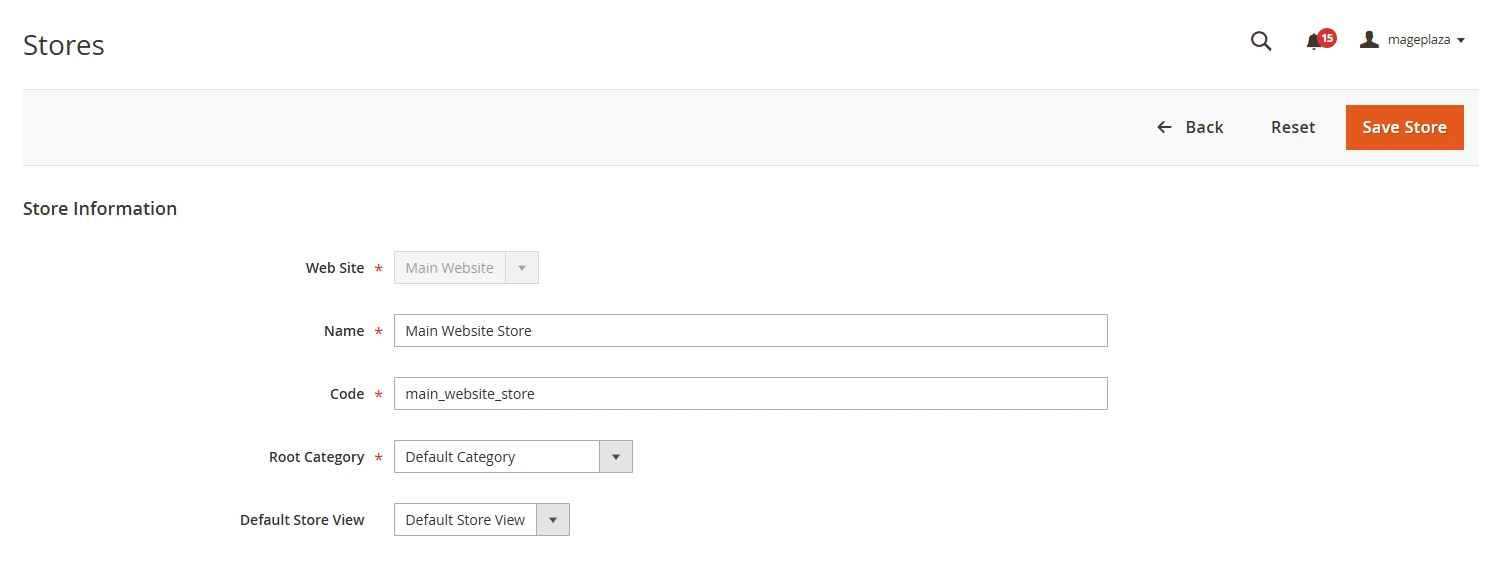
Stores > All Storesand check that the correct Root Category is assigned to your website. - Click
Save Store, thenFlush Magento CacheunderSystem > Cache Management.
💡 Tips
- If your site uses multiple store views, each one may have a separate root category; make sure the right one is connected.
- If it’s not in the Navigation Menu yet, flush your Magento Cache.
Subcategories don’t appear
Why it happens: The “Maximal Depth” setting limits how many category levels appear in your top navigation. If it’s set to 1, your subcategories (Level 3 and deeper) won’t display.
How to fix it:
- Go to
Stores > Configuration > Catalog > Category Top Navigation. - Increase Maximal Depth to 2 or 3.
- Save and flush cache.

💡 Tip: A depth of 2 is ideal for simple catalogs; go higher only if your products truly need multiple layers.
Menu looks or behaves poorly on mobile
Why it happens: Some themes have limited mobile support for multi-level menus, making it harder for shoppers to navigate on smaller screens.
How to fix it:
You can install a third-party extension, which automatically optimizes navigation for both desktop and mobile. It offers a drag-and-drop menu builder, supports icons and images, and ensures a smooth user experience across all devices.
💡 Tip: Always preview your menu in both desktop and mobile modes after setup to make sure it’s fully responsive.
Wrap Up
The Magento 2 top navigation menu is more than just a design element; it shapes how customers explore your store, find products, and make purchase decisions. By understanding category levels and following simple no-code steps, you can create a smooth, intuitive shopping experience that boosts engagement.
We hope this guide helps you set up and manage your Magento 2 navigation menu with confidence. If you run into any issues or want to upgrade your menu design, feel free to contact us for support.
Related posts:
Table of content

Jacker is the Chief Technology Officer (CTO) at Mageplaza, bringing over 10 years of experience in Magento, Shopify, and other eCommerce platforms. With deep technical expertise, he has led numerous successful projects, optimizing and scaling online stores for global brands. Beyond his work in eCommerce development, he is passionate about running and swimming.
Related Post

Magento 2.4.9 Beta Release: What's New?
Magento 2.4.9 beta is here. Stay up to date with every release milestone with this regularly updated guide.
11 mins read
|
03-17-2026

Google Analytics Website Traffic: The A–Z Guide for Magento 2 Store Owners
Learn how to analyze website traffic in Google Analytics 4, identify high-quality traffic sources, and grow your Magento 2 store with data-driven insights.
18 mins read
|
03-17-2026

The Complete Guide to UTM Parameters & Google Analytics for Magento website
Master UTM parameters and Google Analytics for Magento. Track traffic sources, measure campaign performance, and practical tips to use it for better business decisions.
9 mins read
|
10-05-2025
How to implement Cookie Consent for GTM & Google Analytics in Magento Under GDPR?
Implement cookie consent for GTM & GA4 in Magento under GDPR. Step-by-step guide using Google Consent Mode v2 to avoid fines and maintain analytics.
15 mins read
|
02-27-2026

Speed vs. Sales: Comparing Hyvä Checkout and Mageplaza One Step Checkout
Learn how Hyvä Checkout and Mageplaza One Step Checkout impact order completion rates and revenue growth.
8 mins read
|
02-25-2026
1 min read
|
03-30-2026
Magento 2.4.9 Beta Release: What's New?
Magento 2.4.9 beta is here. Stay up to date with every release milestone with this regularly updated guide.
11 mins read
|
03-17-2026
Google Analytics Website Traffic: The A–Z Guide for Magento 2 Store Owners
Learn how to analyze website traffic in Google Analytics 4, identify high-quality traffic sources, and grow your Magento 2 store with data-driven insights.
18 mins read
|
03-17-2026
The Complete Guide to UTM Parameters & Google Analytics for Magento website
Master UTM parameters and Google Analytics for Magento. Track traffic sources, measure campaign performance, and practical tips to use it for better business decisions.
9 mins read
|
10-05-2025
How to implement Cookie Consent for GTM & Google Analytics in Magento Under GDPR?
Implement cookie consent for GTM & GA4 in Magento under GDPR. Step-by-step guide using Google Consent Mode v2 to avoid fines and maintain analytics.
15 mins read
|
02-27-2026
Speed vs. Sales: Comparing Hyvä Checkout and Mageplaza One Step Checkout
Learn how Hyvä Checkout and Mageplaza One Step Checkout impact order completion rates and revenue growth.
8 mins read
|
02-25-2026