Hyvä Theme is Now Open Source: What This Means for Magento Community - Mageplaza
Hyvä is now Open Source and free. Discover what changed, what remains commercial, how it impacts the Magento ecosystem, and how to maximize its full potential.
Cookies help us enhance your experience on our site by storing information about your preferences and interactions. You can customize your cookie settings by choosing which cookies to allow. Please note that disabling certain cookies might impact the functionality and features of our services, such as personalized content and suggestions. Cookie Policy
Cookie PolicyThese cookies are strictly necessary for the site to work and may not be disabled.
InformationThese cookies are strictly necessary for the site to work and may not be disabled.
| Cookie name | Description | Lifetime | Provider |
|---|---|---|---|
| _ce.clock_data | Store the difference in time from the server's time and the current browser. | 1 day | Crazy Egg |
| _ce.clock_event | Prevent repeated requests to the Clock API. | 1 day | Crazy Egg |
| _ce.irv | Store isReturning value during the session | Session | Crazy Egg |
| _ce.s | Track a recording visitor session unique ID, tracking host and start time | 1 year | Crazy Egg |
| _hjSessionUser_2909345 | Store a unique user identifier to track user sessions and interactions for analytics purposes. | 1 year | HotJar |
| _hjSession_2909345 | Store session data to identify and analyze individual user sessions. | 1 day | HotJar |
| apt.uid | Store a unique user identifier for tracking and personalization. | 1 year | Mageplaza |
| cebs | Store user preferences and settings. | Session | Mageplaza |
| cf_clearance | Store a token that indicates a user has passed a Cloudflare security challenge. | 1 year | Cloudflare |
| crisp-client | The crisp-client/session cookie is used to identify and maintain a user session within the Crisp platform. It allows the live chat system to recognize returning users, maintain chat history, and ensure continuity in customer service interactions. | Session | Crisp |
| _ga | Store a unique client identifier (Client ID) for tracking user interactions on the | 2 years | |
| _ga_7B0PZZW26Z | Store session state information for Google Analytics 4. | 2 years | |
| _ga_JTRV42NV3L | Store session state information for Google Analytics 4. | 2 years | |
| _ga_R3HWQ50MM4 | Store a unique client identifier (Client ID) for tracking user interactions on the website. | 2 years | |
| _gid | Store a unique client identifier (Client ID) for tracking user interactions on the website. | 1 day | |
| _gat_UA-76130628-1 | Throttle the request rate to Google Analytics servers. | 1 day |
Advertising cookies deliver ads relevant to your interests, limit ad frequency, and measure ad effectiveness.
InformationAdvertising cookies deliver ads relevant to your interests, limit ad frequency, and measure ad effectiveness.
| Cookie name | Description | Lifetime | Provider |
|---|---|---|---|
| _gcl_au | The cookie is used by Google to track and store conversions. | 1 day | |
| __Secure-3PAPISID | This cookie is used for targeting purposes to build a profile of the website visitor's interests in order to show relevant and personalized Google advertising. | 2 years | |
| HSID | This security cookie is used by Google to confirm visitor authenticity, prevent fraudulent use of login data and protect visitor data from unauthorized access. | 2 years | |
| __Secure-1PSID | This cookie is used for targeting purposes to build a profile of the website visitor's interests in order to show relevant and personalized Google advertising. | 2 years | |
| SID | This security cookie is used by Google to confirm visitor authenticity, prevent fraudulent use of login data and protect visitor data from unauthorized access. | 2 years | |
| APISID | This cookie is used by Google to display personalized advertisements on Google sites, based on recent searches and previous interactions. | 2 years | |
| __Secure-1PAPISID | This cookie is used for targeting purposes to build a profile of the website visitor's interests in order to show relevant and personalized Google advertising. | 2 years | |
| __Secure-3PSID | This cookie is used for targeting purposes to build a profile of the website visitor's interests in order to show relevant and personalized Google advertising. | 2 years | |
| SSID | This cookie is used by Google to display personalized advertisements on Google sites, based on recent searches and previous interactions. | 2 years | |
| SAPISID | This cookie is used by Google to display personalized advertisements on Google sites, based on recent searches and previous interactions. | 2 years | |
| __Secure-3PSIDTS | This cookie collects information about visitor's interactions with Google services and ads. It is used to measure advertising effectiveness and deliver personalised content based on interests. The cookie contains a unique identifier. | 2 years | |
| __Secure-1PSIDTS | This cookie collects information about visitor's interactions with Google services and ads. It is used to measure advertising effectiveness and deliver personalised content based on interests. The cookie contains a unique identifier. | 2 years | |
| SIDCC | This security cookie is used by Google to confirm visitor authenticity, prevent fraudulent use of login data, and protect visitor data from unauthorized access. | 3 months | |
| __Secure-1PSIDCC | This cookie is used for targeting purposes to build a profile of the website visitor's interests in order to show relevant and personalized Google advertising. | 1 year | |
| __Secure-3PSIDCC | This cookie is used for targeting purposes to build a profile of the website visitor's interests in order to show relevant and personalized Google advertising. | 1 year | |
| 1P_JAR | This cookie is a Google Analytics Cookie created by Google DoubleClick and used to show personalized advertisements (ads) based on previous visits to the website. | 1 month | |
| NID | Show Google ads in Google services for signed-out users. | 6 months |
Analytics cookies collect information and report website usage statistics without personally identifying individual visitors to Google.
InformationAnalytics cookies collect information and report website usage statistics without personally identifying individual visitors to Google.
| Cookie name | Description | Lifetime | Provider |
|---|---|---|---|
| _dc_gtm | Manage and deploy marketing tags through Google Tag Manager. | 1 year | |
| 1P_JAR | Gather website statistics and track conversion rates for Google AdWords campaigns. | 1 month | |
| AEC | 1 month | ||
| ar_debug | Debugging purposes related to augmented reality (AR) functionalities. | 1 month | Doubleclick |
| IDE | The IDE cookie is used by Google DoubleClick to register and report the user's actions after viewing or clicking on one of the advertiser's ads with the purpose of measuring the effectiveness of an ad and to present targeted ads to the user. | 1 year | Doubleclick |
| ad_storage | Enables storage, such as cookies (web) or device identifiers (apps), related to advertising. | 1 year | |
| ad_user_data | Sets consent for sending user data to Google for online advertising purposes. | 1 year | |
| ad_personalization | Sets consent for personalized advertising. | 1 year | |
| analytics_storage | Enables storage, such as cookies (web) or device identifiers (apps), related to analytics, for example, visit duration. | 1 year |
Vinh Jacker | 03-17-2025
If you’re looking for a complete, beginner-friendly guide to installing Magento 2 on Windows, you’re in the right place. In this article, we’ll walk you through installing Magento 2.3 (or the latest version) locally using XAMPP with Apache, MariaDB, and PHP 7.x+.
We’ll cover every step — from setting up XAMPP to running the Magento 2 Setup Wizard. Whether you’re downloading Magento from the official repo or GitHub, this guide will help you get your store up and running.
If you’re interested in other environments like Ubuntu or CentOS, you can also read our separate guides for those platforms.
Magento 2 Requirements
Before digging in, you should double check 8 main requirements for Magento 2 here.
XAMPP is one of the most popular solutions for setting up a local web server on Windows. It includes Apache (or NginX), MariaDB (or MySQL), and PHP in one easy installation.
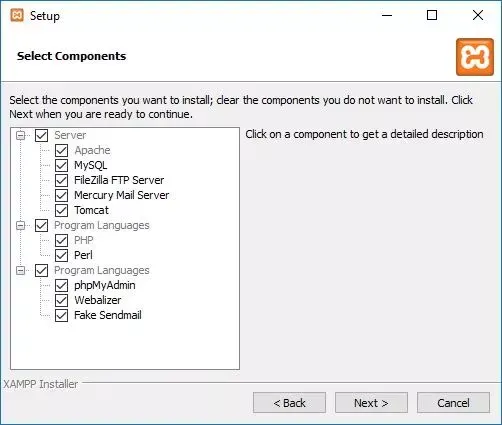
Install it in C drive. We suppose that the path is: c:\xampp\
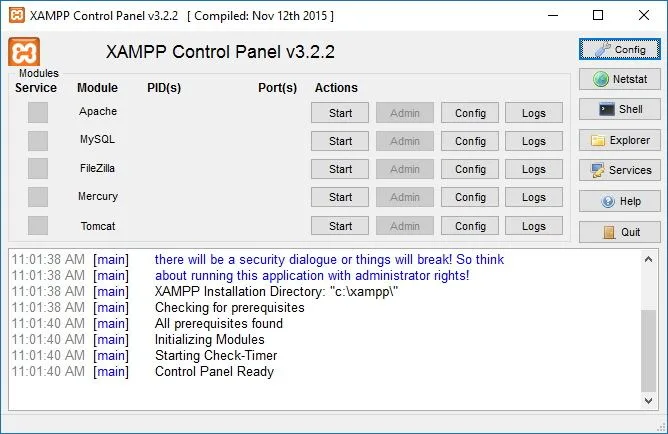
Now you have already set up XAMPP successfully on your Windows.
Magento uses Composer to manage dependencies, so it’s a good idea to install it now.
php -r "copy('https://getcomposer.org/installer', 'composer-setup.php');"
php composer-setup.php
php -r "unlink('composer-setup.php');"
You can download from one of the following resources:
After downloading, you should extract the pack to c:\xampp\htdocs\magento2. E.g. you have a folder called: magento2 in c:\xampp\htdocs\
If you need a more detailed walkthrough on different Magento 2 installation methods, check out our guide on how to install Magento 2.
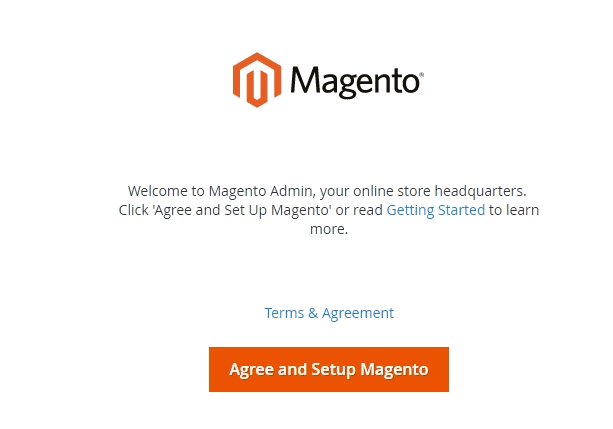
When you get access to this address http://localhost/magento2, you will see the Magento Setup Wizard as the follows:
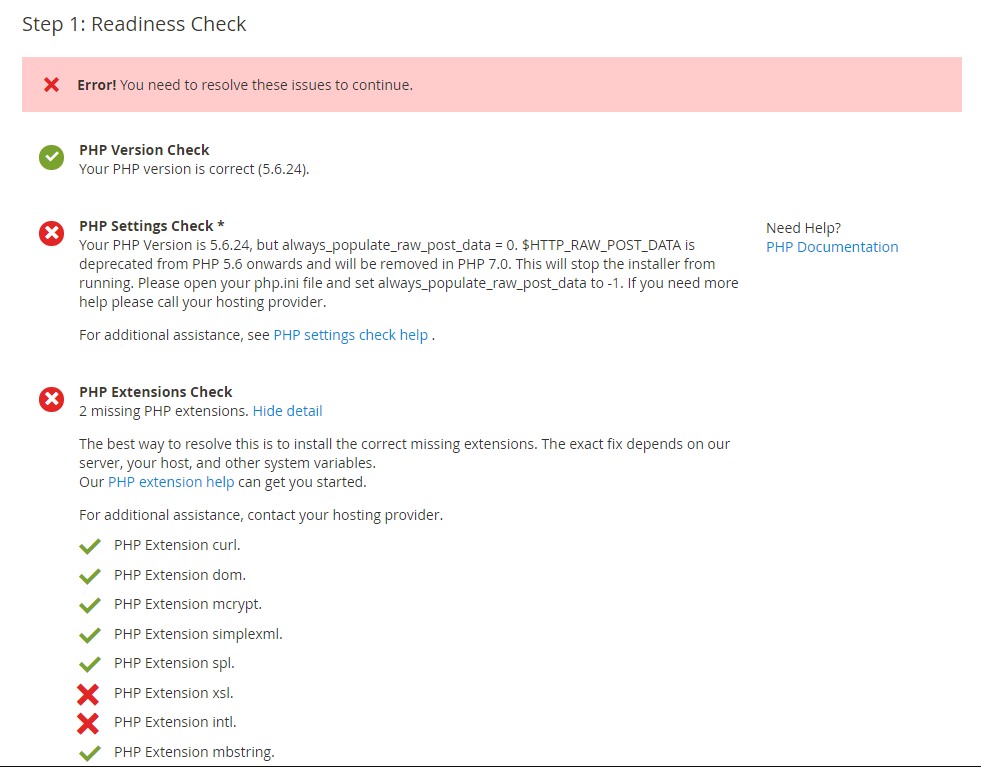
Start Readiness Check. If any errors are displayed, you must resolve them before you continue. Click More detail if available to see more information about each check.
NextFill database information then click Next
http://localhostNext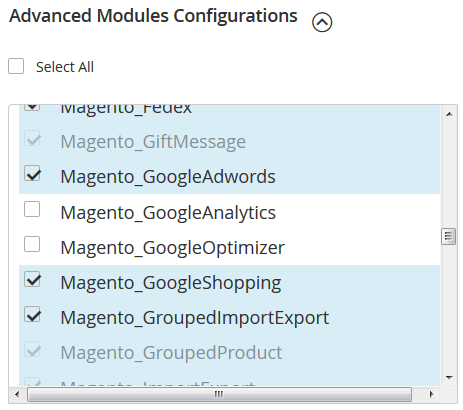
You can choose to install Sample Data or not in this step.
NextImportant Notice: Use Skip dependency check for individual modules with caution. We recommend against it because a typical reason for this error is you manually edited the deployment configuration. Editing the deployment configuration is not recommended because future Magento software updates can undo your changes.
Now enter admin information such as
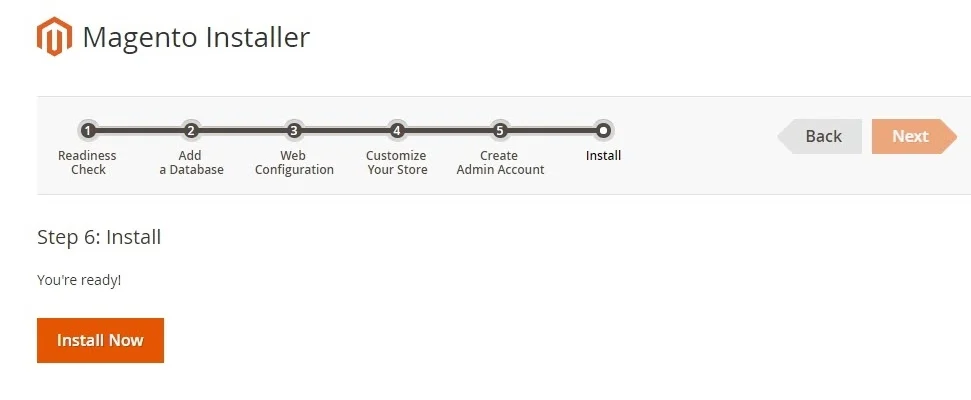
After completing all previous steps in the Setup Wizard, click Install Now.
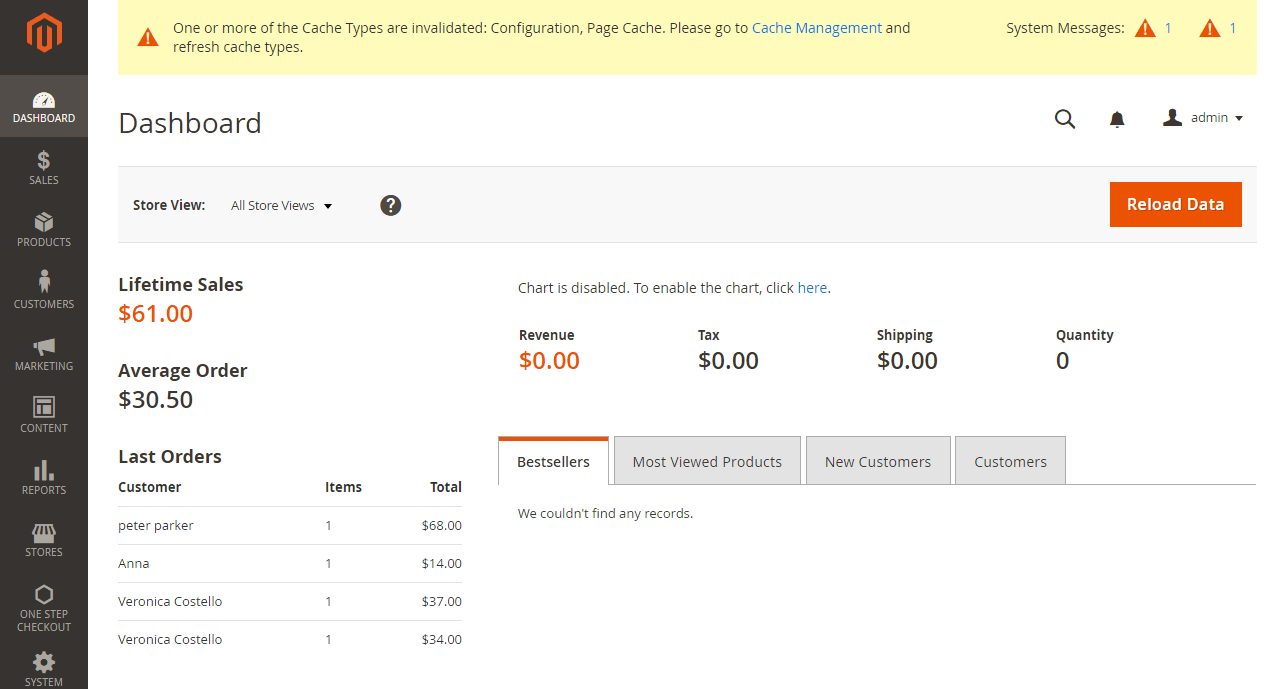
Installation Success The message Success will be displayed to indicate a successful installation.
Now go to the frontend and backend to see the result
Frontend

Backend
That’s all for today. We hope you have gained more insight into how to install Magento 2 on XAMPP Windows. Feel free to leave comments below or contact us if you have any questions or sharing. And stay tuned for next guidance from us!
Installing Magento 2 on Windows using XAMPP is a straightforward process when broken down step-by-step. With a working local environment, you can start developing your store, testing extensions, and experimenting without affecting a live site.
If you’re planning to launch a production site later, be sure to revisit best practices for server configuration and Magento security.
Stay tuned for more Magento 2 tutorials — and feel free to leave a comment or reach out if you have any questions along the way!
Related Topics

Jacker is the Chief Technology Officer (CTO) at Mageplaza, bringing over 10 years of experience in Magento, Shopify, and other eCommerce platforms. With deep technical expertise, he has led numerous successful projects, optimizing and scaling online stores for global brands. Beyond his work in eCommerce development, he is passionate about running and swimming.
Related Post

Hyvä Theme is Now Open Source: What This Means for Magento Community - Mageplaza
Hyvä is now Open Source and free. Discover what changed, what remains commercial, how it impacts the Magento ecosystem, and how to maximize its full potential.


Holiday Marketing Hacks 2025 - How to Boost Sales for Magento 2 Stores? - Mageplaza
Discover the best 2025 holiday marketing strategies for Magento 2. Learn key trends, creative campaign ideas, and expert tips to increase seasonal sales.

Hyvä Theme is Now Open Source: What This Means for Magento Community - Mageplaza
Hyvä is now Open Source and free. Discover what changed, what remains commercial, how it impacts the Magento ecosystem, and how to maximize its full potential.


Holiday Marketing Hacks 2025 - How to Boost Sales for Magento 2 Stores? - Mageplaza
Discover the best 2025 holiday marketing strategies for Magento 2. Learn key trends, creative campaign ideas, and expert tips to increase seasonal sales.

