


1 min read
|
03-30-2026
9 Steps to Build a Magento Website from Scratch (2025 Guide)
Vinh Jacker
|
08-20-2025


Global eCommerce is booming (yes, really booming!) – expected to reach US$4.96 trillion in revenue by 2030. No matter if you’re a small retailer, a B2B wholesaler, or an enterprise, launching your own online store is no longer optional – it’s essential.
If you’re planning to build a Magento website, you’re tapping into one of the most flexible and powerful platforms available. Magento website development powers industry leaders like Coca-Cola, Ford, and Nestlé – proving it can handle everything from niche boutiques to enterprise-grade operations.
This guide walks you through every step of Magento site development, from initial setup and configuration to product strategy, optimization, and ongoing performance tuning – so you can confidently launch and grow your online store in the competitive eCommerce landscape of 2025.
Key Takeaways
- Magento offers powerful scalability – ideal for businesses expecting rapid growth or managing large product catalogs.
- A successful Magento website build goes beyond installation; it requires proper hosting, theme strategy, security setup, and long-term maintenance.
- Developing a custom Magento theme, integrating with third-party platforms, and building AI-driven personalization can level up your Magento store.
- Working with an experienced Magento development partner like Mageplaza ensures best practices, reduces costly mistakes, and accelerates time-to-market.
Magento Overview: Key Facts You Should Know
Magento (now part of Adobe Commerce) is one of the most powerful open-source eCommerce platforms, used by thousands of businesses worldwide to build and scale online stores.
-
What it is: A PHP-based platform that supports everything from small eCommerce shops to enterprise-level operations.
-
Ownership: Launched in 2008, acquired by Adobe in 2018, and actively developed as part of the Adobe Commerce ecosystem.
-
Adoption: Powers over 170,000 websites globally, including well-known brands like Canon, HP, and Helly Hansen.
-
Strengths:
-
Highly customizable with extensions and themes
-
Multi-store and multi-language capabilities
-
Strong B2B and B2C support
-
Scalable architecture for businesses of all sizes
-
-
Who it’s for: Businesses looking for a robust, future-proof eCommerce platform with deep customization and scalability options.
In short, Magento is more than just a store builder – it’s a complete Magento website development framework trusted by both SMBs and enterprises.
Prerequisites Before Building a Magento Website
There are a few critical requirements to prepare before you dive into Magento website development. With these key points in place, your Magento web development project will move faster, avoid technical surprises, and launch on a stable foundation.
1. Technical Environment Requirements
-
Server resources: At least 2GB RAM (minimum), but for production, you should target 4GB+ RAM and SSD storage for smoother performance.
-
Supported PHP & database: Check Magento’s official tech stack and ensure your hosting provider supports the required PHP version, MySQL/MariaDB, Elasticsearch, and Composer.
-
SSL certificate: Secure HTTPS is not optional. You’ll need to purchase or set up an SSL certificate from day one.
-
Hosting choice: Decide early whether you’ll use shared hosting (not recommended), VPS, dedicated server, or cloud (AWS, Google Cloud, Azure). Magento is resource-intensive, so plan accordingly.
2. Business & Store Planning
-
Business model: Define whether your Magento site will support B2C, B2B, wholesale, or multi-vendor. This affects which Magento edition and extensions you’ll need.
-
Catalog structure: Prepare how you’ll organize categories, attributes, and product types (simple, configurable, bundled, downloadable). This planning reduces rework after launch.
-
Payment & shipping strategy: Decide which payment gateways (Stripe, PayPal, Authorize.Net, local methods) and shipping providers (FedEx, UPS, DHL, local couriers) you’ll need.
3. Security & Compliance Setup
-
PCI compliance: If you plan to accept credit card payments, ensure your hosting and Magento setup can meet PCI DSS requirements.
-
GDPR/Local regulations: Prepare data policies, cookie notices, and privacy compliance if selling internationally.
4. Team & Resource Readiness
-
Developer access: If you’re not building the site yourself, secure a Magento-certified developer or agency in advance. Hiring mid-project leads to delays.
-
Project management tools: Set up version control (Git), staging environments, and a ticket system (e.g., Jira, Trello) before development begins.
-
Budget buffer: Allocate 10–20% extra budget for unexpected costs like custom development, additional extensions, or higher hosting requirements.
Read more:
9 Steps to Build a Magento Website
Building a Magento website involves more than just installing the platform. You need the right setup, design, products, extensions, and optimization to ensure your store is ready for growth. The essential steps below can help you.
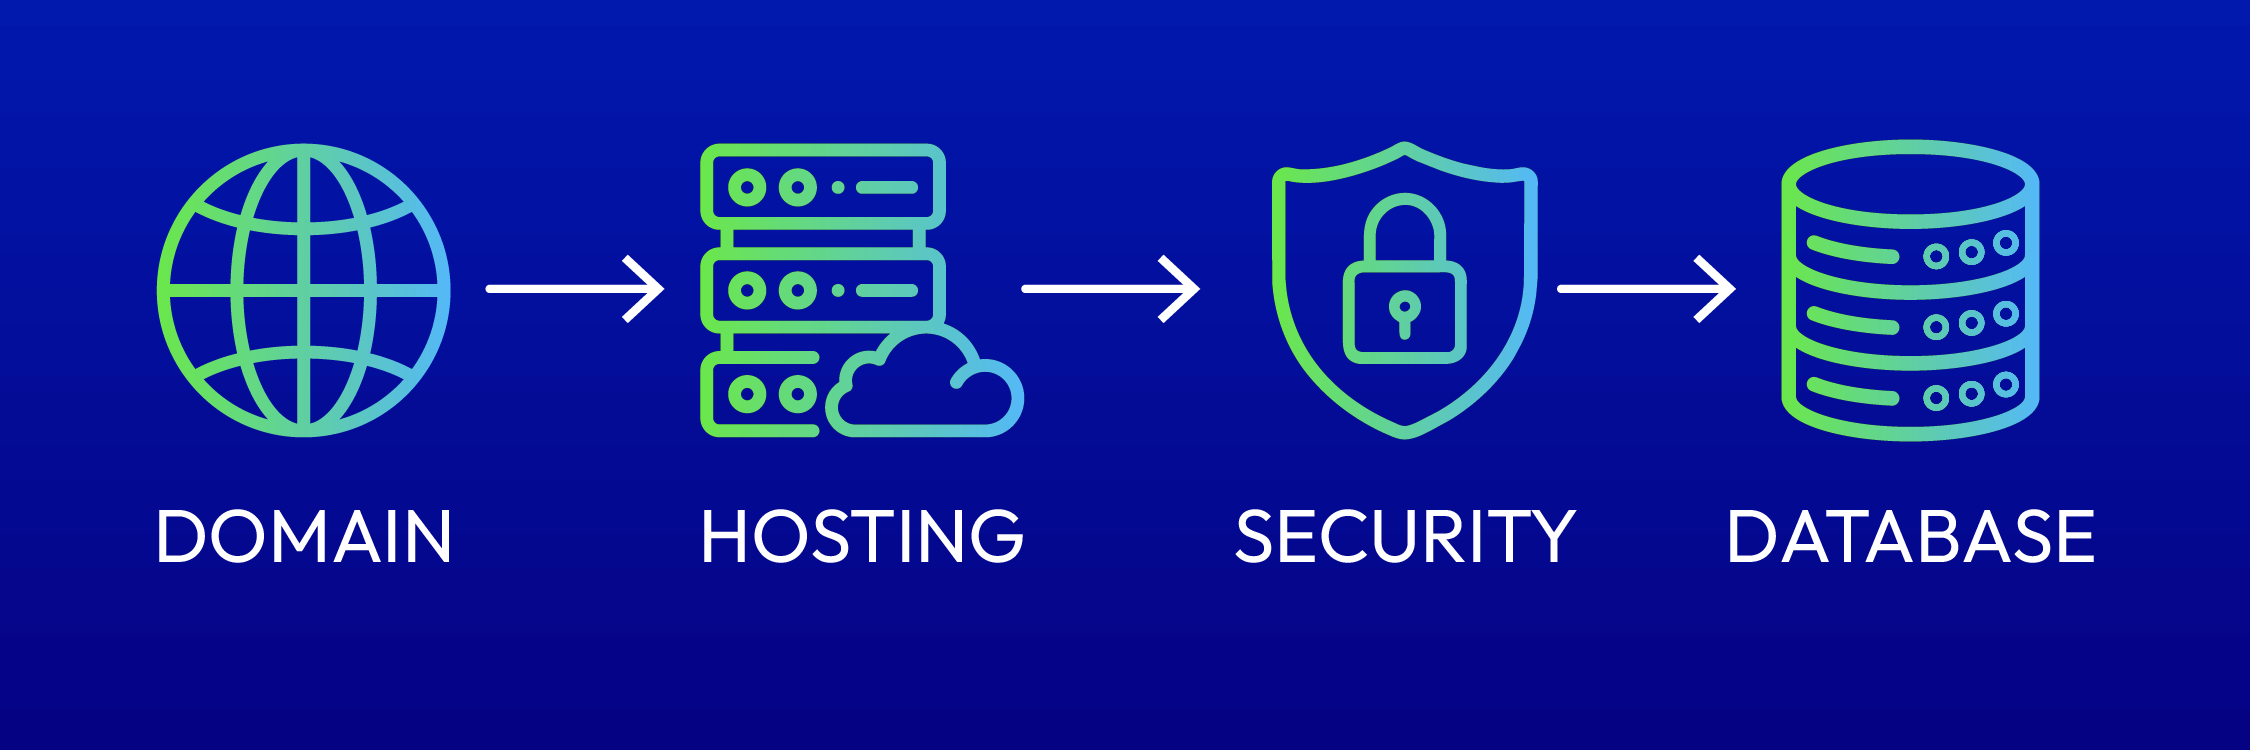
Step 1: Prepare Your Domain, Hosting & Server Environment
Before installing Magento, you need to prepare the basics. Think of it like building a house – you need the land (domain), strong materials (hosting), and proper setup (server environment) before you can decorate the inside.
1.1. Choose a domain name
Your domain is your store’s online address (e.g., mystore.com).
-
Pick something short, easy to remember, and related to your brand.
-
Use a .com if available, or a local extension (like .co.uk) if you target one country.
-
Make sure it’s unique and not a trademarked name.
1.2. Pick the right hosting
Magento needs more power than small website platforms like WordPress or Shopify. Your hosting should be reliable, secure, and optimized for Magento. Options include:
-
VPS hosting – Affordable and good for small to medium stores.
-
Dedicated hosting – Best for larger stores with high traffic.
-
Cloud hosting – Scalable and flexible (AWS, Google Cloud, or specialized Magento hosting).
💡 Tip: Look for hosting with at least 2–4 GB RAM, latest PHP version (8.1+), MySQL or MariaDB database, and SSD storage for faster loading.
1.3. Secure your store with SSL
Customers expect secure shopping. An SSL certificate makes your website HTTPS, which protects customer data and builds trust. Many hosts offer free SSL (like Let’s Encrypt).
1.4. Create a database
Magento needs a database to store product, customer, and order information. Your hosting provider usually lets you create one easily through its control panel. Just set a strong password and keep it safe.
1.5. Check server requirements
To avoid errors later, make sure your hosting has all the technical requirements for Magento (correct PHP extensions, enough memory, and proper file permissions).
Step 2: Install Magento & Run Initial Setup
In this step, you have two main options:
-
Magento Open Source (free, highly customizable, good for SMBs).
-
Adobe Commerce (paid, enterprise-ready, comes with hosting, advanced B2B features, and Adobe support).
2.1. Install Magento Open Source
Download options
-
Composer (recommended): Use Adobe’s official Composer repository. This gives you clean dependency management and smooth future updates.
-
Archive files (ZIP/TAR): For convenience, Mageplaza maintains an easy-to-navigate Magento Download Page that compiles all Magento versions. This is often faster than digging through Adobe docs.
Installation process
-
Create and connect your database (MySQL/MariaDB).
-
Run the Magento setup wizard or CLI installation commands.
-
Configure basic store details (name, admin credentials, language, currency, timezone).
Post-installation essentials
-
Set up cron jobs for automated tasks.
-
Enable production mode for better performance.
-
Apply proper file/folder permissions.
-
Install an SSL certificate to secure checkout.
2.2. Install Adobe Commerce (on-premise or cloud)
Purchase a license
Adobe Commerce requires a paid license. You’ll need to contact Adobe or an official Adobe Solution Partner to get access.
Cloud vs. On-Premise
-
Adobe Commerce Cloud: Hosted on Adobe’s managed infrastructure (built on AWS), bundled with Fastly CDN, caching, auto-scaling, and continuous security patches. Installation, updates, and DevOps tasks are streamlined by Adobe.
-
On-Premise Adobe Commerce: Installed similarly to Open Source via Composer, but requires your license key to access Adobe’s private repository.
Note: If you’re not sure which edition to choose, start with Magento Open Source. Many businesses adopt it first, then migrate to Adobe Commerce as they grow and require advanced B2B features, AI personalization, and dedicated Adobe support.
👉 Installed but stuck? Our Magento experts can fix it fast.
Get a free 1:1 consultation and let Mageplaza guide you through installation, setup, and performance optimization.
Step 3: Configure Basic Store Settings
This step is essential because it determines how your store looks, feels, and functions for customers worldwide.
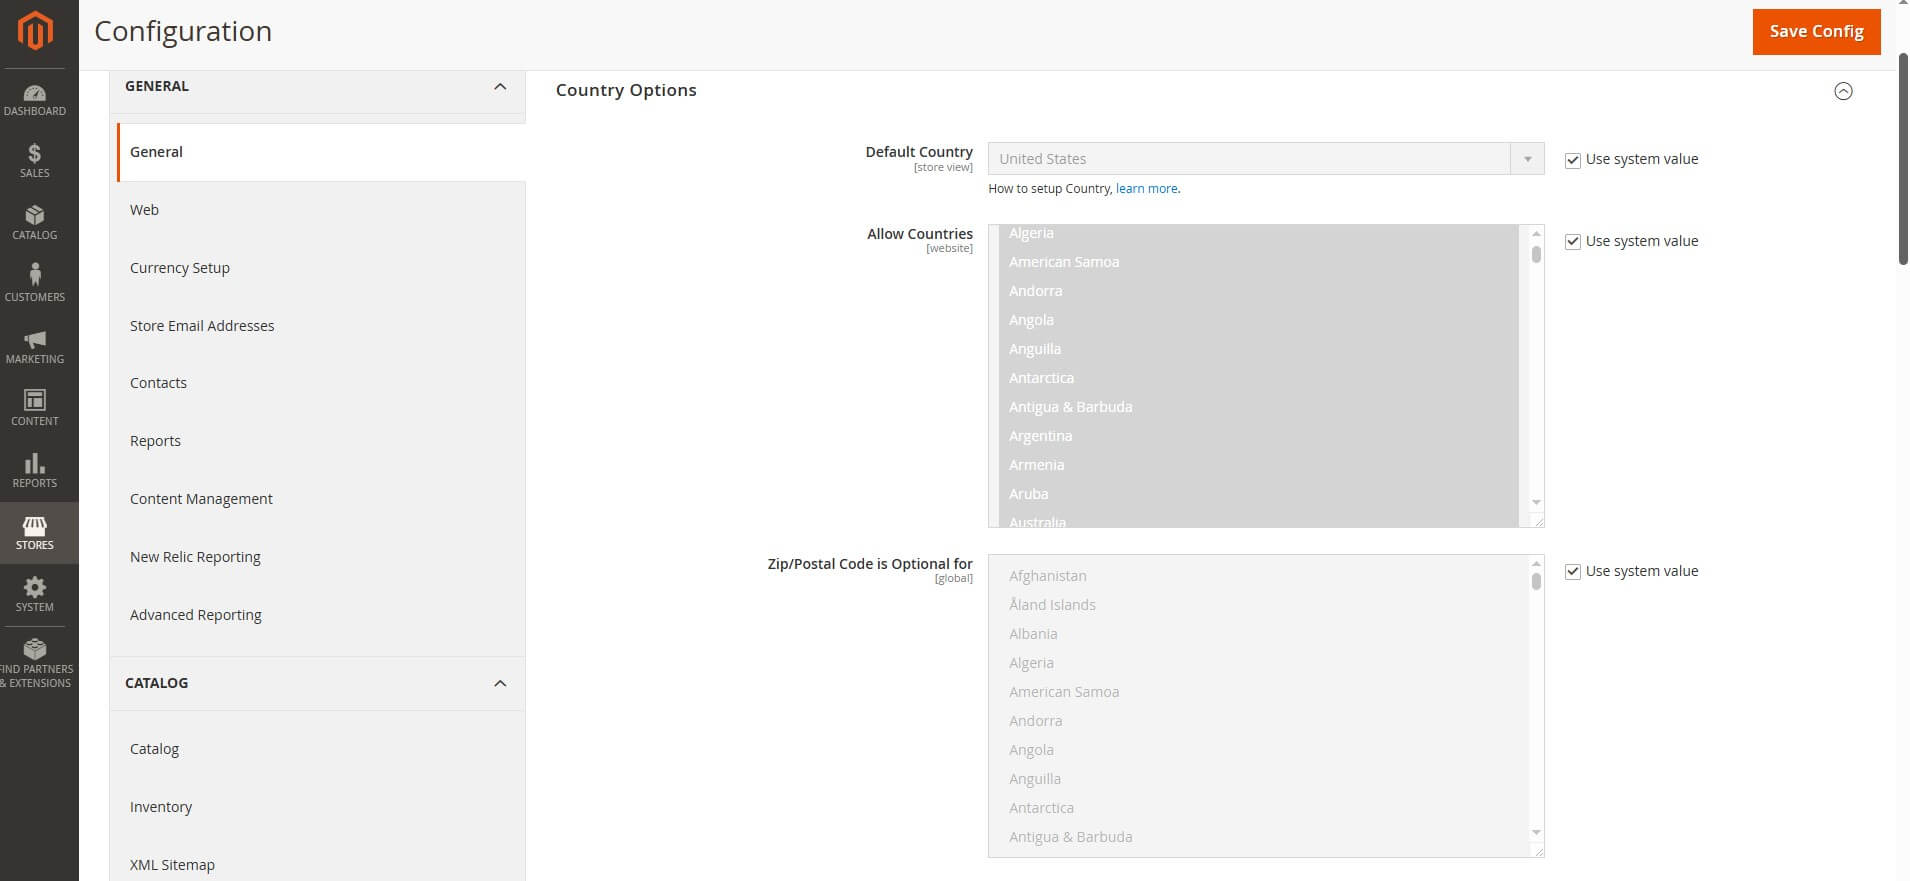
3.1. General store information
-
Store name, legal business name, email addresses (sales, support, general inquiries)
-
Contact details: phone number, street address, VAT/tax ID if applicable
-
This info appears in invoices, emails, and the checkout process – making it critical for customer trust.
3.2. Localization settings
-
Time zone: Ensures order timestamps and reports match your region.
-
Locale (language): Magento supports multiple languages – install language packs if selling internationally.
-
Currency: Set a base currency, then enable multiple currencies for global shoppers. Example: USD, EUR, GBP, JPY.
3.3. Store views & multi-store setup
-
Create multiple store views if you want different languages or catalogs under the same Magento installation. Example: one Magento backend → English store, German store, French store.
-
Configure pricing, tax, and product availability per store view if needed.
3.4. Taxes & regulations
-
Set up tax classes for products, customers, and shipping.
-
Apply region-specific tax rules (e.g., EU VAT, US state tax, GST in Asia-Pacific).
-
Consider integrating tax automation tools for compliance and accuracy.
3.5. Email & communication settings
-
Customize the default email sender identity (e.g., “sales@yourstore.com” instead of “admin@domain.com”).
-
Personalize email templates for order confirmations, shipping updates, and invoices.
💡 Pro Tip: Even if you plan to sell only in one region, set up your store with future expansion in mind – configure multiple currencies and tax flexibility early, so you won’t need to rebuild settings when scaling globally.
Step 4: Select, Install, and Customize Your Theme
This will decide the look of your Magento website. In many cases, you can edit the one you select to match your branding.
4.1. Choose a theme
You can get Magento themes from:
-
Magento Marketplace – Official themes tested for compatibility.
-
Third-party providers – Premium themes (e.g., Porto, Ultimo, Claue) with advanced features.
-
Custom-built themes – Hire developers to create a custom Magento theme (common for enterprise brands).
💡 Pro Tip: Pick a theme that’s lightweight, mobile-friendly, SEO-optimized, and compatible with the latest Magento version.
4.2. Install your theme

To install from Magento Marketplace:
-
Log in to your Marketplace account → My Products → Access Keys.
-
Generate new access keys (public & private) and copy them.
-
In your Magento Admin Panel → System > Web Setup Wizard > Extension Manager, enter your keys.
-
Once connected, your purchased or free themes will appear in the Extension Manager list.
-
Select the theme → Install. Magento will run a Readiness Check before installation.
4.3. Customize your theme
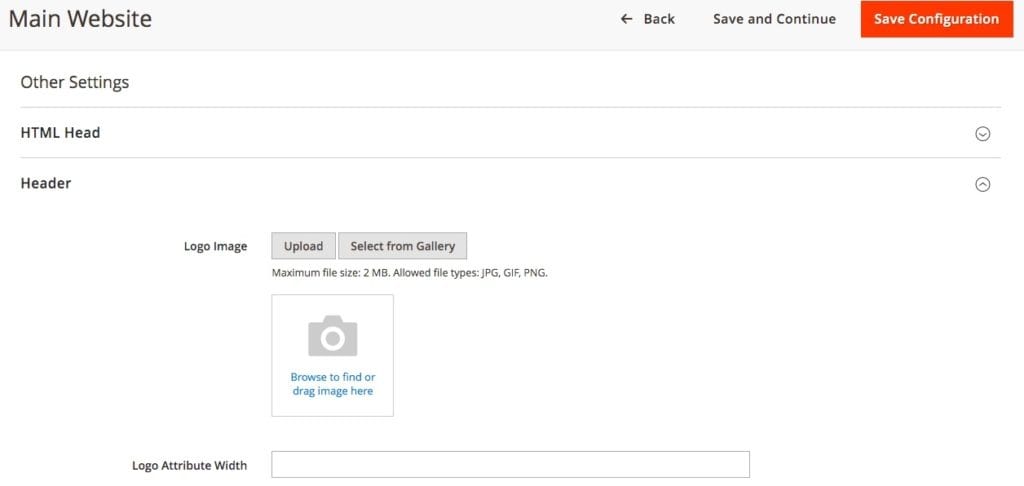
After installation:
-
Go to Content > Design > Configuration → select your store view.
-
Upload your logo, favicon, and brand colors.
-
Use Magento Page Builder (drag-and-drop editor) to design homepage layouts, product pages, and landing pages.
-
Edit pages, widgets, and blocks via Content > Elements.
-
Configure SEO for each page in the built-in SEO panel (URL, meta tags, structured data).
4.4. Understand the Magento content hierarchy
Magento organizes content in three levels:
-
Websites: Your main site (can have multiple websites under one installation).
-
Stores: Each website can have multiple stores with unique catalogs or menus.
-
Store views: Each store can have multiple views (e.g., different languages).
This flexibility lets you run multi-language, multi-brand, or multi-region stores from a single Magento installation.
Step 5: Create Categories & Add Products
This step involves organizing categories and uploading products with complete details.
5.1. Build a clear category structure

-
Create main categories (e.g., Men, Women, Electronics, Home & Living) and break them into subcategories (e.g., Men → Shoes → Sneakers).
-
Use logical, user-friendly navigation so shoppers find products quickly.
-
Keep your structure simple, not too deep (2–3 levels max) to avoid confusing customers.
-
Enable layered navigation/filters (by size, brand, price, color) to make browsing easier.
💡 Pro Tip: A well-organized category tree also helps search engines crawl and index your site more effectively, improving SEO.
5.2. Add products to Magento
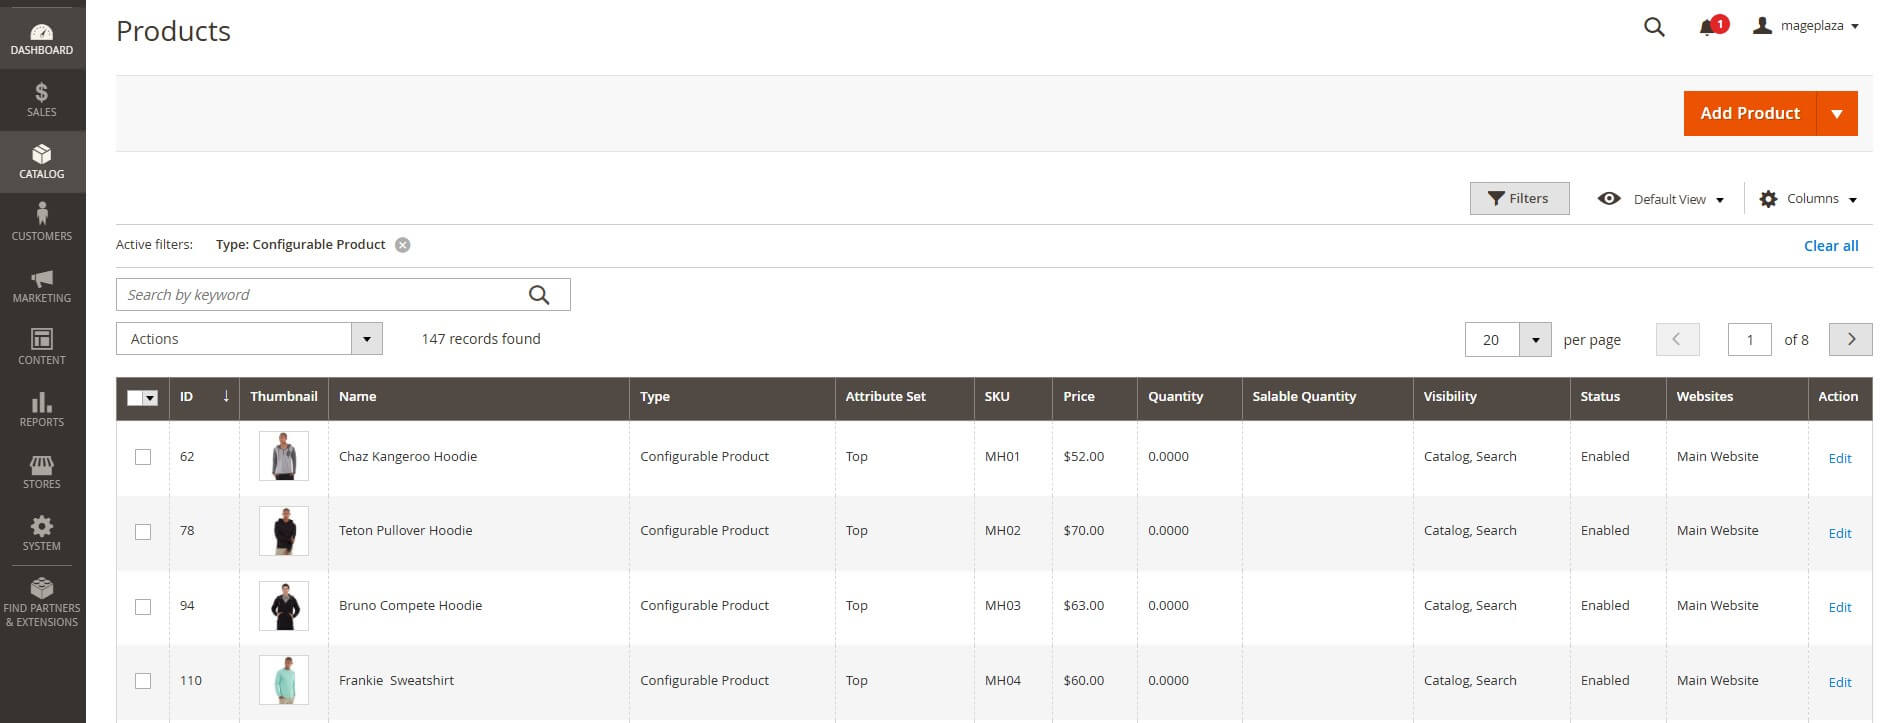
Magento supports multiple product types:
-
Simple products: A single item with no variations (e.g., a book).
-
Configurable products: One product with variations (e.g., a shirt in different sizes/colors).
-
Grouped products: A collection of related simple products sold together.
-
Bundle products: Customers build their own product bundle (e.g., a custom computer).
-
Virtual products: Non-physical items like warranties or subscriptions.
-
Downloadable products: Digital goods like ebooks, software, or music.
When adding products, fill in:
-
Product name & SKU (unique identifier for inventory)
-
High-quality images (compressed for fast loading, preferably WebP format)
-
Short & long descriptions (customer-focused + keyword-rich for SEO)
-
Pricing & tax class (including special prices, discounts, or tiered pricing)
-
Inventory/stock status (in stock, out of stock, quantity tracking)
-
Attributes (size, color, material, etc. — used for configurable products)
5.3. Optimize product pages for SEO & sales
-
Write unique product titles & meta descriptions with relevant keywords
-
Use alt text for images to improve accessibility and SEO.
-
Add rich content like product videos, 360° images, and FAQs.
-
Enable customer reviews and ratings for trust and conversions.
-
Configure structured data (schema markup) so products appear in Google rich snippets.
💡 Pro Tip: Bulk-upload products with Magento’s CSV import/export feature. For large catalogs (10,000+ SKUs), integrate with an ERP/PIM system for automation.
Step 6: Set Up Payment & Shipping
Getting payments and shipping right is critical for smooth order fulfillment and customer satisfaction. Magento gives you the flexibility to configure both for different regions, currencies, and business models.
For Payment, you’ll view settings by heading over to Stores > Settings > Configurations. Then, Payment Methods will be shown under Sales in the menu in the sidebar to the left.
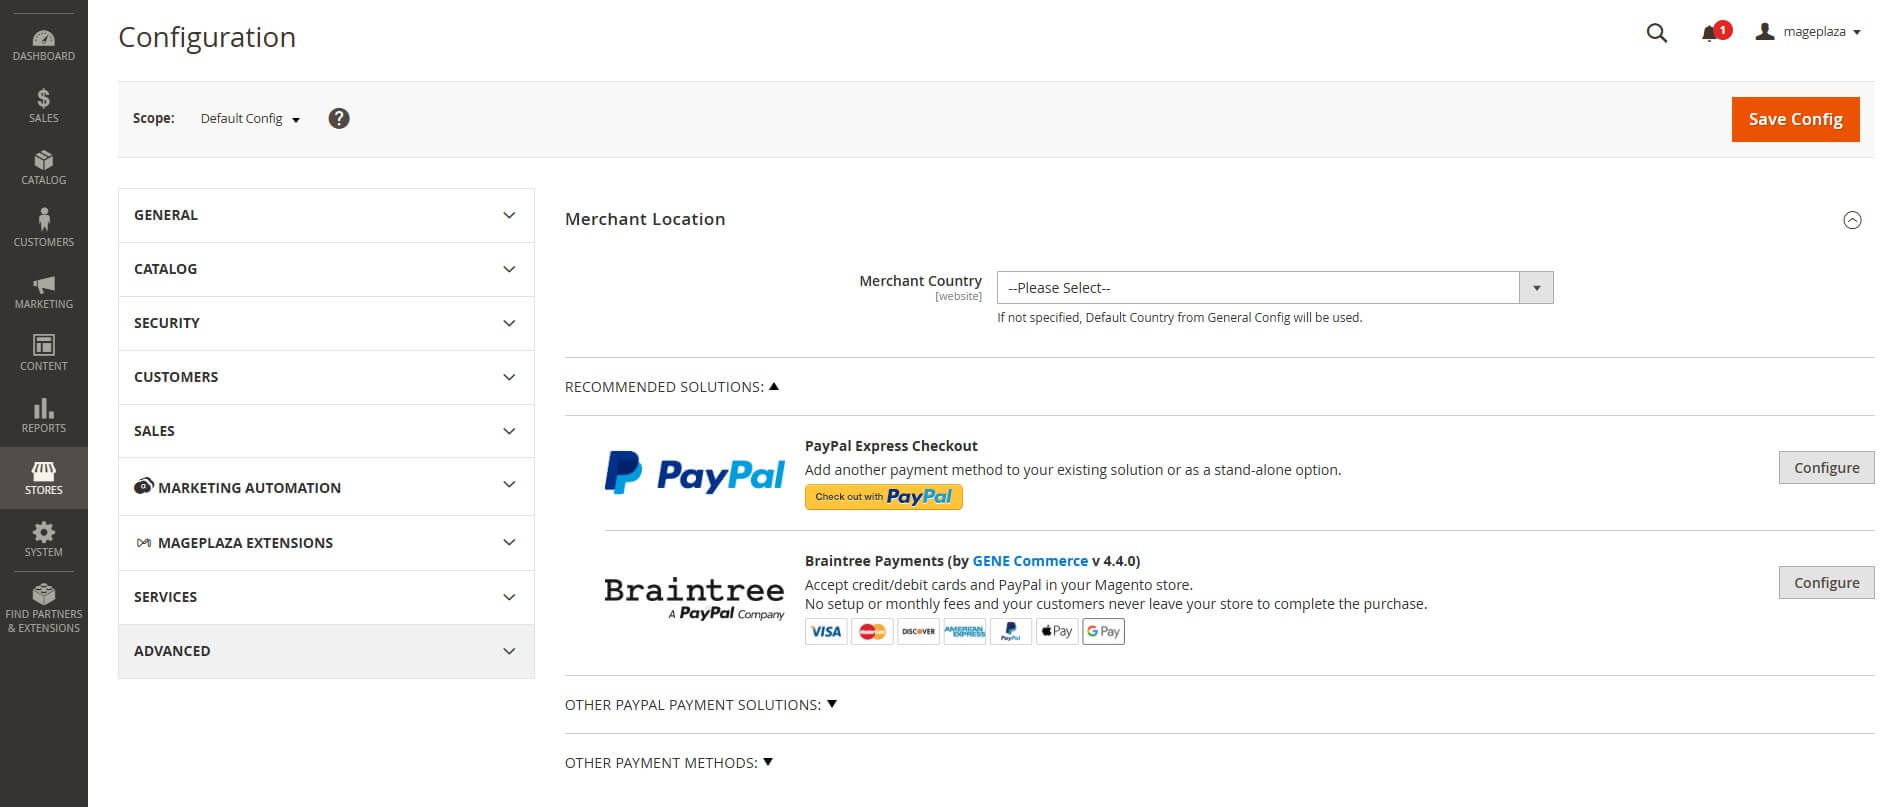
💡 Pro Tip: Always offer at least 2–3 payment options. Many abandoned carts happen because a customer’s preferred method isn’t supported.
And for Shipping, you’ll find the setting under the Sales section as well.
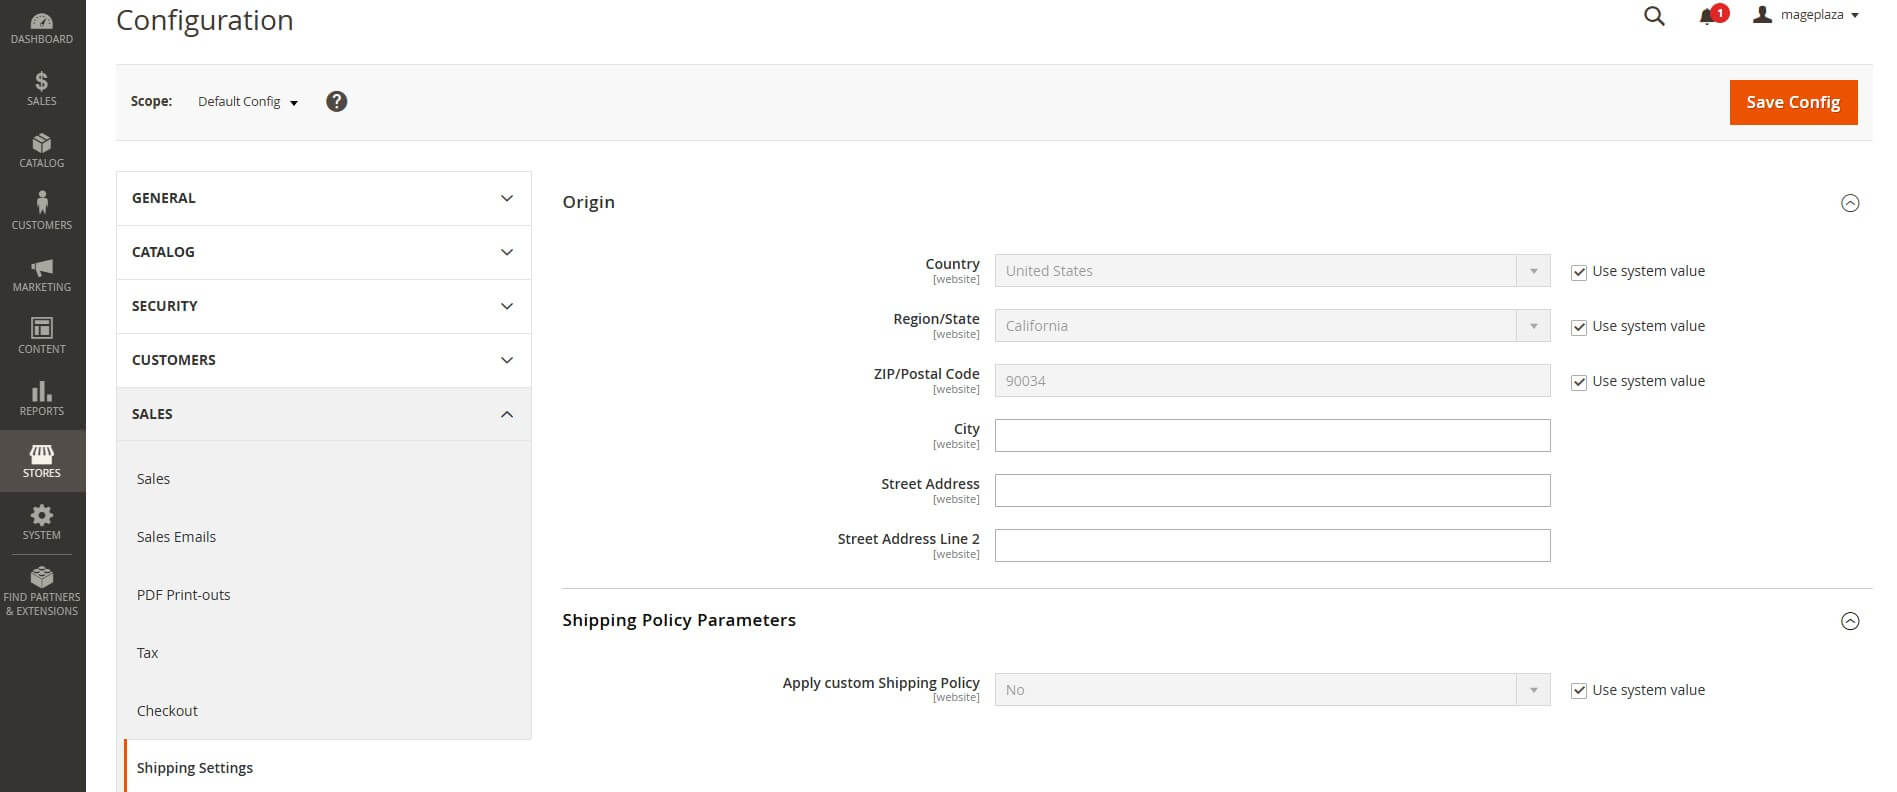
💡 Pro Tip: Offer free shipping thresholds (e.g., “Free shipping on orders over $100”) to increase average order value.
Step 7: Install Essential Extensions for Magento
You can find thousands of extensions in Magento Marketplace and third-party vendors (like Mageplaza).
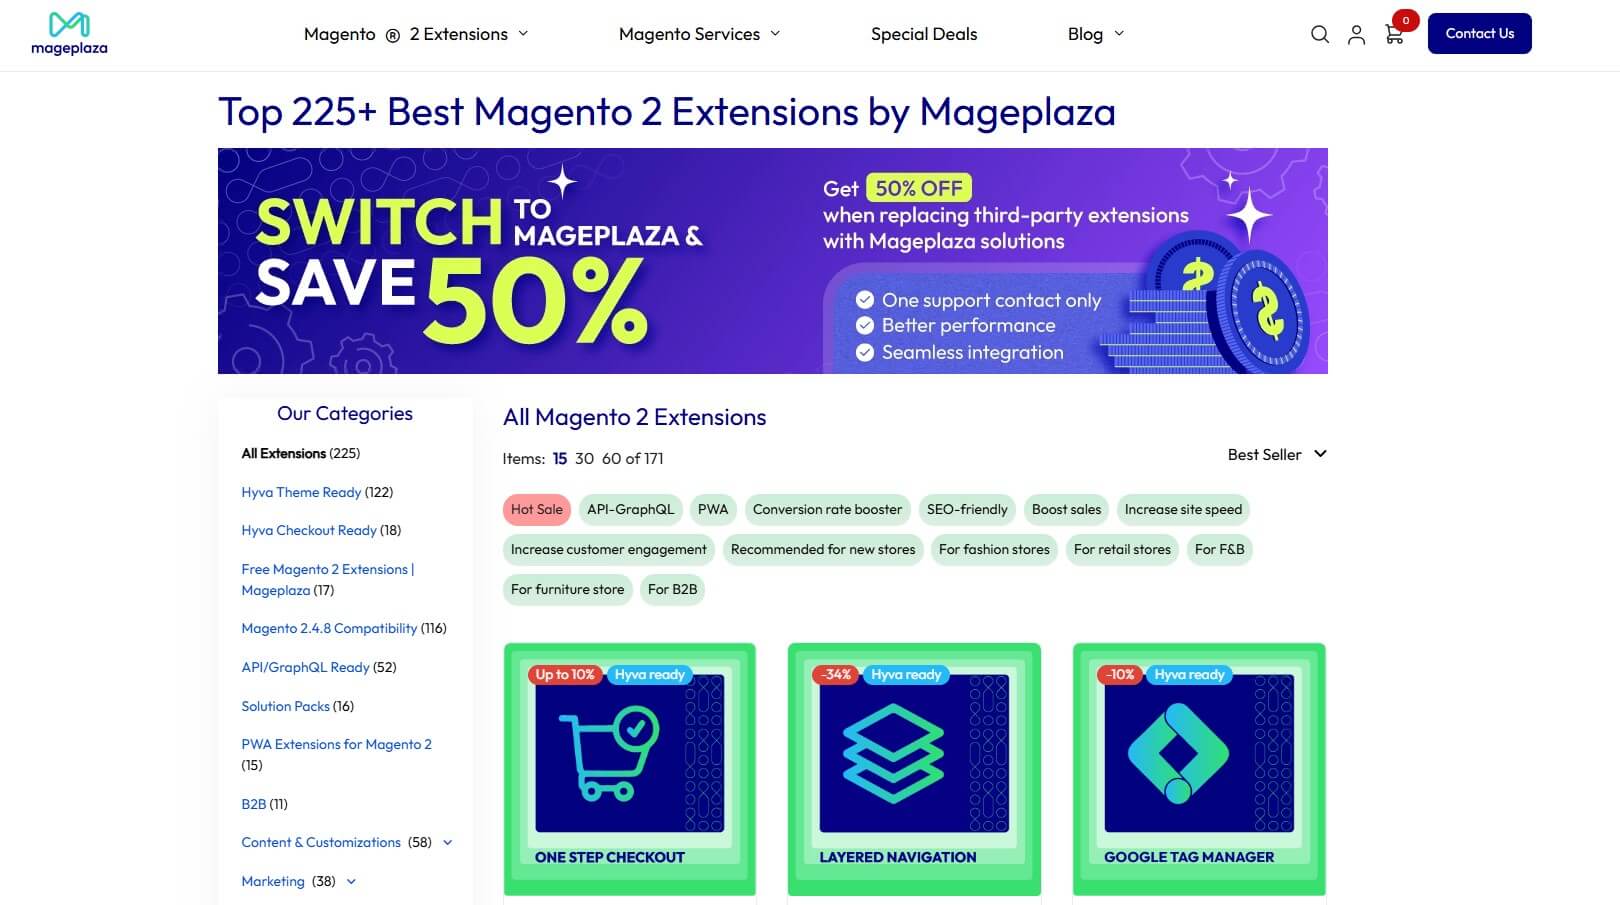
Some categories you might look for include:
-
SEO optimization tools (e.g., Mageplaza SEO Suite)
-
Marketing & personalization (email, upsells, loyalty programs)
-
Security & performance (two-factor authentication, caching, CDN)
-
Analytics & reporting (Google Analytics 4, BI dashboards)
💡 Warning: Avoid installing too many unnecessary extensions, as they can slow down your site.
Step 8: Optimize for Speed, SEO & Security
Without proper optimization, even a well-designed store can suffer from slow loading times, poor rankings, and vulnerabilities. Here’s how you can get it right:
8.1. Speed optimization
-
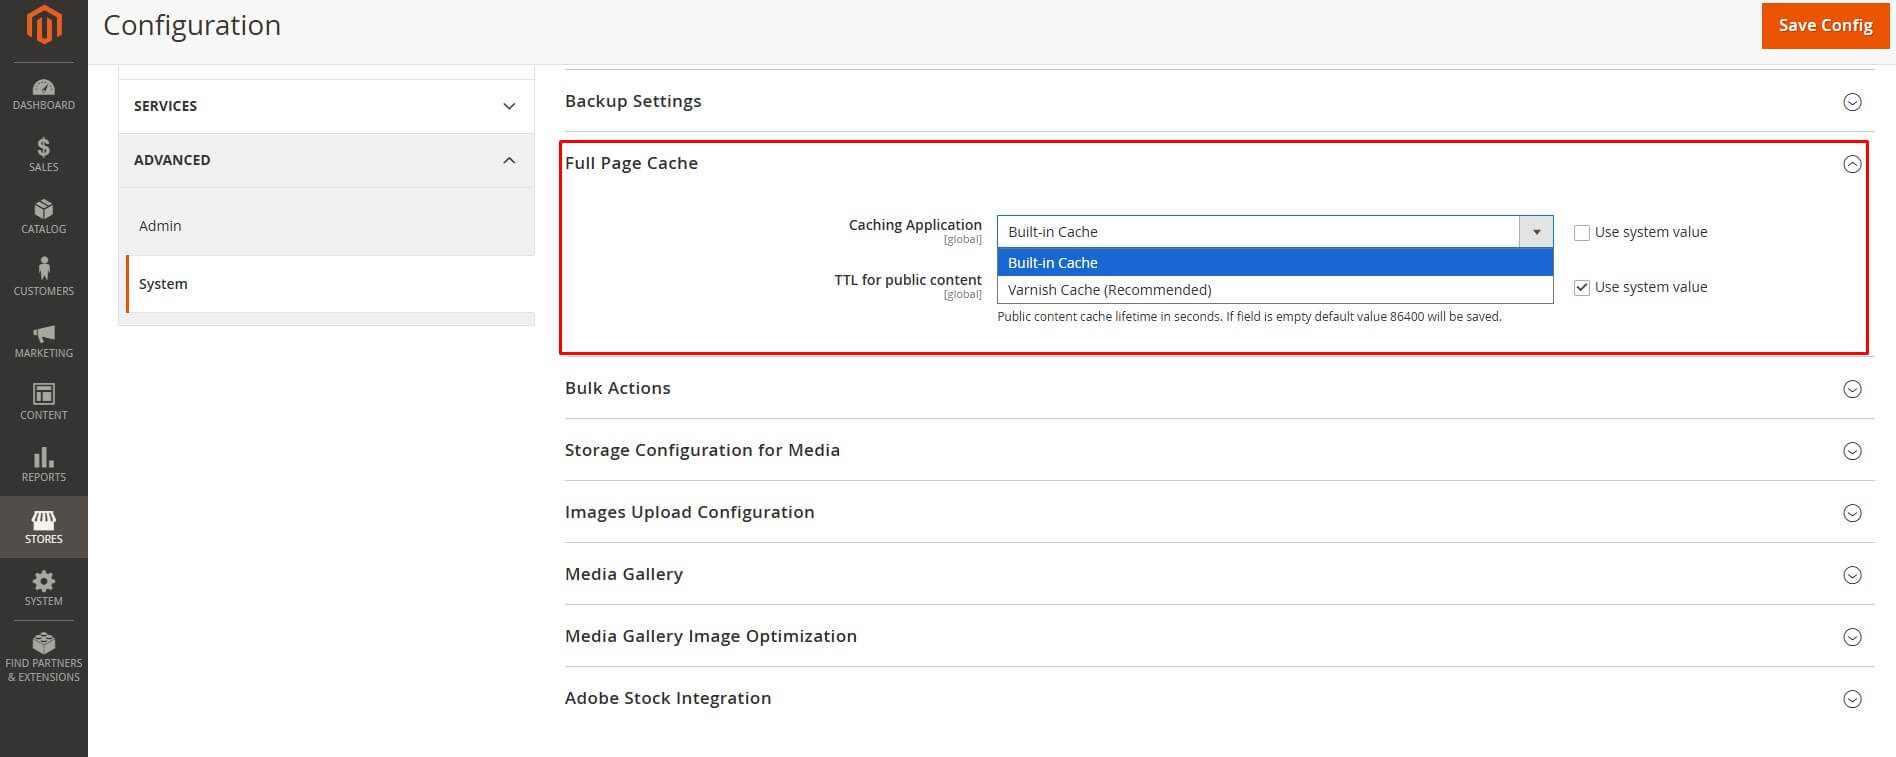
Caching: Enable Varnish Cache and Magento’s built-in caching system to reduce server load.
-
Content Delivery Network (CDN): Use a CDN (e.g., Cloudflare, Fastly) to serve assets like images, CSS, and JavaScript faster to global users.
-
Image optimization: Compress images (JPEG, WebP, AVIF) without losing quality. Tools like TinyPNG or automated Magento extensions help.
-
Lazy loading: Load images/videos only when visible on the screen.
-
Code minification: Merge and minify JavaScript, CSS, and HTML to reduce page size.
💡 Pro Tip: Regularly test your site speed using Google PageSpeed Insights or GTmetrix. Aim for <2.5 seconds loading time for best conversions.
8.2. SEO optimization
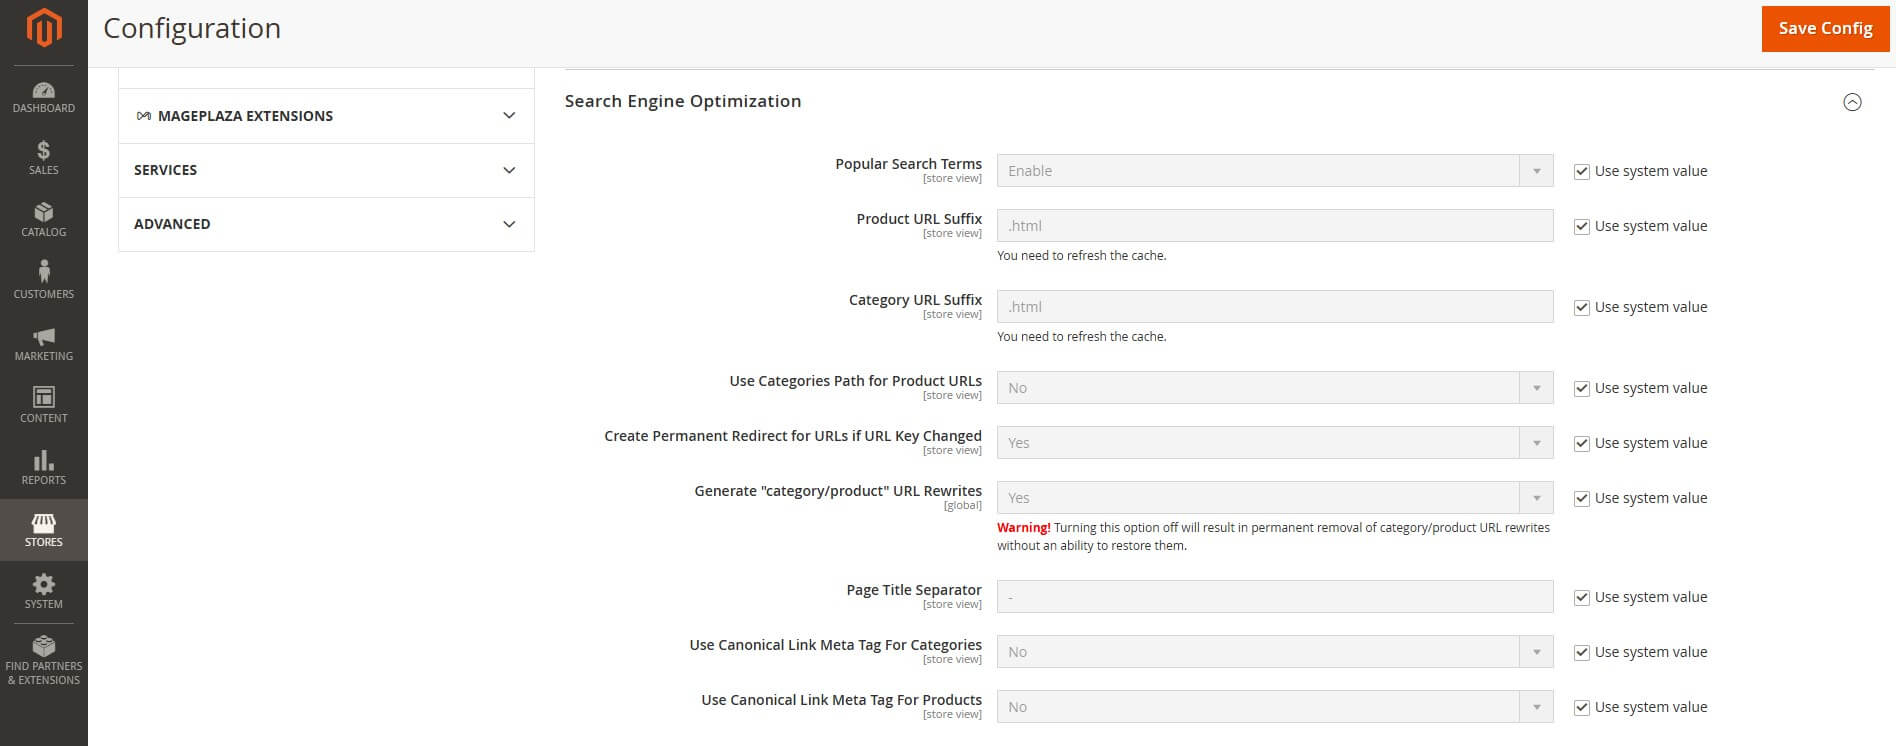
-
URL structure: Use clean, human-readable URLs (e.g., /men/shoes/sneakers instead of long query strings).
-
Meta data: Add optimized meta titles, descriptions, and H1 tags for each page.
-
Structured data (Schema.org): Add rich snippets (ratings, prices, stock) to improve click-through rates in Google.
-
XML sitemap & robots.txt: Submit sitemaps to Google Search Console; block irrelevant pages from indexing.
-
Duplicate content fixes: Use canonical tags and configure layered navigation to prevent SEO dilution.
-
AI-powered SEO: Tools like SurferSEO or SEMrush AI assistants can help generate and optimize content more efficiently in 2025.
💡 Pro Tip: Use an SEO extension like Mageplaza SEO Suite to automate much of this setup and track improvements directly inside Magento.
8.3. Security

-
SSL certificate: Ensure your entire site runs on HTTPS.
-
Two-Factor Authentication (2FA): Add an extra layer of login security for admins.
-
Regular updates: Keep Magento core, extensions, and themes up to date.
-
Admin security:
-
Change the default admin URL
-
Use strong, unique passwords
-
Restrict admin access by IP
-
-
Firewall & monitoring: Implement a Web Application Firewall (WAF) like Sucuri or Cloudflare, and set up malware scanning.
-
Backups & disaster recovery: Schedule automatic backups so you can restore your site quickly in case of hacks or server crashes.
💡 Pro Tip: Adobe Commerce (paid) includes advanced security features out of the box. For Magento Open Source users, you can strengthen protection with extensions or by using a Magento Security Patch service to ensure your store always runs on the latest, most secure version.
Step 9: Test & Launch Your Store
Launching a Magento website isn’t just about pressing “Go Live.” A proper pre-launch checklist ensures your site runs smoothly, delivers a great customer experience, and avoids costly errors after launch.
9.1. Frontend testing (Customer experience)
-
Navigation: Check menus, category links, product pages, and search functionality.
-
Checkout process: Test multiple payment gateways (credit card, PayPal, local methods).
-
Forms: Ensure contact forms, newsletter sign-ups, and login/registration work properly.
-
Mobile responsiveness: 70%+ of eCommerce traffic comes from mobile — test on iOS and Android devices.
9.2. Backend testing (Admin & operations)
-
Order flow: Place a test order → confirm admin receives it → invoice → shipment → refund.
-
Inventory management: Check product stock updates when orders are placed.
-
Tax & shipping rules: Validate tax calculations and shipping rate accuracy for different regions.
-
Email notifications: Verify all transactional emails (order confirmation, shipping update, password reset).
9.3. Performance & load testing
-
Use tools like GTmetrix, Google PageSpeed Insights, or Magento Profiler.
-
Simulate traffic spikes (e.g., 500–1000 concurrent users) to see how the server handles it.
-
Optimize caching, CDN, and database queries before launch.
9.4. Security check
-
Ensure SSL is active on all pages.
-
Run a Magento security scan (Adobe provides a free one).
-
Check admin panel security (2FA, strong passwords, limited access).
9.5. SEO & analytics setup
-
Verify URL structure, meta tags, and sitemaps are SEO-friendly.
-
Connect Google Analytics 4 & Google Search Console.
-
Set up conversion tracking & pixels (Google Ads, Meta Ads, TikTok Ads if relevant).
Advanced Customization Options for Magento Website Development
Do you want your Magento website to be more than just a basic setup?
To maximize performance, usability, and long-term growth, you need to go beyond the essentials with advanced customization and optimization. Below are some of the most effective ways to elevate your Magento web development in 2025.
Custom Theme Development
-
Instead of relying solely on pre-built templates, consider developing a custom Magento theme tailored to your brand identity.
-
A custom theme ensures unique user experience, faster performance, and avoids the “cookie-cutter” look that many competitors may have.
-
Pro Tip: Work with Magento-certified front-end developers who can build a lightweight theme optimized for speed and mobile-first design. For example, Hyva theme development.
Third-Party Integrations & APIs
-
Magento’s strength lies in its extensive integration ecosystem. Beyond standard extensions, you can integrate:
-
CRM systems (Salesforce, HubSpot)
-
ERP solutions (SAP, Odoo, NetSuite)
-
AI-powered tools (recommendation engines, chatbots, personalization engines)
-
Marketing automation platforms (Klaviyo, Mailchimp, Marketo)
-
-
Pro Tip: You should work with a Magento integration service to create a clear roadmap of CRM, ERP, and marketing tools. This ensures smoother performance, better compatibility, and easier long-term scalability.
Personalization & AI-Powered Features
-
Personalization is no longer optional. Shoppers expect AI-driven recommendations, dynamic pricing, and personalized promotions.
-
AI tools integrated into Magento can:
-
Suggest products based on browsing behavior.
-
Predict inventory demand.
-
Automate customer segmentation and email campaigns.
-
-
Pro Tip: Start small with AI chatbots or recommendation engines, then expand into predictive analytics once your store has steady traffic.
Build a Magento Ecommerce Website with Professional Help
Building a Magento website requires careful planning – from setup and design to product management, optimization, and ongoing maintenance. Done right, it can give your business a scalable, high-performing foundation for eCommerce growth.
If you’re looking for expert support, Mageplaza is recognized as the top Magento development agency, trusted for 10+ years of experience, certified developers, and a wide range of solutions. Partnering with professionals can help you launch faster, avoid common pitfalls, and ensure your store is ready to grow.
CONTACT MAGENTO DEVELOPMENT EXPERTS NOW
Magento Website Development FAQs
1. How long does it take to build a Magento website?
On average, a basic Magento store takes 2–4 weeks, while a fully customized Magento site development project may take 3–6 months depending on complexity.
2. Is Magento good for small businesses?
Yes. Magento Open Source is free and highly customizable. But it requires technical skills or a developer’s help.
3. What skills are needed for Magento site development?
Knowledge of PHP, MySQL, HTML/CSS/JS, and Linux server administration.
4. How does Magento compare with Shopify or WooCommerce?
-
Magento = best for scalability, customization, B2B/B2C hybrid.
-
Shopify = best for beginners, SaaS-based.
-
WooCommerce = best for small WordPress stores.
5. Is Magento expensive?
Magento Open Source is free, but costs vary depending on hosting, extensions, and developer fees. Adobe Commerce is premium with enterprise-level pricing.
Table of content

Jacker is the Chief Technology Officer (CTO) at Mageplaza, bringing over 10 years of experience in Magento, Shopify, and other eCommerce platforms. With deep technical expertise, he has led numerous successful projects, optimizing and scaling online stores for global brands. Beyond his work in eCommerce development, he is passionate about running and swimming.
Related Post

Magento 2.4.9 Beta Release: What's New?
Magento 2.4.9 beta is here. Stay up to date with every release milestone with this regularly updated guide.
11 mins read
|
03-17-2026
Google Analytics Website Traffic: The A–Z Guide for Magento 2 Store Owners
Learn how to analyze website traffic in Google Analytics 4, identify high-quality traffic sources, and grow your Magento 2 store with data-driven insights.
18 mins read
|
03-17-2026

The Complete Guide to UTM Parameters & Google Analytics for Magento website
Master UTM parameters and Google Analytics for Magento. Track traffic sources, measure campaign performance, and practical tips to use it for better business decisions.
9 mins read
|
10-05-2025
How to implement Cookie Consent for GTM & Google Analytics in Magento Under GDPR?
Implement cookie consent for GTM & GA4 in Magento under GDPR. Step-by-step guide using Google Consent Mode v2 to avoid fines and maintain analytics.
15 mins read
|
02-27-2026

Speed vs. Sales: Comparing Hyvä Checkout and Mageplaza One Step Checkout
Learn how Hyvä Checkout and Mageplaza One Step Checkout impact order completion rates and revenue growth.
8 mins read
|
02-25-2026
1 min read
|
03-30-2026
Magento 2.4.9 Beta Release: What's New?
Magento 2.4.9 beta is here. Stay up to date with every release milestone with this regularly updated guide.
11 mins read
|
03-17-2026
Google Analytics Website Traffic: The A–Z Guide for Magento 2 Store Owners
Learn how to analyze website traffic in Google Analytics 4, identify high-quality traffic sources, and grow your Magento 2 store with data-driven insights.
18 mins read
|
03-17-2026
The Complete Guide to UTM Parameters & Google Analytics for Magento website
Master UTM parameters and Google Analytics for Magento. Track traffic sources, measure campaign performance, and practical tips to use it for better business decisions.
9 mins read
|
10-05-2025
How to implement Cookie Consent for GTM & Google Analytics in Magento Under GDPR?
Implement cookie consent for GTM & GA4 in Magento under GDPR. Step-by-step guide using Google Consent Mode v2 to avoid fines and maintain analytics.
15 mins read
|
02-27-2026
Speed vs. Sales: Comparing Hyvä Checkout and Mageplaza One Step Checkout
Learn how Hyvä Checkout and Mageplaza One Step Checkout impact order completion rates and revenue growth.
8 mins read
|
02-25-2026