Hyvä Theme is Now Open Source: What This Means for Magento Community - Mageplaza
Hyvä is now Open Source and free. Discover what changed, what remains commercial, how it impacts the Magento ecosystem, and how to maximize its full potential.

Let’s learn how to easily create, customize, and display a countdown timer in Magento 2. Maximize your store profits, increase conversion rates, and enhance promotion strategies with eye-catching and motivating timers.
Countdown timers can be a powerful tool for online stores to boost sales and user engagement. Here are some reasons why you should create a countdown timer for your store:
Create a sense of urgency: Countdown timers create a sense of scarcity, which can motivate customers to complete their purchases before the time runs out. This can be particularly effective for limited-time offers, flash sales, or product launches.
Increase conversion rates: By highlighting the limited time available for a specific offer, countdown timers can nudge customers who are on the fence about making a purchase to take action.
Boost excitement and engagement: Countdown timers can add a sense of excitement and anticipation to your website, which can keep customers engaged and coming back for more.
Highlight product availability: Timers can be used to indicate when a product will be back in stock or when pre-orders will close. This can be helpful for managing customer expectations and generating interest.
Improve perceived value: By emphasizing the limited time of an offer, countdown timers can make your products or services seem more valuable.
The Magento 2 Countdown Timer extension enables store owners to easily customize and display attractive discounts on various pages, naturally motivating shoppers to place more orders in a short period of time.
To create a countdown timer, first and foremost, you need to download the extension, then log in to the admin panel, and follow the instructions below.
Navigate to Mageplaza > Countdown Timer > Manage Rules. This is where you make a new timer and edit created ones.
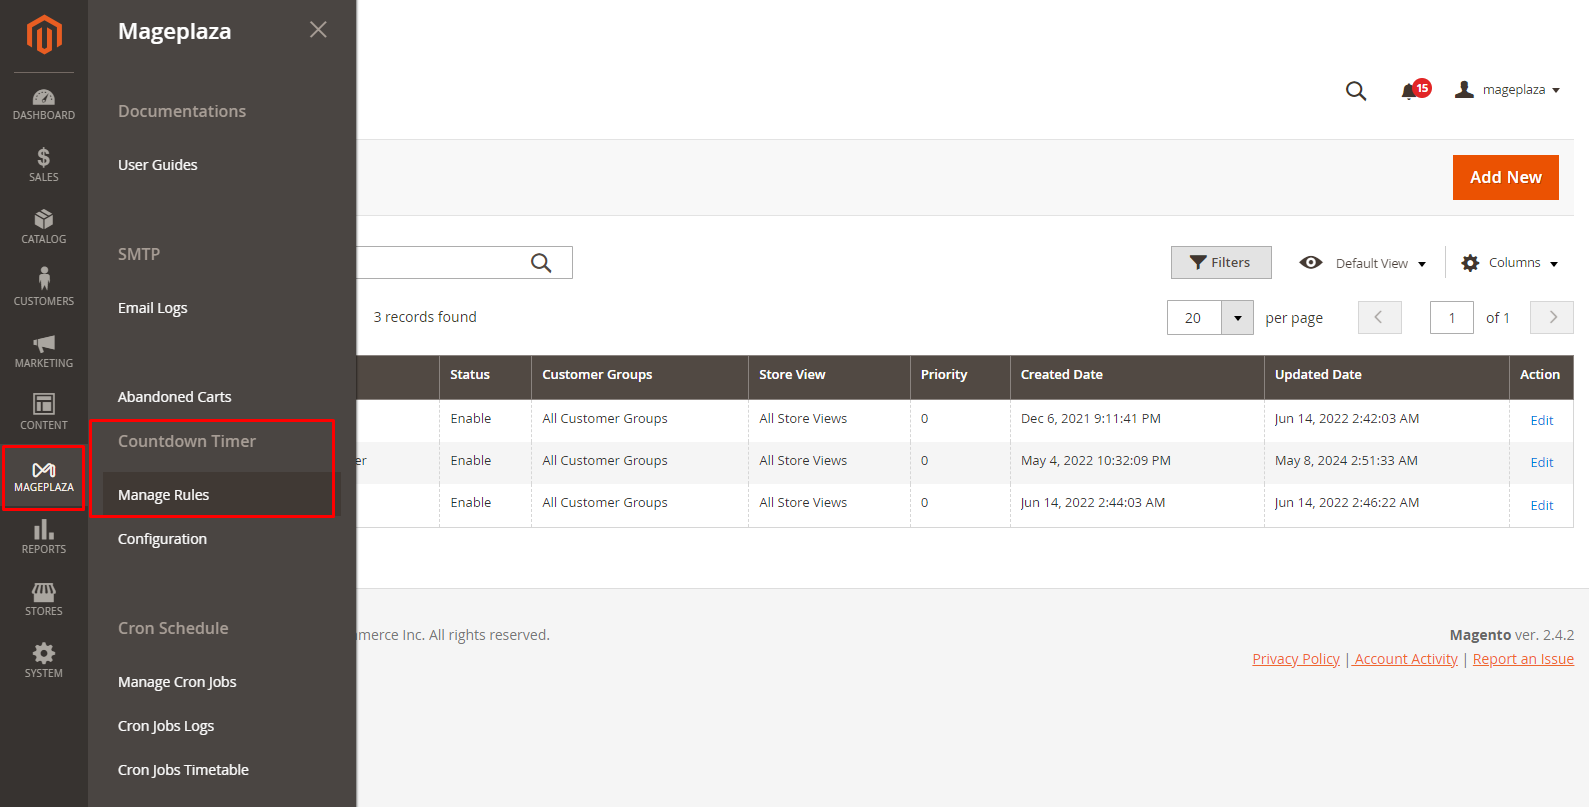
Now, click the Add New button on the top right corner.
In the first part, you need to fill out these fields.
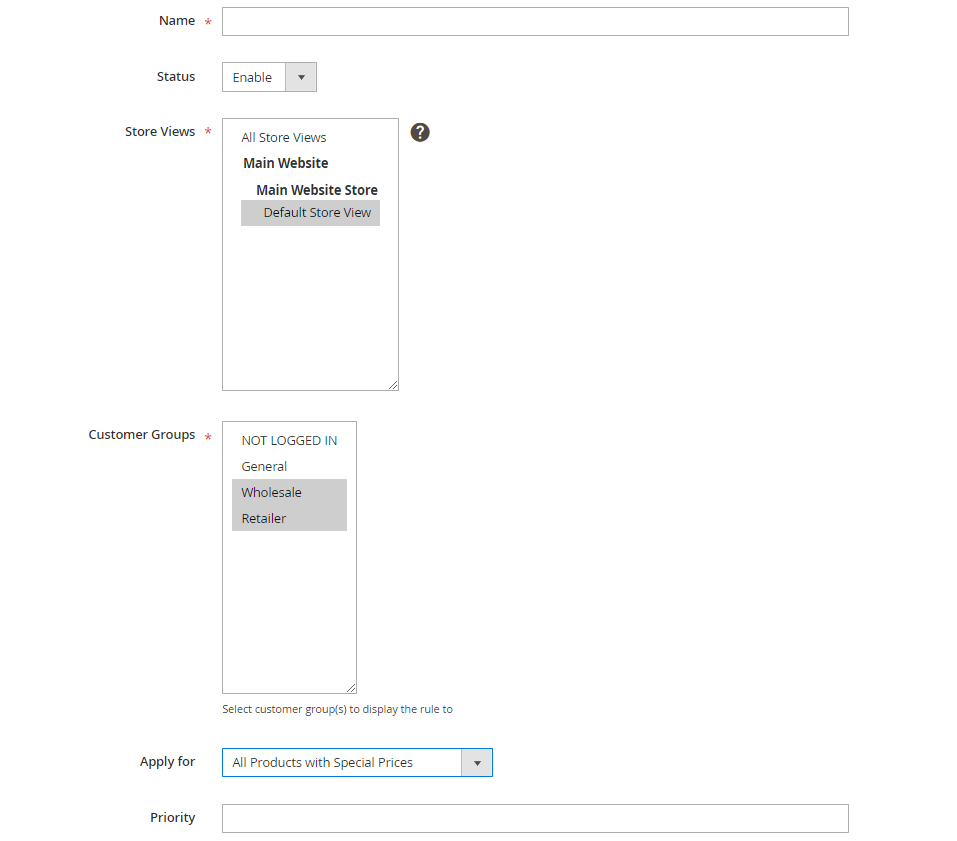
Enable to display it in the storefrontApply for: Decide how the Countdown Timer will be applied. There are 4 options:
Conditions. Here, you can set conditions to identify the products you want to apply the timer.
Catalog Price Rule field. Now, you can quickly choose any option without having to configure it from the beginning.
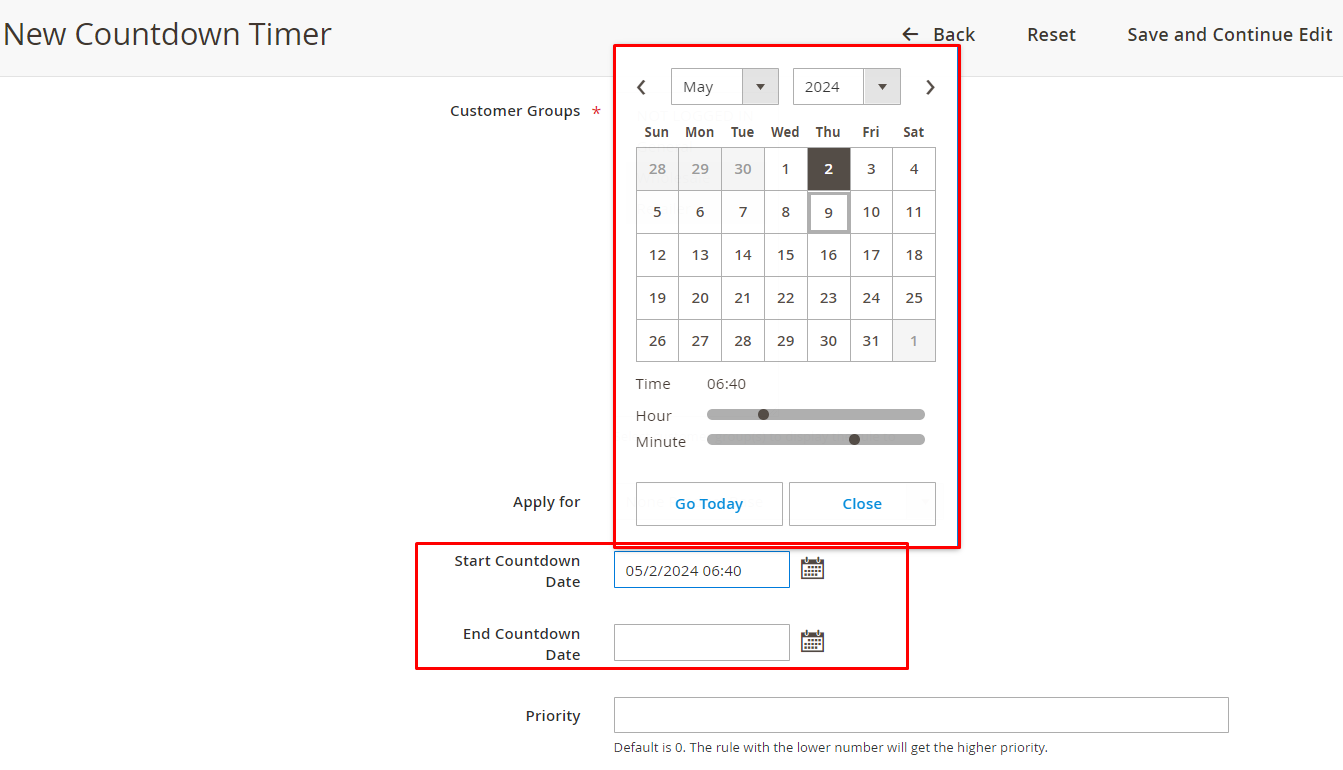

Snippet Code: display the code segment.
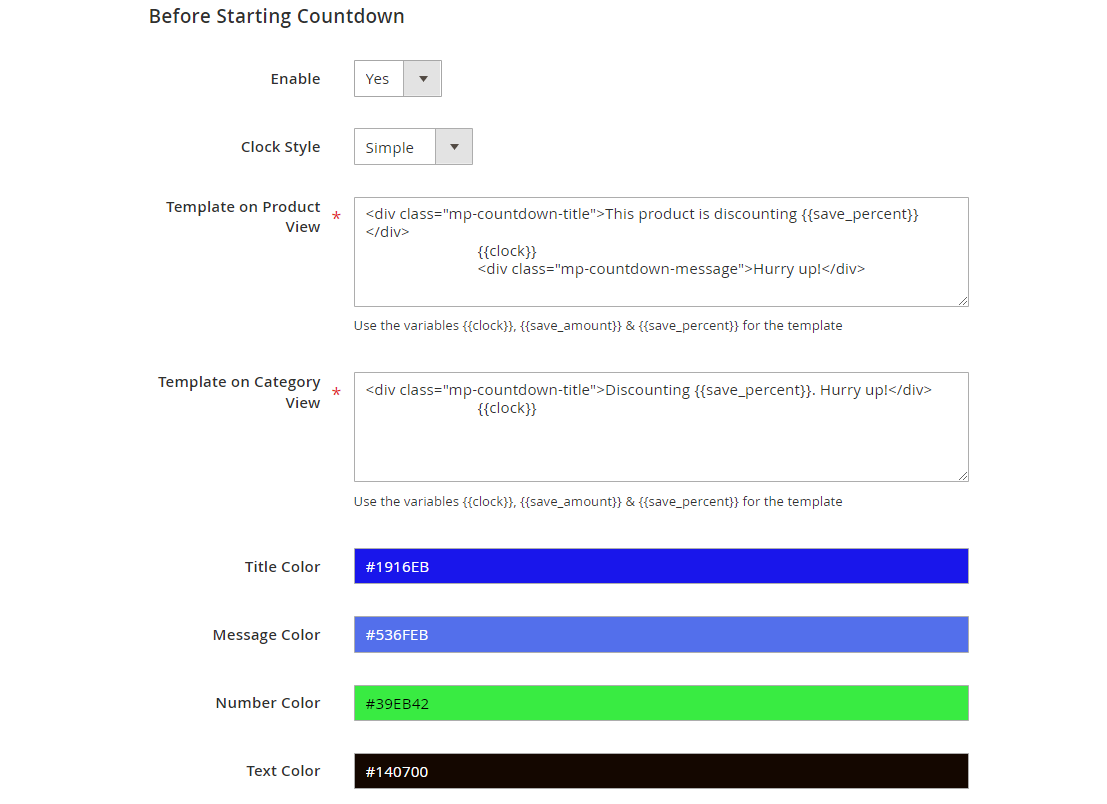
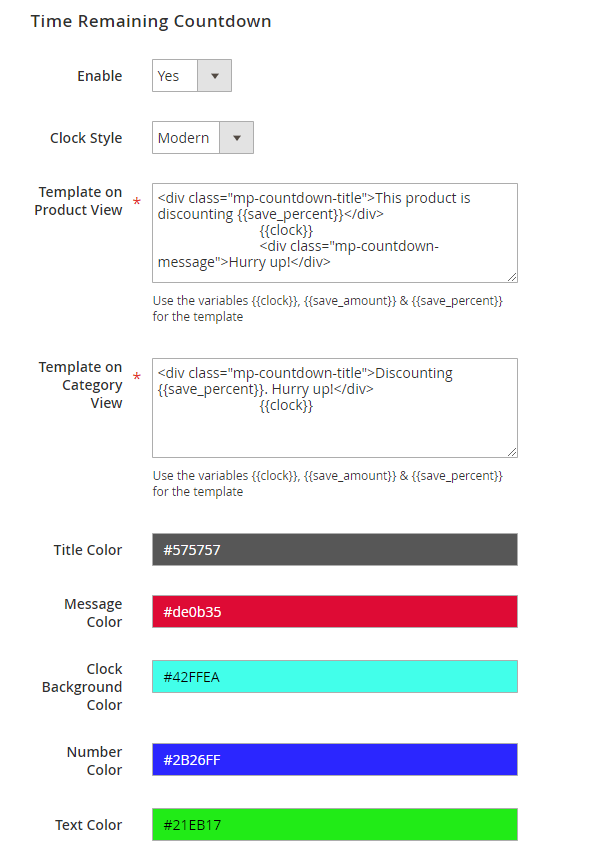
Yes in the Enable field to allow displaying the countdown timer before product promotion starts. <div class="mp-countdown-message">Hurry up!</div> ```
``` * : Show clock * : Show discounted amount * : Show discounted percentage
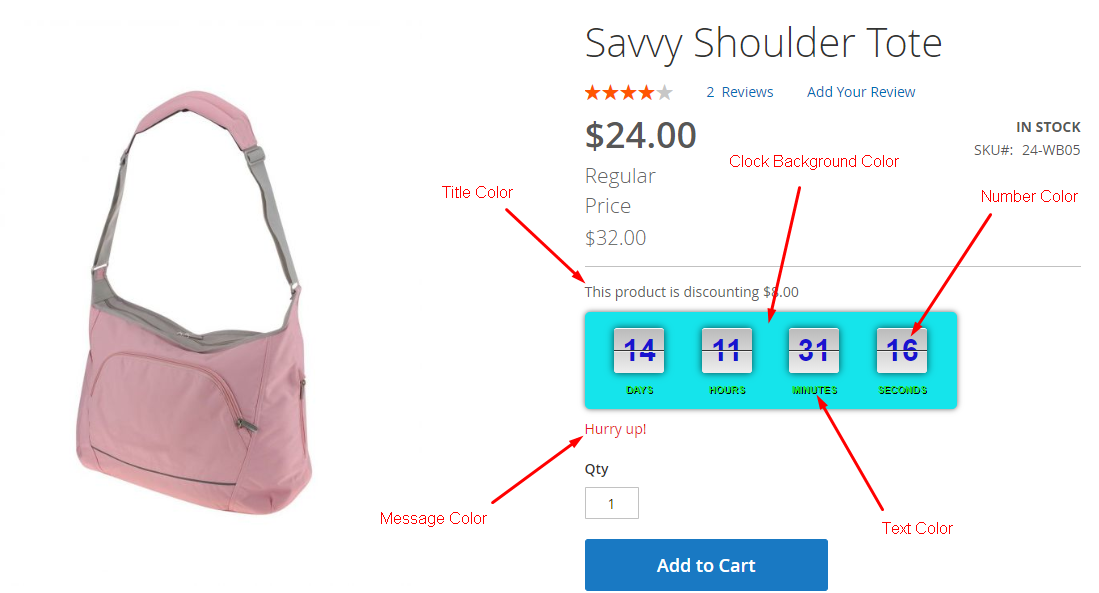
Here’s how a countdown timer looks like on storefront:
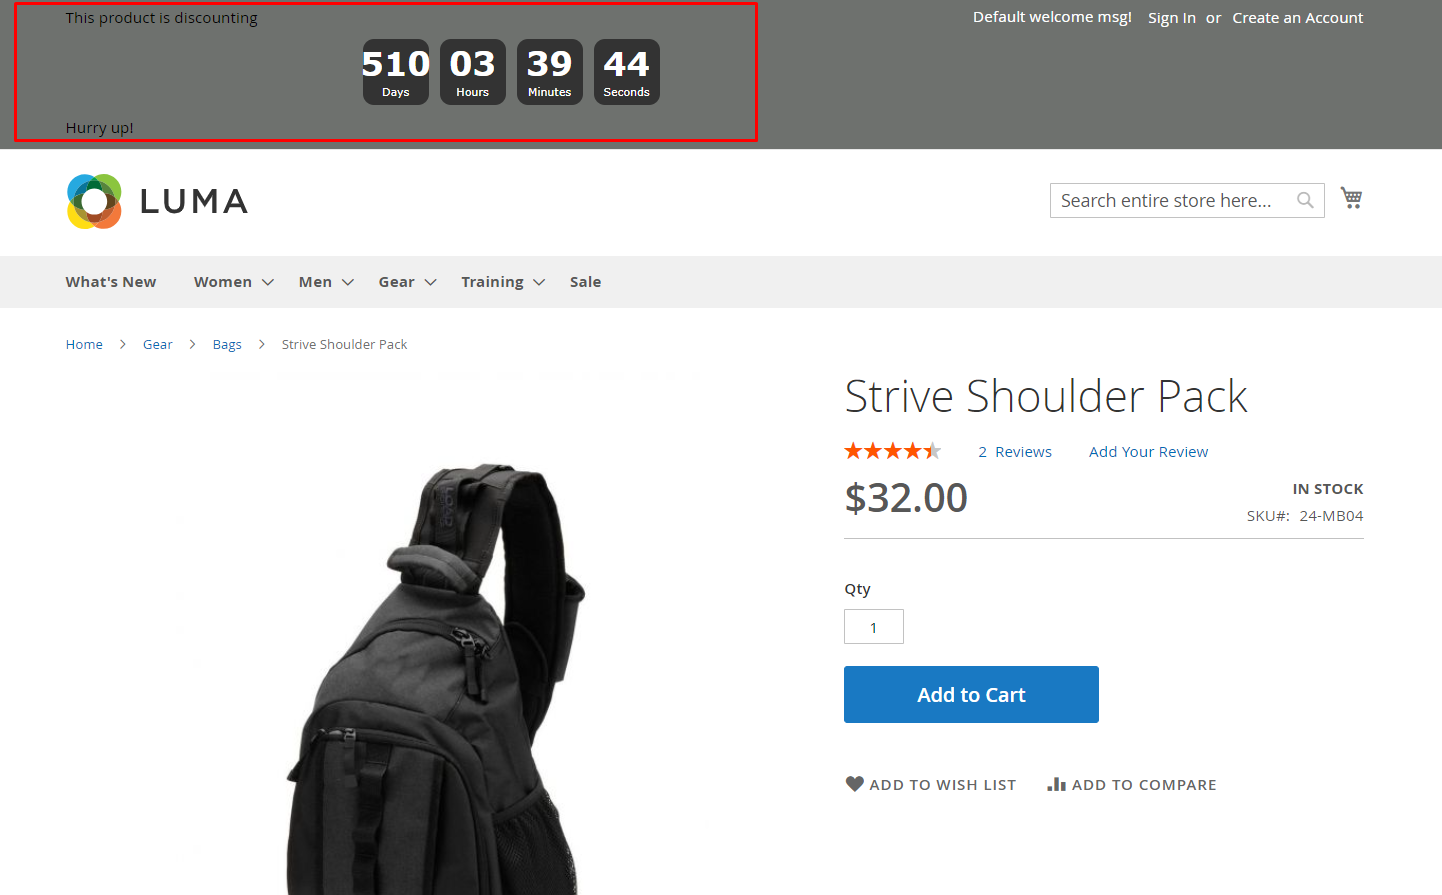
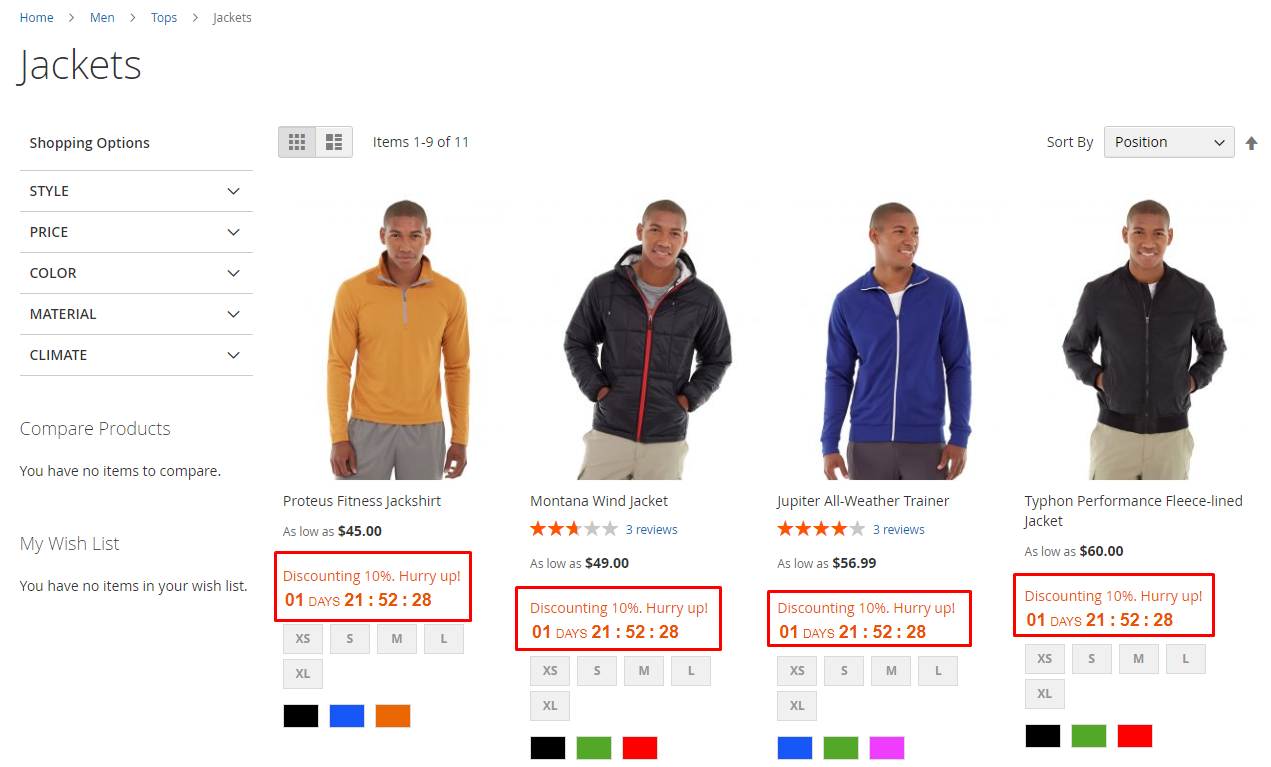
A successful campaign is not just about offering great deals but also how you attract people to notice your incentives. A countdown timer, designed with appealing visuals can absolutely draw customers’ attention. Moreover, the strong message in the timer would be a great motivation as well.
So, why not take advantage of countdown timer right away?