


2 mins read
|
12-30-2025
How to Start a Shopify Store – Full Setup & Launch Guide
Summer Nguyen | 11-13-2023
Shopify is one of the leading e-commerce platforms, powering nearly 5 million active websites worldwide. If you’re looking to tap into this thriving market, knowing how to start a Shopify store is the first crucial step. In this “How to Start Shopify Store” guide, we’ll not only walk you through building your store from scratch but also share optimization tips to give you a competitive edge. Discover now!
Only $999 ($1999) to launch your Shopify store

What You Need Before Starting Your Shopify Store
Setting up a Shopify store can be exciting, but proper preparation is key to success. Here’s a concise checklist:
Domain name
- Choose a domain: Short, memorable, brandable; avoid numbers or special characters. Check availability using Shopify or registrars like GoDaddy.
- Secure it: Buy via Shopify or third-party registrars and opt for privacy protection.
Logo and branding
- Logo: Use tools like Canva or hire professionals (Fiverr, Upwork). Ensure it’s scalable and versatile.
- Branding:
- Color Palette: Choose 2-3 colors that reflect your brand (e.g., blue for trust, green for sustainability).
- Typography: Legible fonts that align with your brand tone.
- Voice & Tone: Define and maintain consistency (e.g., casual or professional).
Product information
- Descriptions: Highlight benefits, solve problems, and use SEO-friendly keywords.
- Images: High-quality, multiple angles, lifestyle shots; enhance with tools like Photoshop or remove.bg.
- Variants: Clearly list sizes, colors, and SKUs for inventory management.
- Pricing: Research competitors, offer discounts, bundles, or tiered pricing.
Payment methods and shipping options

-
- Payment: Use Shopify Payments or integrate third-party options like PayPal, Stripe, or local gateways. Offer digital wallets and buy-now-pay-later options.
-
- Shipping:
-
- Rates: Flat, free (conditionally), or carrier-calculated.
-
- Partners: Reliable carriers like FedEx, DHL, or local services.
-
- Packaging: Consider branded, eco-friendly options and clarify handling times.
- Packaging: Consider branded, eco-friendly options and clarify handling times.
-
- Returns Policy: Draft a clear, accessible policy for returns, exchanges, and refunds
- Shipping:
Business documents and legal requirements
-
- Business Registration: Register your business and choose a structure (e.g., LLC, corporation).
-
- Tax Compliance: Obtain tax IDs (e.g., EIN, VAT) and understand tax obligations, especially for international markets.
-
- Policies: Use Shopify’s policy generator or legal assistance for privacy policies and terms of service.
-
- Licenses: Ensure compliance with local regulations (e.g., FDA approval for health products).
Step-by-Step Guide to Starting Your Shopify Store
Follow this guide to get your store up and running step by step:
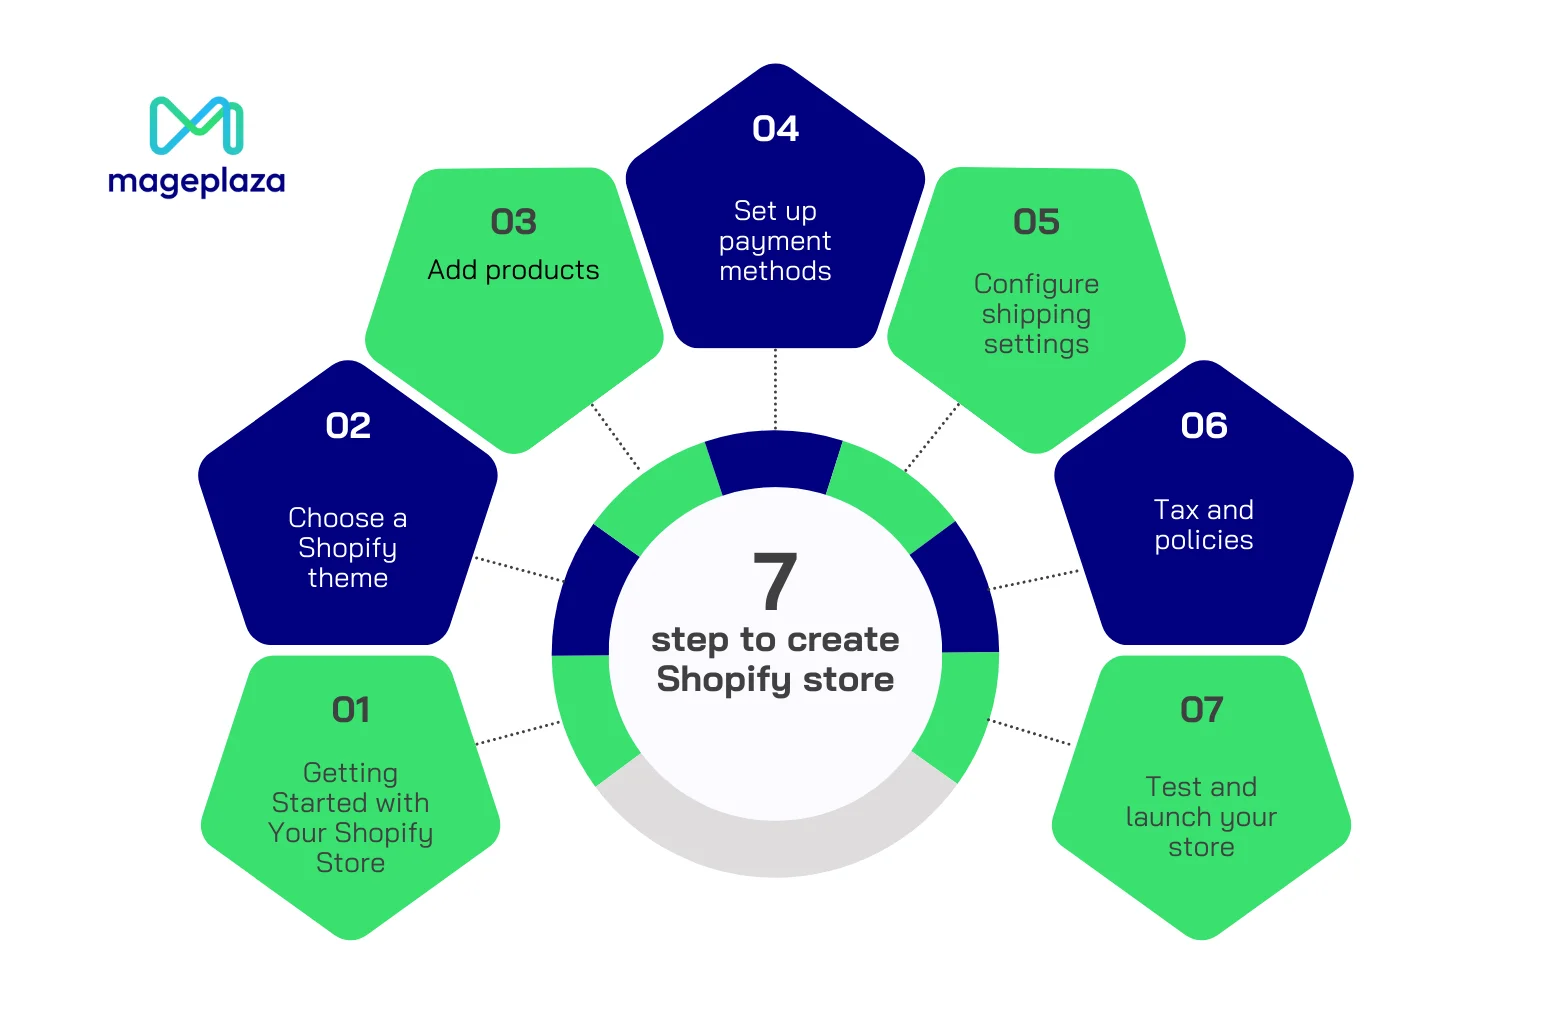
Step 1. Create Your Shopify Store
1.1. Create Shopify account
-
-
Visit Shopify’s website and click “Start Free Trial.”
-
-
-
Enter your email address, create a secure password, and choose a store name. Your chosen name will generate a Shopify subdomain (e.g., yourstore.myshopify.com).
-
-
-
Answer a few simple questions about your business, such as your industry and the types of products you plan to sell.
-
After completing these steps, Shopify will take you to your admin dashboard. This dashboard is the heart of your store management, where you can add products, customize your design, and configure settings.
Pro Tip: If you have a specific store name in mind, check domain availability early so you can secure it when you’re ready.
1.2. Choosing a Shopify plan
Immediately after creating your account, Shopify will redirect you to the store manager’s home page. You have 3 days to experience how to use Shopify and get familiar with its tools, then you need to choose a plan for your store. Shopify offers a range of plans:
-
- Shopify Starter Plan: Ideal for adding e-commerce functionality to an existing website or blog, priced at $5 per month.
-
- Basic Shopify: Perfect for small businesses starting their online stores, priced at $25 per month.
-
- Shopify: Suited for businesses looking to expand and scale, priced at $65 per month, with enhanced features.
-
- Advanced Shopify: Designed for high-growth businesses, priced at $399 per month, with advanced reporting and lower transaction fees.
Pro Tip: Choose the plan that aligns with your business size and projected sales. Don’t worry—you can always upgrade later as your store expands.
Read more:
1.3 Setting Up Store Basics
At this stage, you need:
-
- Go to Settings > General in your dashboard to set up your store name, contact email, and legal address.
-
- Select your store currency to align with the location of your primary customer base.
-
- Navigate to Online Store > Domains to secure a custom domain. Shopify makes it simple to purchase a domain directly or connect an existing one.

Step 2: Choose a Shopify Theme
2.1 Exploring Shopify Themes
Shopify’s Theme Store features over 100 free and premium themes. Each one is optimized for different purposes, so take your time to explore and find the best fit for your brand.
At this point, you should:
-
- Navigate to Online Store > Themes in your admin dashboard.
-
- Browse free themes, such as Dawn, or explore premium options in the Shopify Theme Store.
-
- Preview themes to evaluate their layout, customization options, and responsiveness on desktop and mobile devices.
Pro Tip: For the best experience, opt for a simple, mobile-optimized theme (be sure to check the demo before purchasing). If you’re unsure, start with a free theme like Debut or Dawn to get a feel for the platform. While paid themes offer more customization options, they require some prior experience to make the most of their features.
2.2 Customizing Your Theme
Once you’ve chosen a theme, the next step is to customize it. This is where you can make your store uniquely yours by aligning its design with your brand.
At this point, focus on:
-
- Header and Navigation: Add your logo, adjust colors to match your brand palette, and create an easy-to-follow menu.
-
- Homepage: Feature a bold banner image, highlight your most popular collections, and include testimonials to build trust.
-
- Footer: Add links to important pages like your Privacy Policy, FAQ, and contact information.
Pro Tip: Use Shopify’s Theme Editor to preview changes in real time. This ensures your store looks great before going live.
Step 3: Add Products
3.1 Adding Product Listings
To add a product to your store:
1. Go to Products > Add Product in the Shopify admin panel.

2. Fill out the product details, including:
-
-
Title: Clearly name the product to help customers understand what it is at a glance (e.g., “Organic Cotton Bath Towel Set”).
-
-
-
Description: Write compelling descriptions that focus on benefits. Instead of saying “Made of cotton,” explain “Made from 100% organic cotton for a soft, luxurious feel that’s gentle on sensitive skin.” Use bullet points for specifications like dimensions, materials, or care instructions.
-

-
- Images and Videos: Upload high-quality photos showcasing the product from multiple angles. Add lifestyle shots (e.g., the towel set displayed in a modern bathroom) to help customers envision the product in use.

Shopify also allows you to embed videos directly into product listings, which can be especially useful for demonstrating how the product works.
3.2 Configuring Pricing and Inventory
To price your products and manage inventory efficiently:
-
-
Set the Price: Input your product’s retail price. You can also add a Compare-at Price to highlight discounts (e.g., “$40, now $30”).
-

-
-
Track Inventory: Enable the Track Quantity option to monitor stock levels. You can also set inventory rules to prevent customers from purchasing out-of-stock items.
-
-
-
Shipping Details: If you’re selling physical products, add the product’s weight and select whether it requires shipping. This ensures accurate shipping calculations during checkout.
-
Pro Tip: Use Shopify’s bulk editor to quickly update product details if you have many items. This saves time and keeps your catalog consistent.
3.3 Organizing products into collections
Collections group related products together, making it easier for customers to browse. For example, you can create collections like “Summer Essentials,” “Best Sellers,” or “Under $50.”
To create a collection:
1. Go to Products > Collections in the admin dashboard.
2. Choose between Manual Collections (where you manually add products) or Automated Collections (which group products based on tags, price, or other criteria).

3. Add a description to your collection page to improve SEO. For instance, describe why your “Holiday Gifts” collection is perfect for the season.
Pro Tip: Use tags consistently across products to make automated collections work efficiently. For example, tag all sale items with “discount” to automatically populate a “Sale” collection.
Step 4: Set Up Payment Methods
4.1 Adding Payment Gateways
To set up payment methods:
1. Go to Settings > Payments in your Shopify dashboard.

2. Enable Shopify Payments to process credit card payments seamlessly. Shopify Payments eliminates extra transaction fees and integrates directly into your checkout.
3. Add third-party gateways like PayPal, Stripe, or Klarna.

4.2 Customizing the Checkout Experience
Shopify lets you tailor the checkout process to suit your brand and audience.
-
- Guest Checkout: Decide whether to allow customers to check out as guests or require account creation. Guest checkout simplifies the process and reduces barriers to purchase.
-
- Fraud Prevention: Enable tools like CVV checks and billing address verification to minimize fraudulent transactions.
-
- Language and Currency Settings: If you’re targeting international customers, configure multi-language support and multi-currency options.
Pro Tip: Add security badges or icons like “SSL Secured” and “100% Safe Checkout” to reassure customers during the payment process.
Step 5: Configure Shipping Settings
5.1 Setting Up Shipping Zones and Rates
Define your shipping strategy to accommodate both domestic and international customers:
1. Navigate to Settings > Shipping and Delivery.
2. Create Shipping Zones based on regions you plan to ship to (e.g., domestic, international, or specific countries).


3. Set rates for each zone:

-
- Flat Rate: A fixed price per order, regardless of weight or size.

-
- Weight-Based Rates: Charges increase with the package’s weight.
-
- Free Shipping: Offer free shipping on orders over a specific amount (e.g., “Free shipping on orders above $50”).
5.2 Packaging and Shipping Labels
To calculate shipping costs accurately, enter the dimensions and weight of your packaging in Settings > Shipping and Delivery > Packages. Shopify integrates with apps like ShipStation and Easyship to automate label printing and tracking.
Pro Tip: Offering free shipping thresholds encourages larger orders. For example, “Spend $75 and get free shipping” motivates customers to add more items to their cart.
Step 6: Tax and Policies
6.1 Configuring Taxes
Taxes can be complicated, but Shopify’s tax settings are designed to simplify the process. Here’s how you can set it up:
1. Enable Tax Settings:
-
- Go to Settings > Taxes and Duties in your Shopify admin.
-
- Shopify automatically calculates taxes based on your store’s location and the customer’s shipping address. Ensure your store address is correctly set under General Settings, as this will determine your default tax rates.

2. Automatic Tax Calculation:
-
- Shopify will automatically calculate taxes for countries or regions where tax rules are straightforward.
-
- For regions like the U.S., Shopify provides default tax settings based on your state’s tax rules. However, you’ll need to manually enable tax collection for certain regions, like Canada or European Union countries, which have specific VAT rules.
3. Tax Overrides and Exemptions:
If you sell products that are tax-exempt or fall under special tax conditions (such as food, medicine, or digital goods), you can create custom tax overrides. For instance, you can apply tax exemptions for certain products or offer discounted tax rates to eligible customers.
For international customers, you may need to collect VAT on digital products or services. Shopify has built-in functionality for this as well, but make sure you’ve selected the appropriate tax collection options under Settings > Taxes.
Pro Tip: Always consult a tax professional to ensure you’re compliant with local tax laws. Shopify’s automated calculations are convenient, but you should verify accuracy, especially when selling internationally.
6.2 Drafting Policies
Navigate to Settings > Policies and click on the Create Policy button. Shopify offers default templates for the following:
-
-
Privacy Policy: Explains how you collect, store, and use customer data. It’s especially important if you’re operating in countries with strict data protection regulations (such as the GDPR in Europe).
-
-
-
Refund Policy: Details the terms under which customers can return products and request refunds. You can also specify the return window (e.g., “Returns accepted within 30 days of purchase”).
-
-
-
Terms of Service: Defines the legal relationship between you and your customers, including shipping, payment, and order cancellation terms.
-
-
-
Shipping Policy: Provides your customers with shipping timelines, costs, and tracking information. Be transparent about any handling times or delays that may occur.
-

Pro Tip: While Shopify’s templates are a great starting point, make sure you tailor them to your business. For example, if you offer free returns, this should be clearly stated in your Refund Policy.
Step 7: Test and Launch Your Store
Before you officially launch your Shopify store, it’s essential to test every aspect of the store to ensure a smooth experience for your customers. This final step can help you identify any issues before customers experience them.
7.1 Pre-Launch Testing
Testing is critical to prevent surprises once your store is live. Here’s a checklist to guide you through the process:
- Place a Test Order:
-
- Go to your store as a customer and place a test order to verify everything from the product page to checkout, including payment and shipping.
-
- Test Multiple Payment Methods: Ensure that different payment options (credit card, PayPal, etc.) work without issues. Shopify provides a Bogus Gateway that allows you to simulate a transaction without actual payments.
- Check Product Listings:
-
- Go through each product listing to ensure the images, descriptions, and pricing are correct. This includes verifying that product variants (sizes, colors, etc.) display and function properly.
-
- Verify that collections (e.g., “New Arrivals” or “Sale Items”) are correctly organized and display the appropriate products.
Want to check how other stores structure their product pages and collections? Learn how to identify if a website is built on Shopify so you can analyze competitors and get inspiration.
💡 Pro Tip: After launch, it’s important to monitor your store for broken links and missing pages. These can hurt your SEO and user experience. If you’re unsure how to handle them, check out our guide on how to manage and customize your Shopify 404 page.
Pro Tip: Use Google PageSpeed Insights to check the loading speed of your store on mobile and desktop. A slow website can result in lost sales, especially on mobile devices.
7.2 Preparing for Launch
Once everything is in place, it’s time to prepare for your big launch.
- Connect Your Domain:
-
- Go to Online Store > Domains in Shopify and either purchase a new domain or connect an existing one.

-
- Make sure your SSL certificate is activated, which Shopify automatically handles for you. This ensures your customers’ data is encrypted and secure, which is essential for trust and SEO.
For a detailed step-by-step guide, check out How to Connect a Domain to Shopify to ensure everything is set up correctly.
- Remove Password Protection: Shopify allows you to set up a password page for your store before it’s live. Once everything is tested, go to Online Store > Preferences, and remove the password protection to make your store publicly accessible.
Pro Tip: Use Google Analytics to track website traffic and customer behavior from day one. It helps you analyze where visitors are coming from, what products they’re interested in, and where you may need to adjust your strategy.
If you’d prefer a more visual guide to setting up your Shopify store, check out this helpful video: Shopify Tutorial For Beginners 2025
After launching, one of your first tasks is to make sure your store is indexed by Google. Read this: Why is my Shopify Store not Showing up on Google?
Common Challenges in Setting Up a Shopify Store
Setting up a Shopify store can be a straightforward process, but there are several common challenges that many store owners face along the way. These challenges can range from design and performance optimization to third-party integrations and shipping complications. Below, we’ll explore these issues in more detail and provide guidance on how to overcome them.
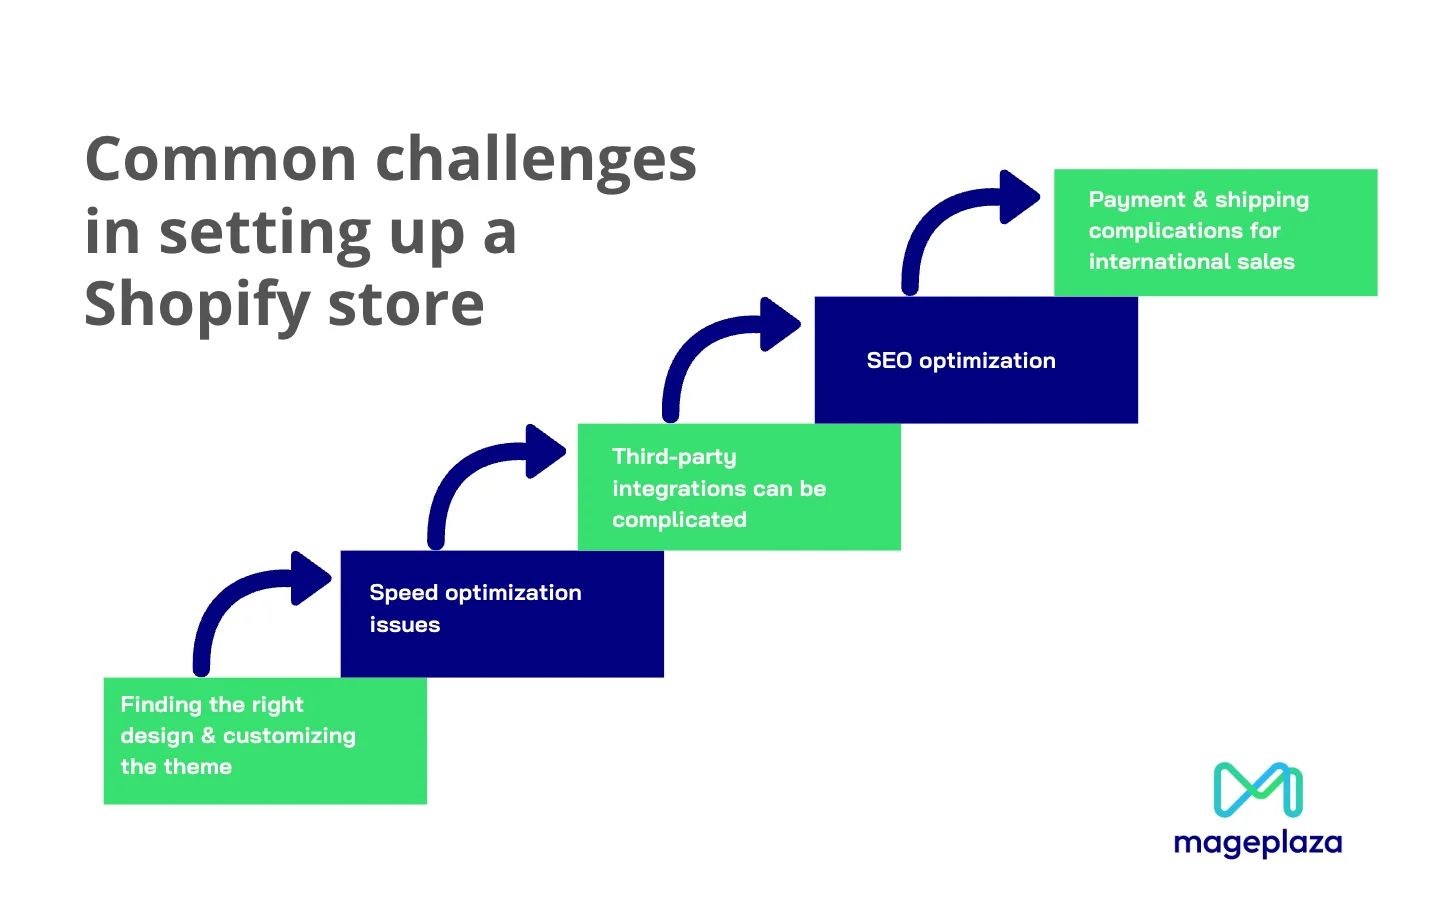
1. Finding the Right Design & Customizing the Theme
One of the first challenges Shopify store owners encounter is selecting a theme that suits their brand. While Shopify offers a wide range of pre-designed themes, it can still be difficult to find one that perfectly aligns with your store’s identity and goals. Customizing a theme to match your brand’s aesthetics can also be a time-consuming and complex process for those without design or coding experience.
At this stage, you may find that it’s hard to modify colors, fonts, or layouts to create a cohesive brand experience. You may also face limitations if the chosen theme doesn’t offer sufficient customization options.
2. Speed Optimization Issues
Another common issue is site speed. As your store grows and becomes more complex, the pages can load slowly, which can be detrimental to the user experience. A slow website can lead to high bounce rates, lower conversion rates, and, ultimately, loss of potential customers.
Factors that can affect site speed include:
-
- Large images or files that haven’t been compressed properly
-
- Too many apps or plugins running in the background
-
- Inefficient coding in themes or third-party integrations
Explore: The Ultimate Guide for Shopify Speed Optimization
3. Third-Party Integrations Can Be Complicated
Shopify offers many third-party integrations for expanding the functionality of your store—whether for marketing, inventory management, shipping, or customer support. However, integrating these third-party apps and services into your Shopify store can be tricky, especially when there are compatibility issues or limited documentation.
This is especially challenging when you’re working with complex integrations, such as connecting your store to an ERP system, integrating with a local payment gateway, or using custom apps that need to synchronize with your Shopify platform. Without technical expertise, these integrations might not work as smoothly as expected, leading to disruptions in your business operations.
4. SEO optimization
Search engine optimization (SEO) is crucial for driving organic traffic to your Shopify store. However, many store owners find it difficult to optimize their Shopify store for search engines due to the platform’s built-in limitations or lack of SEO knowledge.
Key SEO issues that can arise include:
-
- Poor URL structure
-
- Missing or incomplete meta descriptions and titles
-
- Lack of optimized content, including product descriptions and image alt text
5. Payment & shipping complications for international sales
Payment and shipping issues are common obstacles for Shopify store owners, especially when selling to international customers. International sales introduce complications such as currency conversion, taxes, and varied shipping rates. Setting up payment gateways that work across borders can also be challenging, as not all payment providers support every country or currency. Additionally, issues with international shipping rates, delivery times, and customs can lead to frustration for both you and your customers.
Struggling to set up your Shopify store? Let Mageplaza’s Shopify Setup Service handle everything for you. [Contact Us Now].
Conclusion
In the ever-expanding world of e-commerce, the time to start your Shopify store is now. Shopify, as a trusted e-commerce platform, simplifies the process of establishing and growing your online store, providing essential tools for design, product management, and more.
By following the steps outlined in this guide, you can set up your Shopify store, choose your niche, create a brand, add products, and configure essential settings. As you launch your store, the key to success lies in scaling your business by implementing effective marketing strategies, expanding your product offerings, and analyzing data for continuous growth.
Table of content

Summer is the CMO and Digital Commerce Solution Expert with 10+ years of experience. She specializes in Magento, Shopify, ERP, CRM, AI, and Blockchain, delivering strategic solutions that transform businesses. With a deep understanding of digital commerce, she helps brands scale and stay ahead in a competitive market.
Related Post

2 mins read
|
11-30-2025
3 mins read
|
10-30-2025
Discover Top 10+ Must-Have Shopify Customer Account Apps - Mageplaza
Discover top 10+ Shopify customer account apps to transform your store! Learn how to create a seamless and engaging customer experience that keeps them coming back.
17 mins read
|
10-12-2025
![Top 20+ Must-have Shopify Apps for 2025 [Free & Paid] - Mageplaza](https://cdn2.mageplaza.com/media/blog/must-have-shopify-apps/top-must-have-shopify-apps.png)
Top 20+ Must-have Shopify Apps for 2025 [Free & Paid] - Mageplaza
Elevate your Shopify store with our curated list of must-have apps. Enhance functionality, streamline operations, and boost your eCommerce success with these essential Shopify applications.
26 mins read
|
10-12-2025
![[2025 Updates] Top 10+ Upsell Apps for Shopify - Mageplaza](https://cdn2.mageplaza.com/media/blog/best-upsell-shopify-app/cover.png)
[2025 Updates] Top 10+ Upsell Apps for Shopify - Mageplaza
Discover the best upsell Shopify apps such as Adoric, Bold Upsell, Candy Rack, etc., that you have access to the latest tools and innovations to boost your sales
22 mins read
|
10-12-2025
2 mins read
|
12-30-2025
2 mins read
|
11-30-2025
3 mins read
|
10-30-2025
Discover Top 10+ Must-Have Shopify Customer Account Apps - Mageplaza
Discover top 10+ Shopify customer account apps to transform your store! Learn how to create a seamless and engaging customer experience that keeps them coming back.
17 mins read
|
10-12-2025
Top 20+ Must-have Shopify Apps for 2025 [Free & Paid] - Mageplaza
Elevate your Shopify store with our curated list of must-have apps. Enhance functionality, streamline operations, and boost your eCommerce success with these essential Shopify applications.
26 mins read
|
10-12-2025
[2025 Updates] Top 10+ Upsell Apps for Shopify - Mageplaza
Discover the best upsell Shopify apps such as Adoric, Bold Upsell, Candy Rack, etc., that you have access to the latest tools and innovations to boost your sales
22 mins read
|
10-12-2025