

Shopify GA4: How to integrate and best practices to follow
Summer Nguyen | 01-22-2024

For many online business owners, data utilization is the secret ingredient for achieving success. With the help of Shopify GA4, you can understand your customers, their behaviors, and their interactions with your brand. This advanced web analytics tool can address all your e-commerce brand’s burning questions.
This blog will provide essential information about Shopify GA4 and highlight the key features that make GA4 a game-changer for e-commerce businesses. So, if you’re ready to supercharge your Shopify store, let’s dive in!
What is Google Analytics 4 (GA4)?
If you have yet to hear, GA4 is the cutting-edge iteration of Google’s web analytics platform. Created with the specific needs of e-commerce businesses in mind, GA4 provides unparalleled power and flexibility when it comes to understanding website traffic and user behavior.
What sets GA4 apart is its innovative event-based data model, revolutionizing the way user interactions and engagement are tracked across multiple digital channels. This includes websites and mobile apps, ensuring you have a comprehensive view of your customer’s actions and preferences.
With GA4, you’ll gain deeper insights into how users navigate your online presence, enabling you to optimize every touchpoint of their journey. From tracking specific events and conversions to uncovering valuable patterns and trends, GA4 empowers you to make data-driven decisions that drive your e-commerce success.
In comparison to its predecessor, Google Analytics, GA4 adds a number of new capabilities that improve your analytics experience. GA4 also improves data privacy protections, allowing you to maintain a secure and compliant analytics environment.
Why should you use Shopify GA4?
You should use Shopify GA4 because it provides better tracking, deeper insights, and improved user experience analytics for your Shopify store. It enhances your ability to understand customer behavior and optimize your marketing strategies. Key benefits include:
- Event-based tracking – Captures user interactions more accurately than Universal Analytics.
- Cross-device tracking – Helps you analyze customer behavior across multiple devices.
- AI-powered insights – Uses machine learning to predict trends and customer actions.
- Privacy-focused analytics – Ensures compliance with modern data protection regulations.
- Improved reporting – Provides detailed reports to boost sales and customer retention.
What are the key features of Shopify GA4?
Shopify GA4 has numerous new features that business owners need to know to unlock the potential levels of performance analysis. Here are some key features that you may find in Shopify GA4:
- Predictive analysis assisted by Machine Learning and Artificial Intelligence
GA4 uses advanced technologies such as machine learning and artificial intelligence to deliver predictive analysis. This implies the platform can examine past data and user behavior patterns to generate insights and predictions about future events. This useful feature lets you make data-driven decisions and improve your marketing efforts.
- Increased event and conversion capacity
GA4 offers expanded event and conversion tracking capabilities. It allows you to collect up to 30 conversions, specific actions or goals you define, and up to 300 events, which are individual user interactions. This enhanced capacity enables you to track various user activities and measure multiple objectives simultaneously.
- Creating custom reports
GA4 allows you to produce personalized reports tailored to your requirements. You can create reports that highlight cohorts (groups of users with similar characteristics), routes (user navigation paths), funnels (conversion funnels), or segments (particular subsets of users). The flexibility enables you to delve deeply into specific elements of your analytics data and get meaningful insights.
- Automatic event tracking
GA4 can automatically capture events from various user activities, including scrolls, video views, and first-time visits. This eliminates the need to manually configure event tracking for these activities. By automatically capturing these events, you better understand user engagement and activity on your website or app.
- Attribution model flexibility
GA4 allows you to select a specific attribution model. Attribution models manage how conversion credit is distributed to various marketing channels or touchpoints in a user’s journey. You can modify the way credit is assigned with the flexibility to set your attribution model, allowing you to better assess the impact of your marketing efforts and improve your campaigns accordingly.
Two Methods to Set up GA4 on Shopify
Here, we’ll explore two methods for setting up GA4 on your Shopify store:
Method 1: Using the built-in integration (easiest method)
Shopify offers a native integration for GA4, making setup a breeze. Here’s a detailed breakdown:
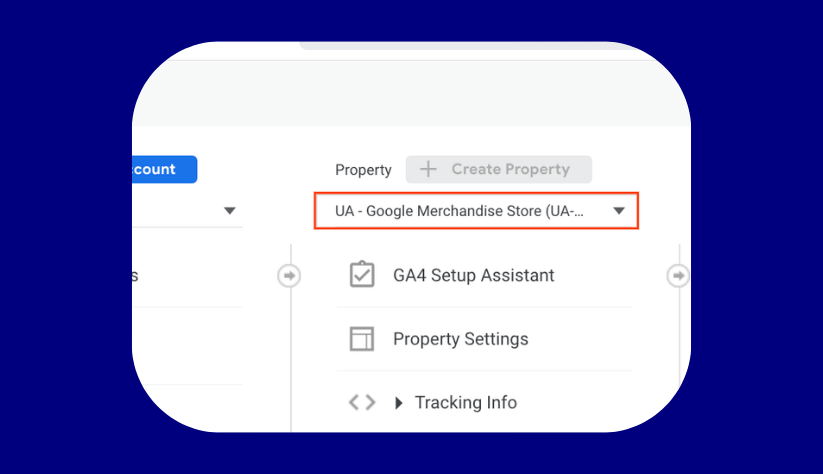
Step 1: Set up your Google Analytics 4 property
Before starting the Google Analytics Shopify setup process, it’s essential to have a Google Analytics account in place with a GA4 property and data stream ready for use. If you have already completed this setup, you can proceed to the next step.
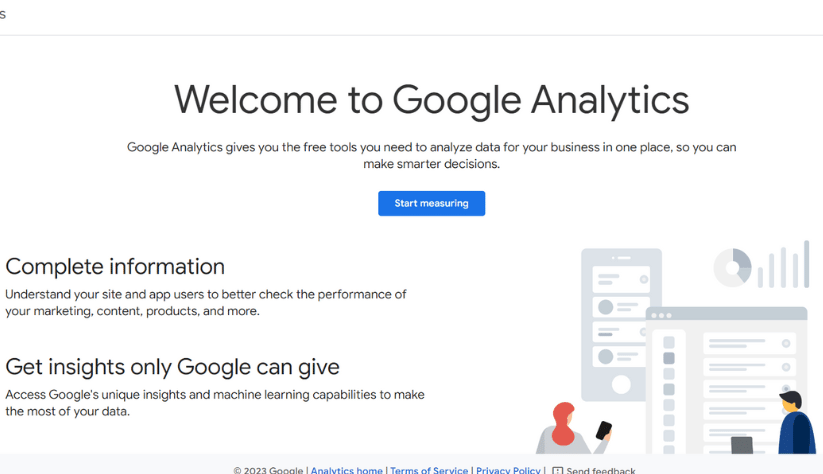
However, suppose you haven’t set up your Google Analytics property for your Shopify store. In that case, you need to follow a guide to create a new Google Analytics property specifically tailored for your Shopify store. This step ensures that you have the necessary foundation in place to effectively integrate Google Analytics with your Shopify store and gather valuable insights from your data.
Step 2: Find Google’s channel/app in your Shopify’s admin panel
To initiate the GA4 setup process for your Shopify store, you need to locate Google’s Channel/App within the Shopify Admin Panel. Here’s how you can do it:
- Access your Shopify Admin Panel.
- From the left-hand menu, select the “Online Store” channel.
- Click on “Preferences” within the Online Store section.
- Scroll down until you find the Google Analytics section.
- In the Google Analytics section, look for the “Manage Pixel” button and click on it. This will take you to the relevant settings for integrating Google Analytics with your Shopify store.
Alternatively, you can use the app search bar within the Shopify Admin Panel to search for the Google app. Once you locate it, proceed to install the Google app on your store.
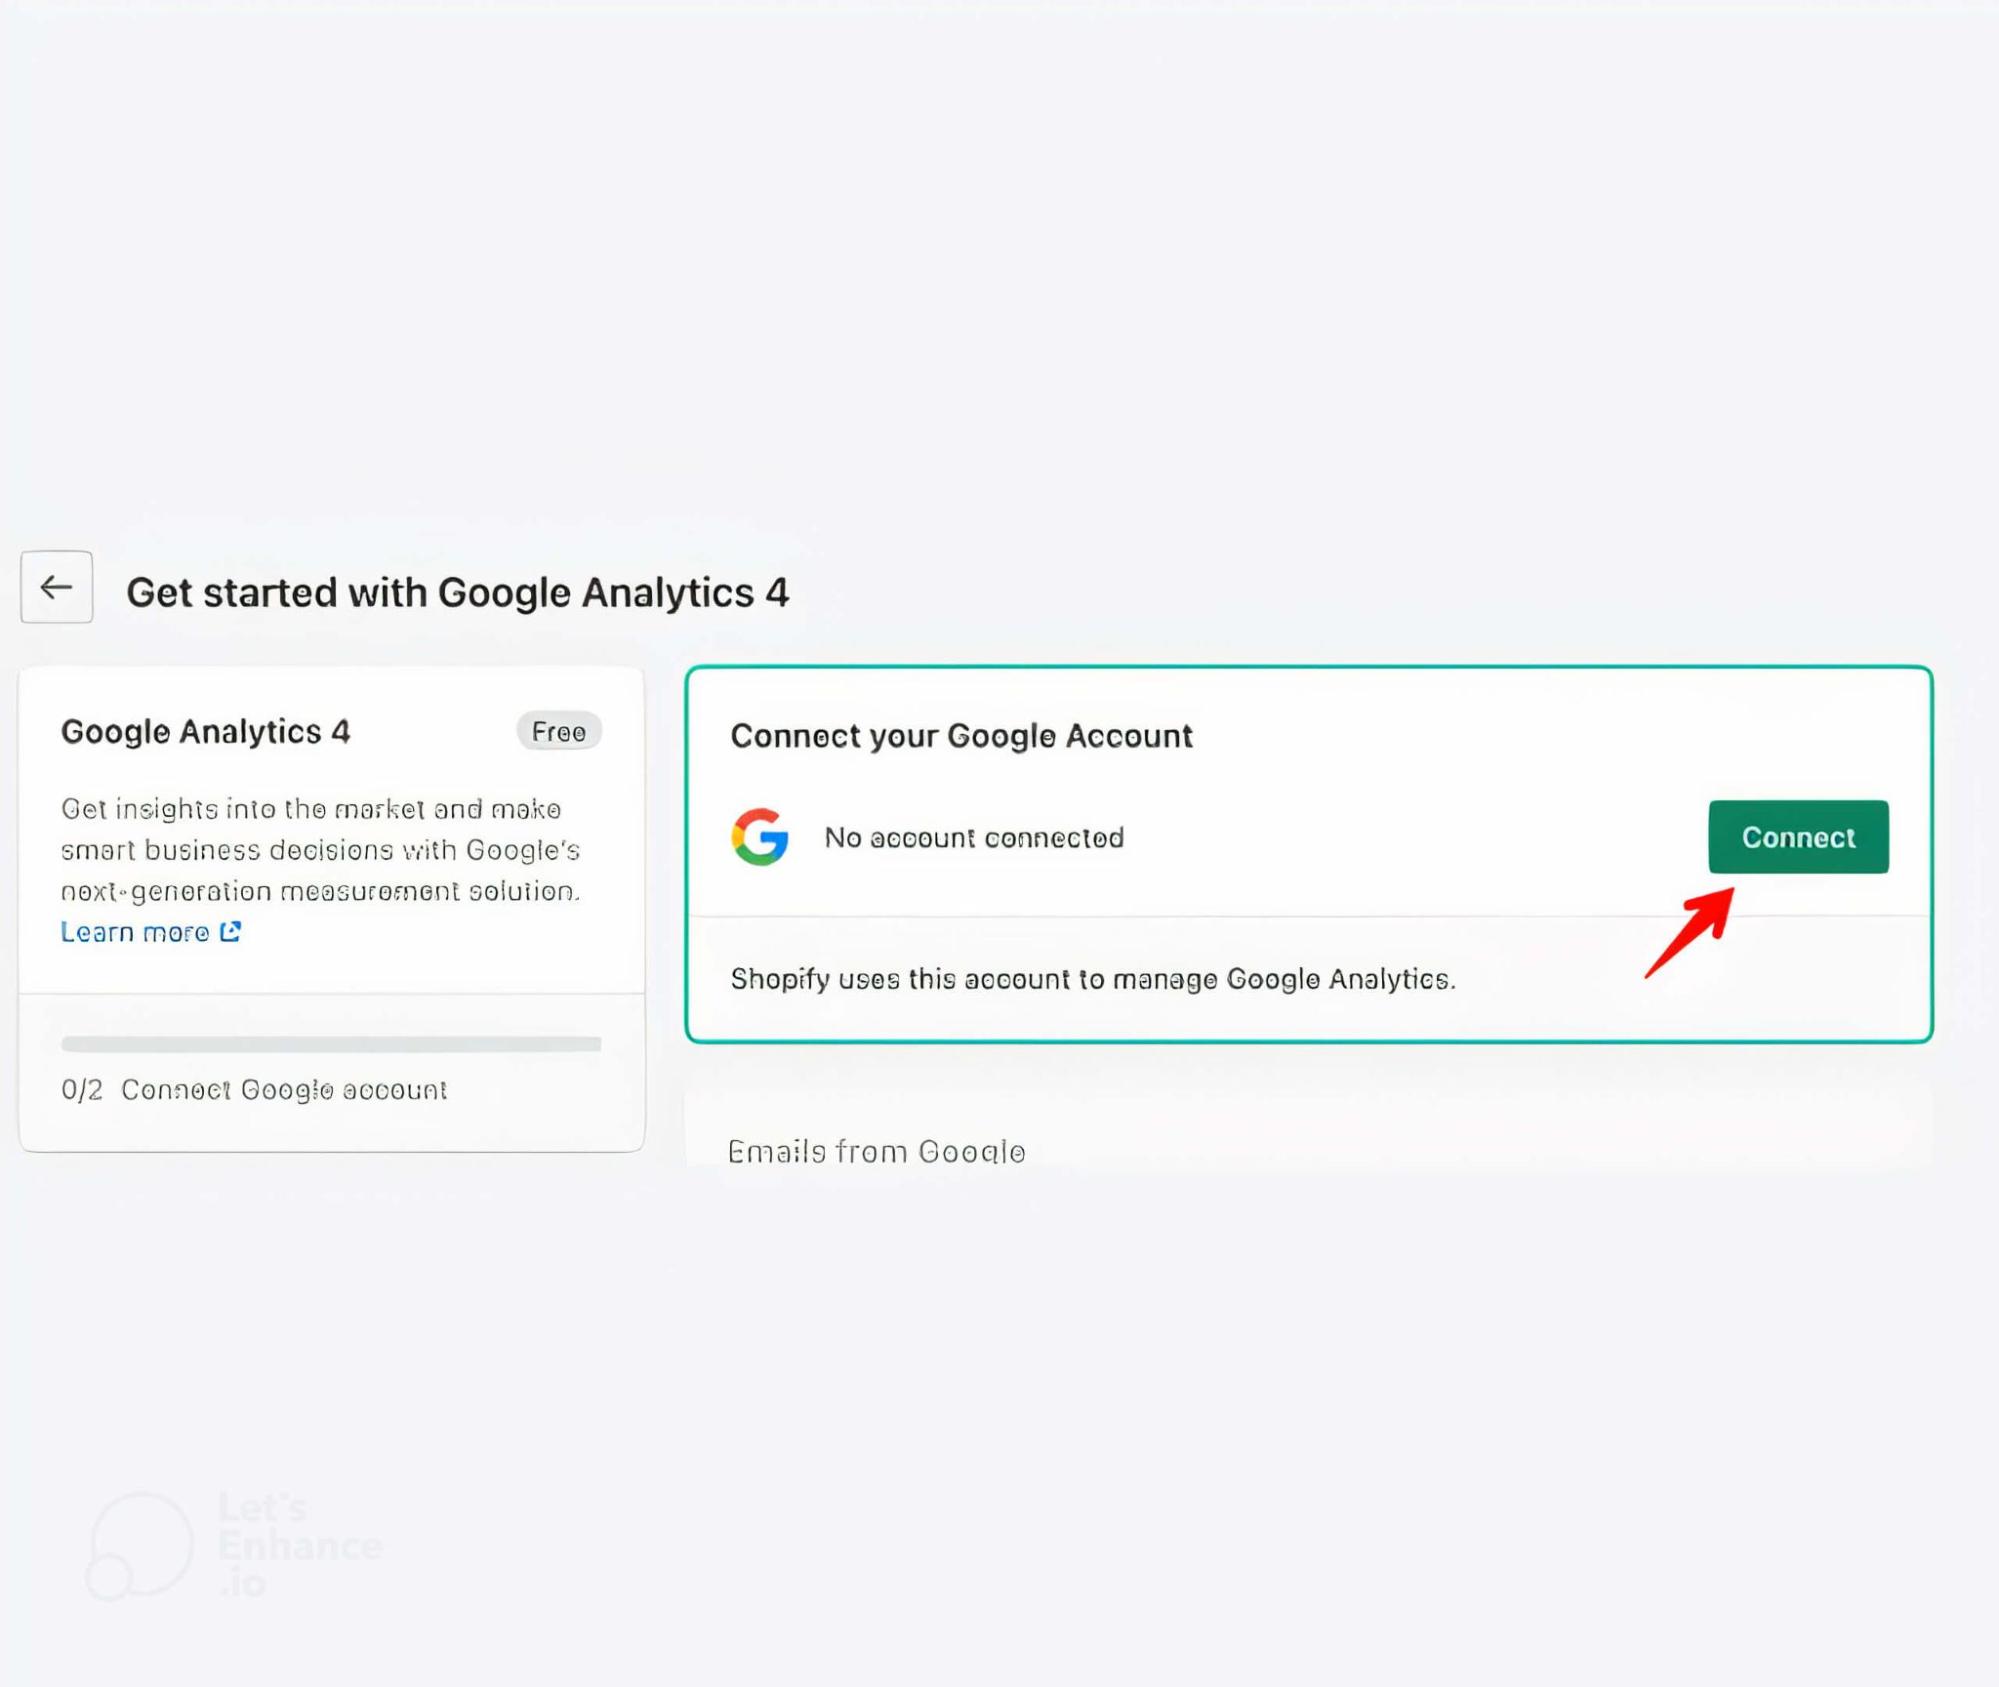
Step 3: Link your Google Analytics account to Shopify
After accessing the Google Channel within Shopify, the next step is establishing a connection with your Google Analytics account. Here’s how you can do it:
- The “Connect your Google Account” section is located within the Google Channel.
- Click on the “Connect” button found under this section.
- You will be asked to give Google permission. This is necessary for Google to access and retrieve data from your Shopify store.
- Proceed by approving Google’s request for permissions.
Step 4: Connect a Google Analytics property
In this step, you choose the specific data stream you want to connect and then proceed with the connection process. Here’s how to do it:
- Within the Google Channel or the connected Google Analytics settings, locate the option to select the desired data stream.
- Choose the appropriate data stream that corresponds to the specific information you want to track and analyze in GA4.
- Once you have selected, click on the “Connect” button to establish the connection between your chosen data stream and GA4.
Step 5: Verify data collection
To ensure the successful setup of GA4 for Shopify, it is crucial to verify that your configuration is working correctly. Follow these steps to confirm:
- Visit the “Real-time” section of your GA4 property in Google Analytics. This section provides immediate feedback on whether data is populating in real time.
- If you don’t see any data appearing, it indicates that there might be an issue with your data stream setup. Double-check your data stream configuration to ensure accuracy.
- To further validate your setup, visit your own store and check if you can see your own data in the “Real-time report.” If you don’t see any data, review your data stream selection during setup to ensure you have chosen the correct one.
Remember that there may be some lag in processing data within GA4. It’s normal for most reports to not show new information for approximately 24 hours. Therefore, it’s recommended to revisit the reports the next day to ensure everything is functioning as expected.
Optionally, you can consider removing the integration of the previous version (Universal Analytics) from your store. However, note that these two integrations typically do not interfere with each other. For comparative purposes, you may prefer to keep both integrations active unless there is a specific reason to remove the previous version.
Method 2: Using Google Tag Manager (GTM)
If you require more advanced tracking capabilities or already use Google Tag Manager (GTM) for managing website tags, you can set up GA4 through GTM.
Step 1: Set Up Google Tag Manager (if you haven’t already)
-
Create a GTM account at https://tagmanager.google.com/ and set up a container for your Shopify store.
-
Follow Google’s instructions to add the GTM container snippet to your Shopify theme.
Step 2: Create a GA4 Tag in GTM
-
Within your GTM container, click on “Tags” and then “New.”
-
Choose “GA4 Configuration” as the tag type.
-
Enter your GA4 Measurement ID (found in your GA4 property settings) and configure the tag settings as needed (e.g., trigger firing on all pages, specific events, etc.).
-
Save the tag and publish your GTM container.
Step 3: Verify GA4 Setup
-
Use Google Tag Assistant (https://tagassistant.google.com/) to verify that the GA4 tag is firing correctly on your Shopify store.
8 Vital Shopify GA4 Configuration (And Settup Method)
Google Analytics 4 (GA4) offers a powerful upgrade for Shopify merchants, providing deeper insights into customer behavior. But to unlock its full potential, you need to ensure accurate data collection. Here are 8 crucial GA4 configurations to get you started, complete with step-by-step instructions:
-
Exclude unwanted referrals: See your marketing channels clearly
Shopify stores often have internal traffic sources that shouldn’t be counted as referrals, like payment gateways (Stripe, PayPal) and your own store management platform (Shop.app). Excluding these sources gives you a clearer picture of how your marketing campaigns are actually performing.
Here’s how to fix it:
- In your GA4 admin panel, navigate to Admin > Data Streams.
- Select the data stream for your Shopify store.
- Under Data Settings, find List unwanted referrals.
- Enter the domain names of sources you want to exclude (e.g., stripe.com, paypal.com, shop.app).
- Click Save.
-
Configure domains
If your Shopify store uses subdomains, ensure GA4 recognizes them as part of your website. This provides a comprehensive view of your overall traffic sources.
Here’s how to set it up:
- In your GA4 admin panel, navigate to Admin > Data Streams.
- Select the data stream for your Shopify store.
- Under Website settings, find the field for Primary Domain.
- Enter your main domain name (e.g., yourstore.com).
- In the Additional Domains field, list all your subdomains separated by commas.
- Click Save.
-
Enable Google signals: Understand cross-device customer journeys
Google Signals leverages anonymized data from users signed into Google accounts. This provides valuable insights into user behavior across devices, helping you understand how customers interact with your store on desktops, phones, and tablets.
Steps to set up:
-
- In your GA4 admin panel, navigate to Admin > Setup Assistant.
- Follow the on-screen instructions to enable Google Signals. You’ll need a Google Ads account linked to your GA4 property.
-
Integrate Search Console & Google Ads
Linking GA4 with Search Console unlocks valuable SEO data within GA4, allowing you to see how organic search performance impacts your website traffic and conversions. Additionally, integrating Google Ads allows you to analyze campaign performance directly in GA4, streamlining your marketing analysis. Here’s how to activate it:
Phase 1: Search Console integration:
- In your GA4 admin panel, navigate to Admin > Data Streams.
- Select the data stream for your Shopify store.
- Under Connections, click on Search Console.
- Follow the on-screen instructions to link your Search Console property.
Phase 2: Google Ads integration:
- In your GA4 admin panel, navigate to Admin > Data Streams.
- Select the data stream for your Shopify store.
- Under Connections, click on Google Ads.
- Follow the on-screen instructions to link your Google Ads account.
-
Disable form interaction hits
By default, GA4 tracks form interactions (e.g., button clicks) as separate events. This can skew your data if the actual form submission is a more important metric for your business.
Here’s how to disable it:
- In your GA4 admin panel, navigate to Admin > Events.
- Find the event category for your form interactions (e.g., “form”).
- Click on the specific form interaction event you want to modify.
- Under Event Parameters, toggle off the switch for Send as interaction.
- Click Save.
-
Adjust session timeout
The default session timeout in GA4 is 30 minutes. This means if a user returns to your website within 30 minutes of inactivity, their visit will be counted as a single session. You can adjust this based on your audience’s typical browsing behavior to ensure sessions are accurately measured.
Important note: A longer session timeout can inflate your traffic numbers, while a shorter timeout might split user journeys into multiple sessions, making analysis less accurate. Analyze your audience’s behavior to find the right balance.
Here is how to modify session timeout:
- In your GA4 admin panel, navigate to Admin > Property Settings.
- Under Data Settings, find the field for Session timeout.
- Enter your desired session duration in minutes (e.g., 60 for a 1-hour timeout).
- Click Save.
- Filter internal traffic
Internal IP addresses shouldn’t be counted as website traffic, as they skew the data and inflate the number of website visitors. Setting up filters to exclude traffic from your own IP address or office network ensures cleaner data for better analysis.
- In your GA4 admin panel, navigate to Admin > Data Filters.
- Click on Create filter.
- Give your filter a recognizable name (e.g., “Exclude Internal Traffic”).
- Select Source IP as the filter field.
- Enter your office IP address or IP address range in the Filter pattern field. You can find your IP address through a quick web search.
- Choose Exclude for the filter type.
- Click Save.
Best practices for Shopify GA4 to follow
To maximize the effectiveness of your Google Analytics 4 (GA4) implementation for your Shopify store, it is crucial to ensure accurate data tracking and reporting. We will give you some useful tips to enhance the accuracy of your GA4 data:
- Maintain consistent tracking codes
To uphold the accuracy and currency of your data, it is vital to maintain consistent tracking codes. This practice holds particular significance when tracking customer journeys and evaluating the effectiveness of your store’s offerings. By consistently using and updating tracking codes, you can ensure that the collected data reflects user behavior and enables accurate analysis and decision-making for your Shopify store.
- Implement consistent naming conventions
When configuring your GA4 property, it is crucial to adopt consistent naming conventions. This practice plays a vital role in ensuring the accuracy and clarity of your data.
Using standardized naming conventions, you can effectively organize and interpret your data, making it easier to understand and analyze. Consistent naming conventions facilitate seamless collaboration among team members and enable efficient data management for your Shopify store.
- Regularly verify for errors
Regularly checking for errors in your GA4 data is crucial to maintaining its accuracy and reliability. By diligently verifying the data for precision and currency, you can promptly identify and address any discrepancies or inaccuracies.
This practice helps to uphold the integrity of your data and provides confidence in the accuracy of the insights and decisions derived from it. Make it a routine to regularly review and validate your GA4 data to maximize its reliability and effectiveness for your Shopify store.
- Conduct thorough testing of your setup
Performing comprehensive testing of your GA4 property setup is a valuable approach to ensuring its correctness and effectiveness. This step is important for accurately tracking customer journeys and evaluating the performance of your store’s products and services.
You can identify potential issues or discrepancies in the data collection process by conducting thorough testing. This practice allows you to fine-tune and optimize your GA4 setup, ensuring the data accurately reflects user behavior. This also provides meaningful insights for informed decision-making in your Shopify store.
Some pitfalls to avoid when using Shopify GA4
- Fail to establish separate GA4 properties for each store
Neglecting to set up a dedicated GA4 property for each Shopify store can lead to a significant drawback. It is vital to create separate GA4 properties for each store to effectively track and assess their performance. By having distinct GA4 properties, you can accurately isolate and analyze the data specific to each store, enabling comprehensive insights.
- Overlook the importance of UTM parameters
Failing to utilize UTM parameters can result in a significant pitfall when monitoring the performance of your marketing campaigns. It is crucial to set up UTM parameters to effectively track and evaluate the effectiveness of your marketing efforts. You can accurately attribute traffic and conversions to specific marketing initiatives by incorporating UTM parameters into your campaign URLs.
- Not enable enhanced E-commerce
Overlooking the activation of enhanced e-commerce can lead to a significant drawback. You may fail to understand user behavior and optimize your store’s performance. By activating this feature, you can access detailed data on product impressions, add-to-cart events, purchases, and other crucial metrics. This enables you to analyze user behavior, identify areas for improvement, and make data-driven decisions.
- Forget to set up goals
Failing to establish accurate goals can be detrimental when evaluating the success of your store. On the contrary, setting goals provides valuable insights into key performance indicators. These KPIs can be conversions and user engagement. They will allow you to measure progress and identify areas for improvement.
Conclusion
To sum up, integrating Google Analytics 4 (GA4) with your Shopify store opens up a world of valuable insights and opportunities for growth. By following the best practices provided in this blog, you can optimize the accuracy and effectiveness of your GA4 implementation. With Shopify GA4 by your side, you can unlock actionable data, make informed decisions, and drive the success of your Shopify store to new heights.

Summer is the CMO and Digital Commerce Solution Expert with 10+ years of experience. She specializes in Magento, Shopify, ERP, CRM, AI, and Blockchain, delivering strategic solutions that transform businesses. With a deep understanding of digital commerce, she helps brands scale and stay ahead in a competitive market.
Related Post

Review 74 Mageplaza extension updates from April 2025, highlighting Magento 2.4.8 compatibility, Hyvä theme support, and enhanced functionalities.

Social Media Marketing: Your Ultimate Guide to Skyrocketing Engagement - Mageplaza
Discover a step-by-step framework for effective social media marketing. Learn how to optimize content, run ads, track KPIs, and future-proof your strategy across all major platforms.
Review 74 Mageplaza extension updates from April 2025, highlighting Magento 2.4.8 compatibility, Hyvä theme support, and enhanced functionalities.
Social Media Marketing: Your Ultimate Guide to Skyrocketing Engagement - Mageplaza
Discover a step-by-step framework for effective social media marketing. Learn how to optimize content, run ads, track KPIs, and future-proof your strategy across all major platforms.