Change Store Email Addresses - Mageplaza
Magento 2 get customer address custom attribute value
Vinh Jacker | 10-28-2019

Collecting address is one of the vital information which assists eCommerce business to proceed at the final stage of the orders. However, it can bring more valuable information than you expect. With extra attributes being added to the stores, you can have more opportunities to learn more about your customer.
The essential can be an additional email or a survey question on the stores. Every single detail collected from the customer will be an important piece of information for your stores. Thus, to learn how you can obtain this critical information and discover our Customer Attributes module, please feel free to continue reading this blog post.
Create Customer Attributes programmatically in Magento 2
Table of Contents
- Gain benefits with customer attributes
- How to configure attribute value in the backend
- 3 Steps to Configure Attribute value in Magento 2
- Frontend interface
- Mageplaza Customer Attributes usage
- Final words
Gain benefits with customer attributes
Increase relationship with customers
Nowadays, the more information you can collect from the customers’ address, the deeper you can penetrate in the customers’ mind. The same will happen when you can learn more about your customer address. When knowing all the locations of your group customer live, you can seregrate the customer groups according to their location. From there, you can know the buyers at a certain position will mostly purchase and create appealing offer for the customers.
Support your marketing strategies
The address is the most valuable information you can gain from customers when selling online. It is the main strings that connect you with your buyers. By using the function, added values will appear in several available positions that you have set in the backend. These positions include the Account registration page, Customer address edit page, Frontend checkout page, Admin checkout in the backend. From the geographical position collected from your online shoppers, you can create a precise marketing and cross-selling campaigns with suitable message.
By applying this function suitably, your marketing strategies will become more customer-focus. The segregation can drive more value for both customers and your store. Like a chain reaction, strategy will help to convert many prospects of B2C and B2B business into buyers and turn one time customers to become loyal and raving fans.
How to configure attribute value in the backend
Customizing the new address field is a great feature that featured in the Customer Attributes extension for Magento 2. There is a simple process you need to make behind the admin panel so that it can make the value work perform normally on the frontend. That is the reason why we are going to dive in and learn more about how you can set the function in motion.
3 Steps to Configure Attribute value in Magento 2
-
Step 1: Fill information into customer attributes
-
Step 2: Name the value to display on the frontend
-
Step 3: Choose positions to display new Attribute
Step 1: Fill information into customer attributes
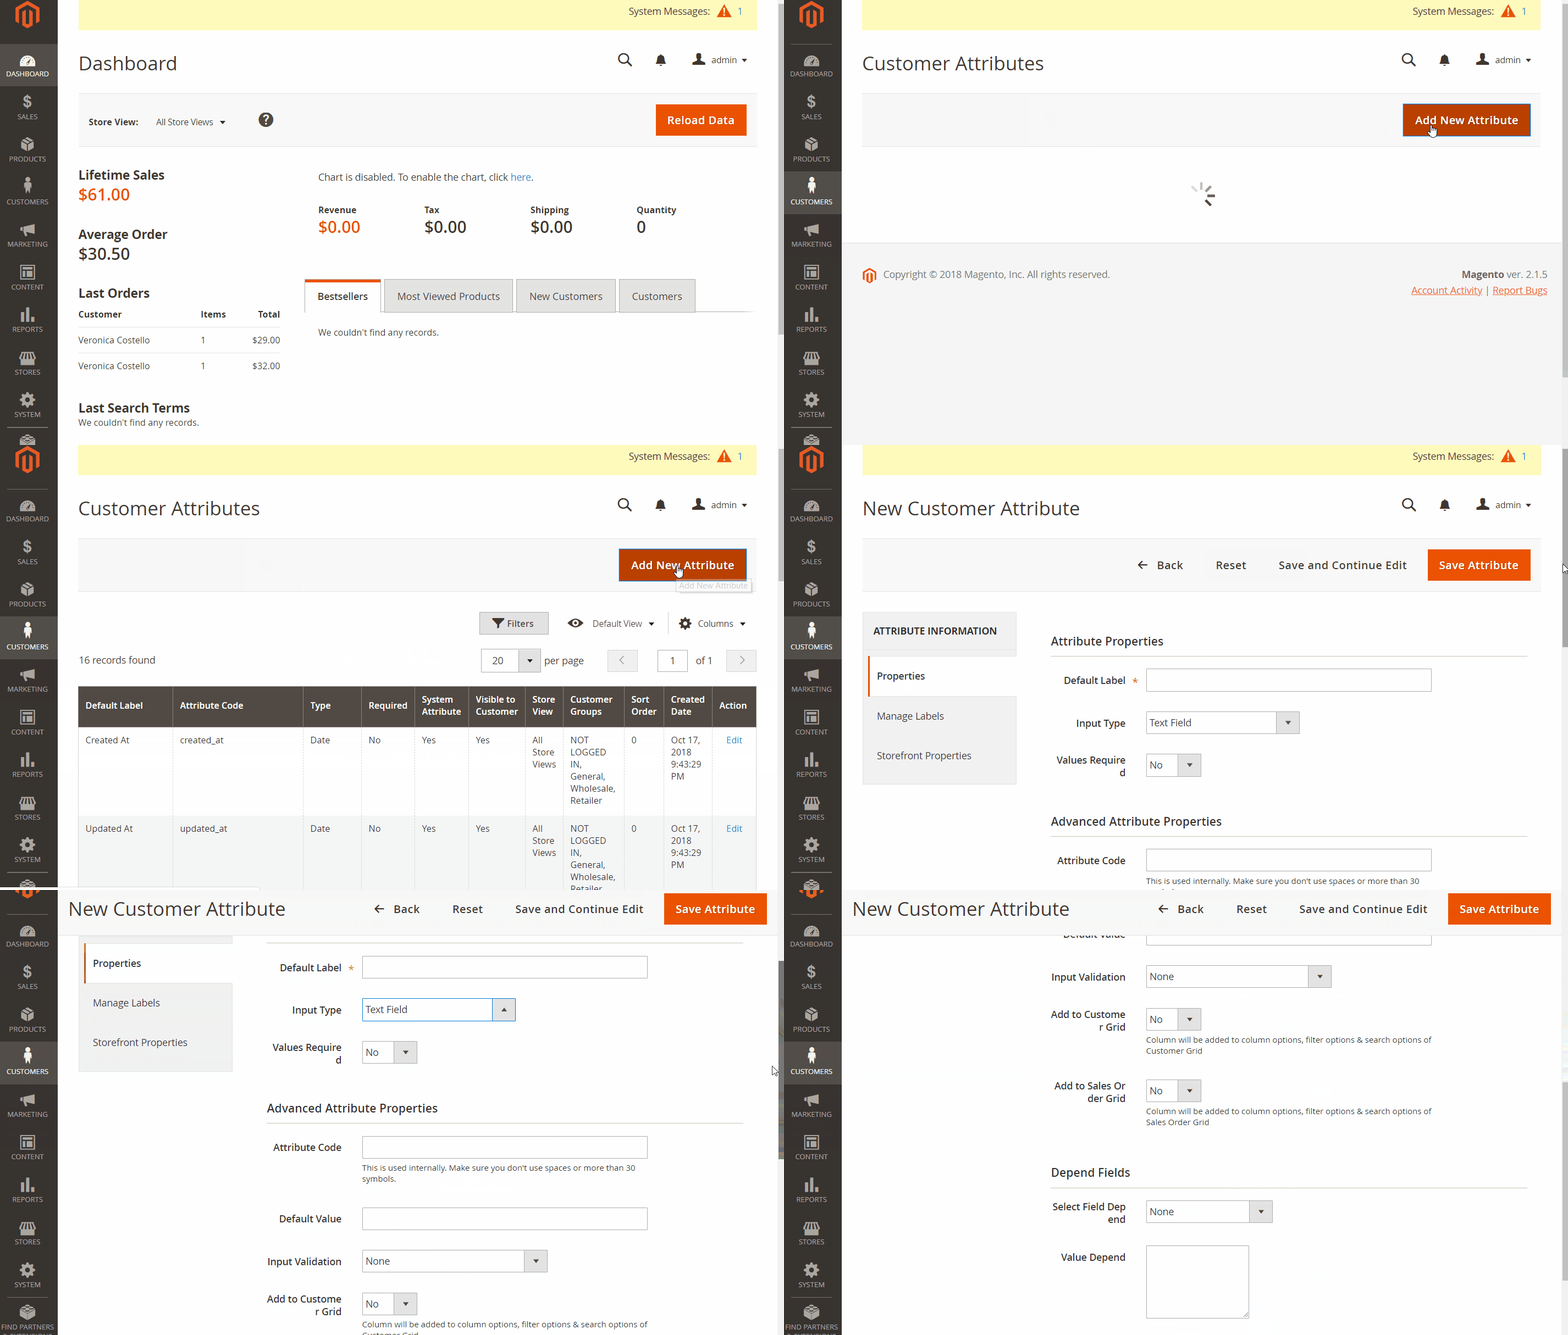
Before creating the customer address, let’s access the Magento back panel and go to Customers > Attribute > Customers, and choose Add New Attribute.
1. Attribute Properties
The default label is a required field that helps you to name your new address field. If you leave this field blank, you will fail to create new values with a notice shown: “This is a required field”. Right after you finish filling the first value, its name will appear while you enter the data.
Now, you can move on to select the input type. For the address field, the store needs to select Text Field for address filling. Furthermore, if you want the customer to fill in their address as a mandatory value, then choose Yes in the Value Required field. After you have set yes, an icon will display at the left of the attributes (*).
2. Advance attribute properties
The extension helps you to create the attribute code for internal use purposes. The code is no more than 30 characters and no space in between these characters. If you leave it blank, the system will set a default value based on the Default Label field.
The second field in this section is Default Value. The value you enter in this field will appear with the attributes you generate in the Customer Account Create area.
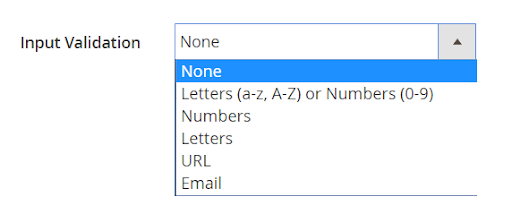
Input Validation is another field that is created to help you choose the validation type. This function only works when you apply Text Field as the Input Type. There are 6 options in this field:
Next, select Yes for Add to Customer Grid field. The column will be added to Column Options, Filter option & Search Option of Customer Grid.
Also, select Yes for Add to Sale Order Grid to insert the attribute into Column Options, filter Option & Search Options of Sale Order Grid.
Step 2: Name the value to display on the frontend
Admins need to fill in the name of the new value that you want to show on the attributes name that you want to demonstrate to the customers. This name will replace the attribute’s name which you have created before. If the field is left blank, the attribute name is what you will set in the Default Label.

Step 3: Choose positions to display new Attribute
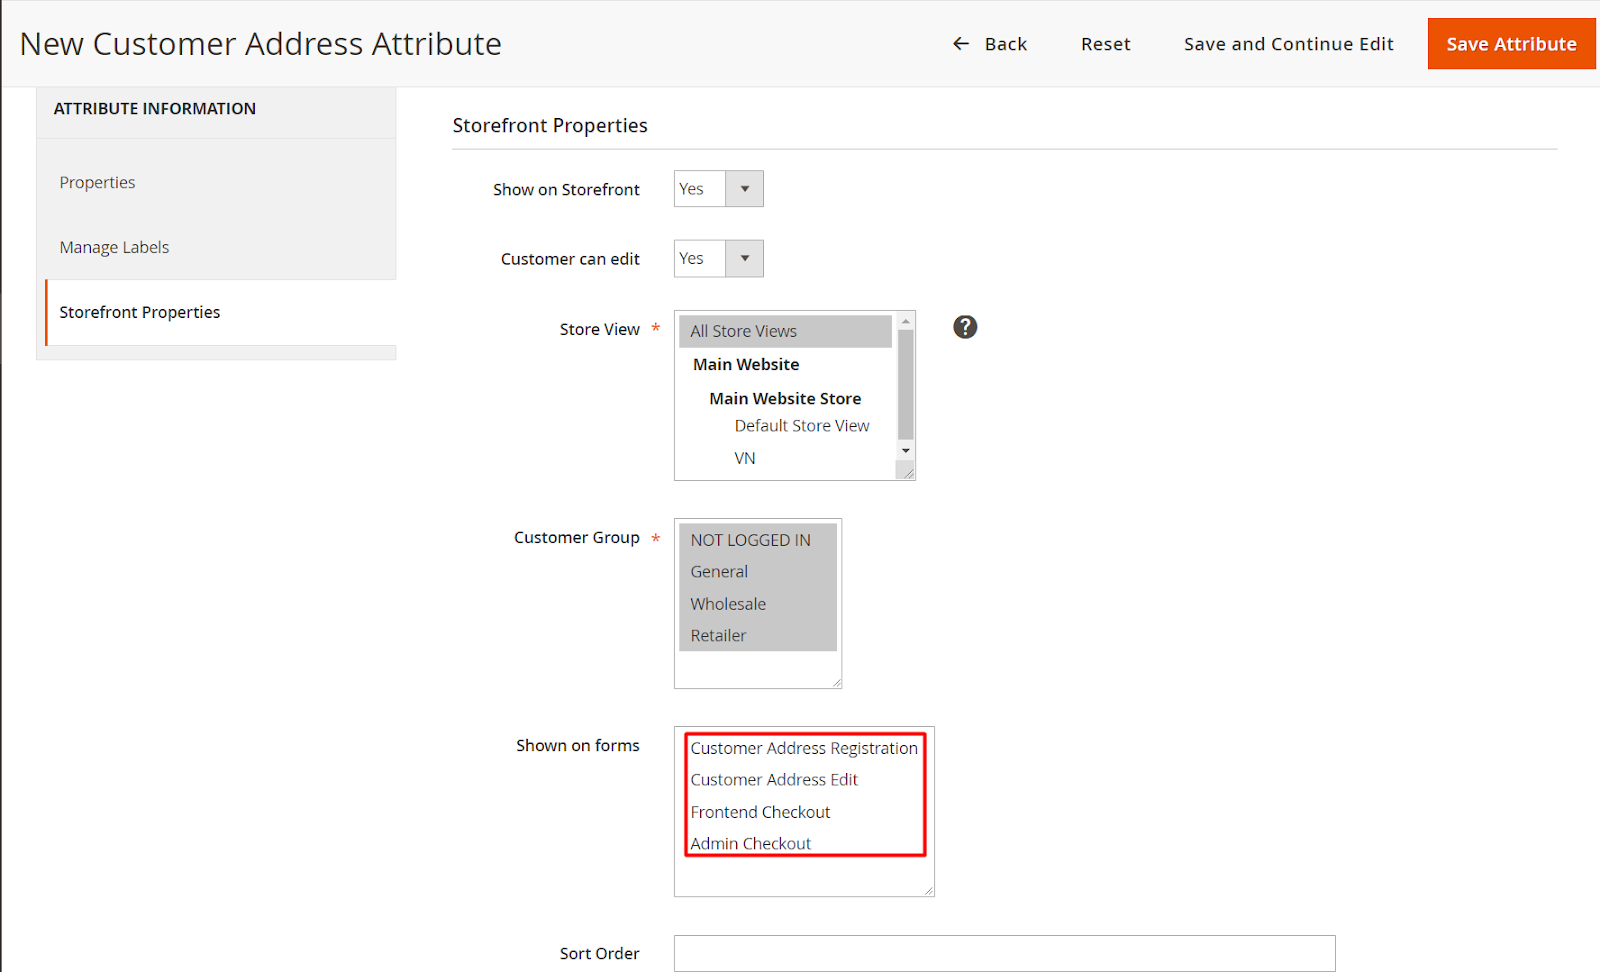
As you can see in the image above, the address field can be displayed on 4 different forms which are Customer Address Registration, Customer Address Edit, Frontend Checkout, and Admin Checkout.
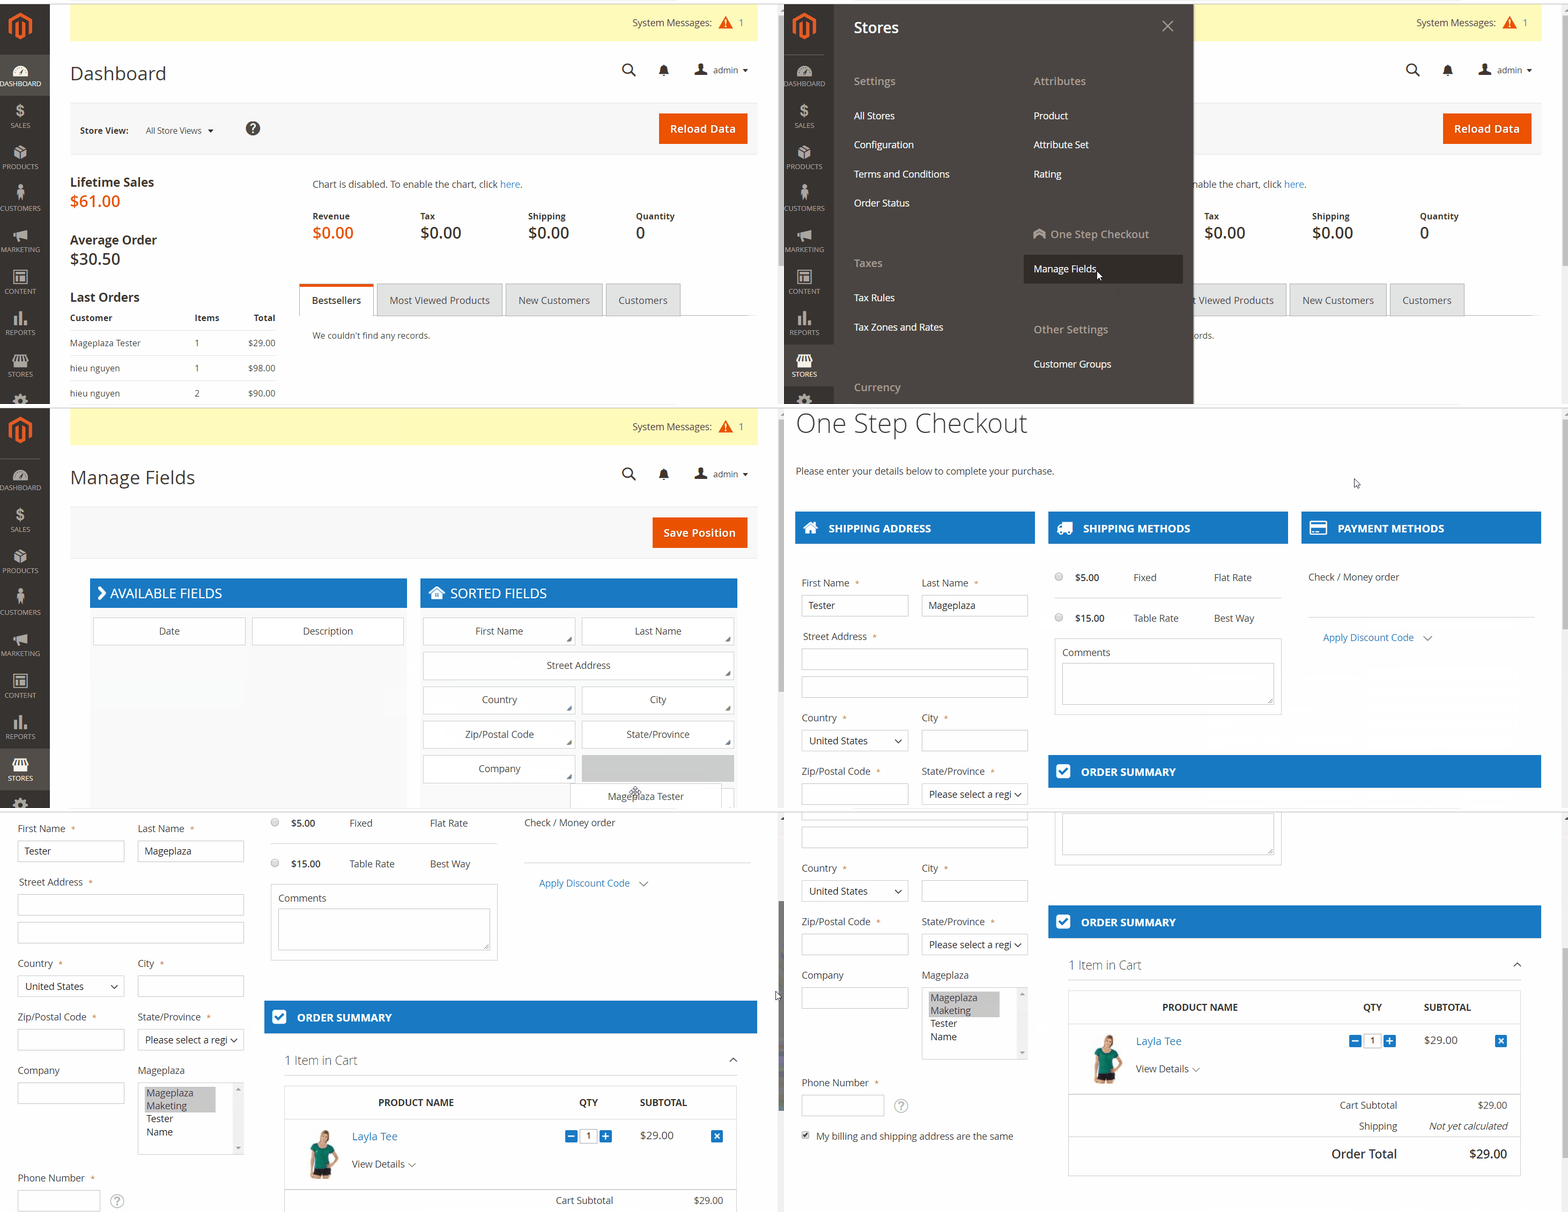
In addition, when you install the One Step Checkout Module, which helps your clients to checkout faster with only one page. You can have a better chance of arranging the field as you wanted in the checkout field. In detail, from the Admin panel, access Store > One Step Checkout > Manage Fields. In this section, drag your address fields from the available fields to the Sorted Fields column that you want to show on the One Step Checkout.
Frontend interface
After setting every detail in the product grid, it is time to check on the backend. The final results will mostly look like images below:
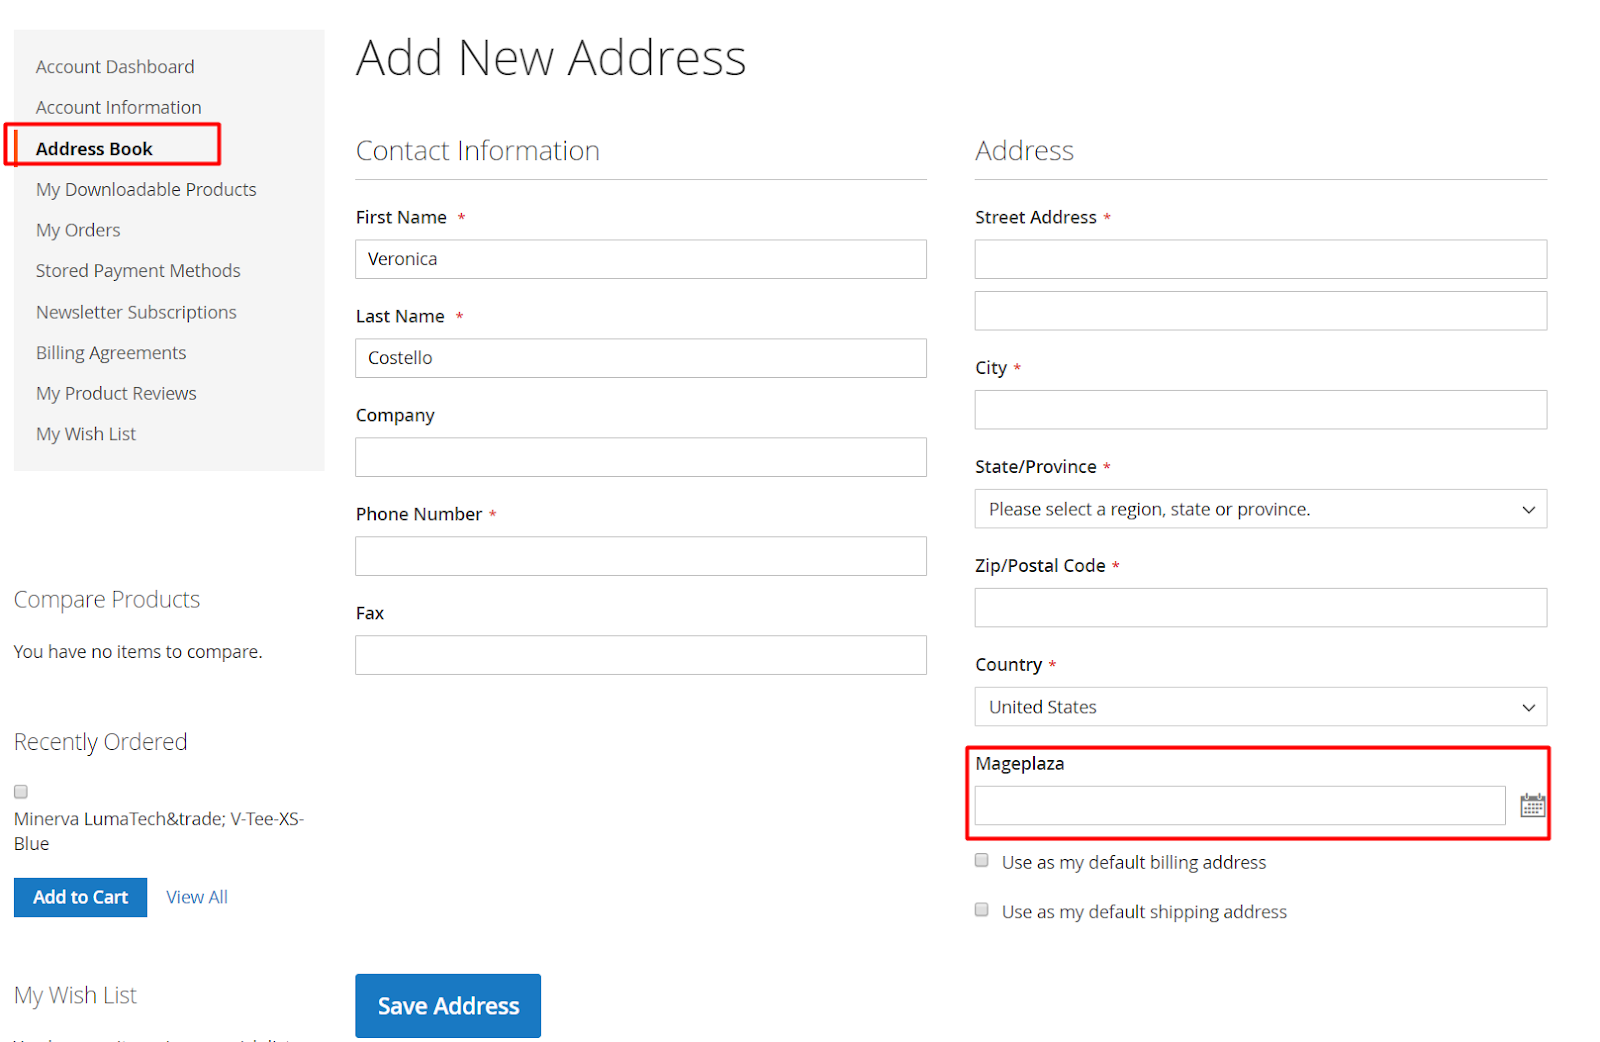
- Customer Address Registration: You can set the address field for the customer’s second address for the first time when they register their account.
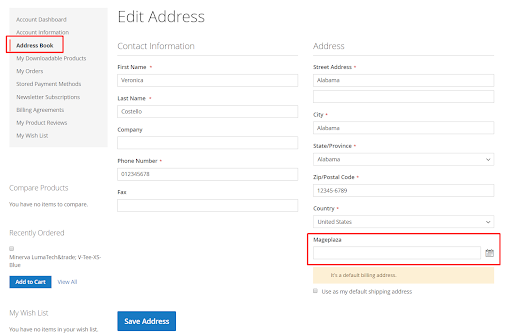
- Customer Address Edit: the customer data can also be added to the Customer Address adjustment page in case the customer wants to add their frequently used email details.
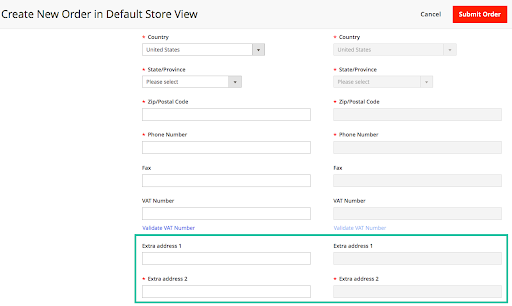
- Frontend Checkout: You should not miss the checkout page on the front end as you can exploit the most information on the storefront with ease
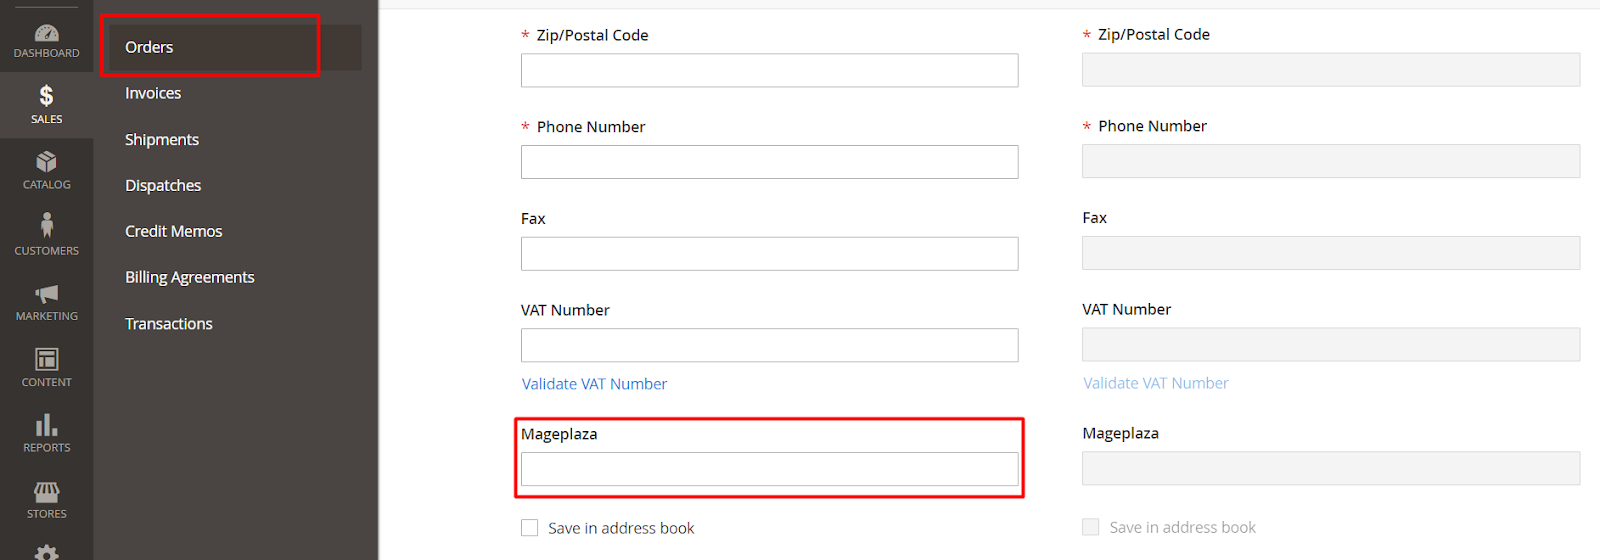
- Admin Checkout: The value can also be available in the backend checkout page if you feel essential when placing an order for a client.
Mageplaza Customer Attributes usage
Customer Attributes for Magento 2 by Mageplaza supports stores in creating new information fields in the form:
- Create as many attributes as you want
- 11 input types allows stores to collect information in various forms.
- Allow back-end configuration for admins to edit the details with ease
- Set data validation to get valuable answers with correct forms
- Compatible with One Step Checkout to integrate information fields at checkout page
Final words
In summary, adding a new custom field to collect the additional address of the store will bring numerous advantages for your stores. In addition, to create a new value, you only have to follow a simple process.
Hence, this function is only a small feature of the Customer Attributes plugin. Many other functions still awaits you to explore like creating dependent attributes to optimize the store form’s layout!


