

Change Store Email Addresses - Mageplaza
3 mins read
|
04-02-2016

Vinh Jacker | 07-13-2017

For an eCommerce website, Storefronts is the most important things when building the website. That is what customers see first when visiting your store. A store can have many Magento storefronts which include products, categories and search options. So, How To Configure Magento 2 Frontend in your store?
Admin sidebar, then choose Products > Categories. Skip to Step 6 if you want your stores to share the same catalog and products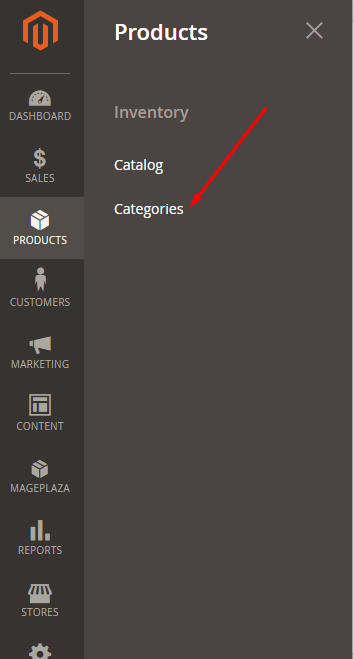
Add Root Category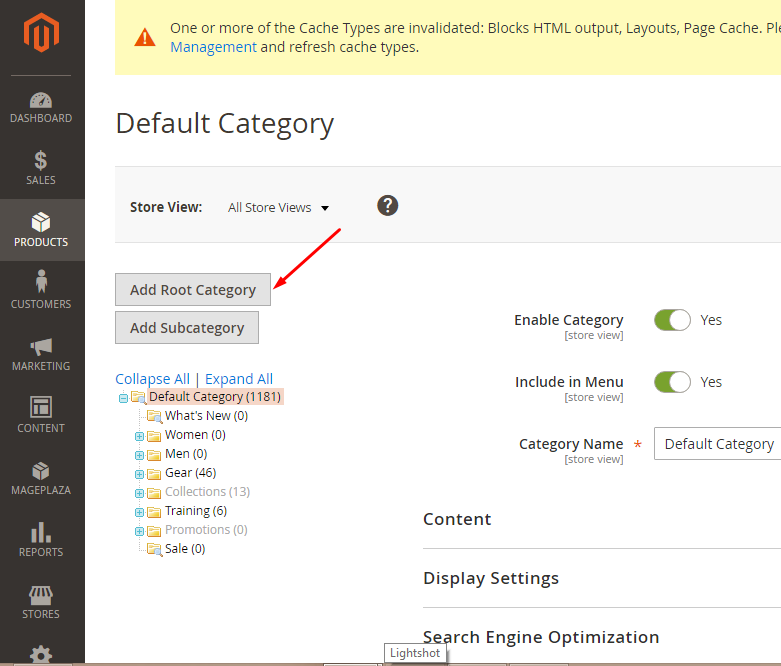
Name field, type your new store nameIs Active field, click YesDisplay Settings field, choose Yes in Anchor field. Then select Save CategoryAdmin sidebar, select Stores. After that, under Settings options, choose All Stores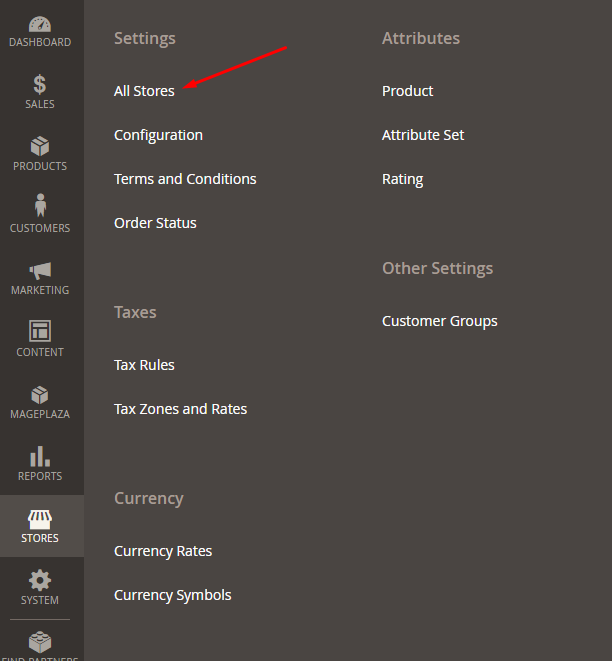
Create WebSite in the right up cornerName fieldCode field then select Save Web site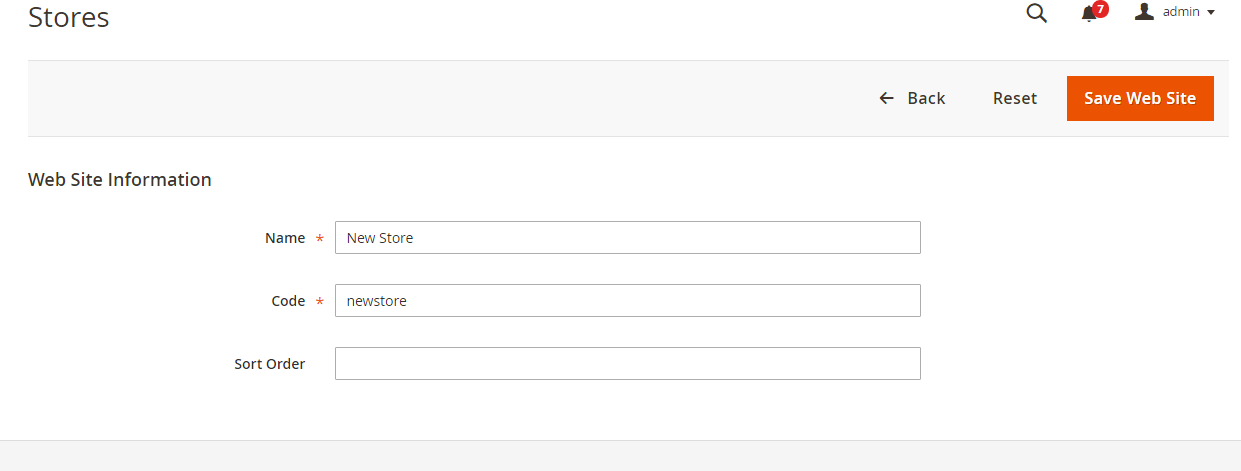
Create StoreWeb site field, choose the website that you just createdName field, type your store’s nameRoot Category field, choose the root category that you just created or use the Default Root Category if you ignore ahead. Then select Save Store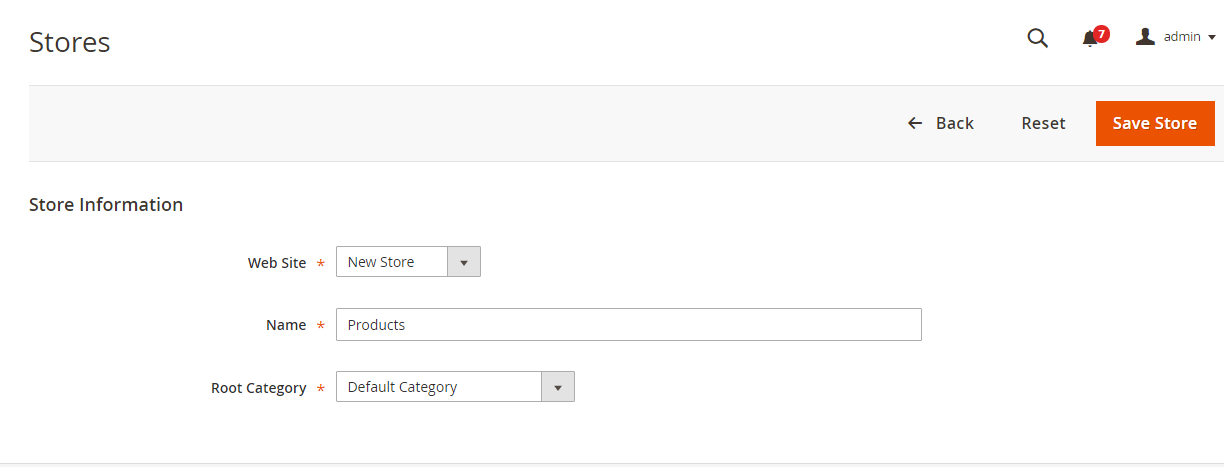
Create Store ViewStore field, choose the store that you just created.Name field, enter a name such as “Cat”Code field, enter a string to determine the store view.Enabled in Status field then Click Save Store View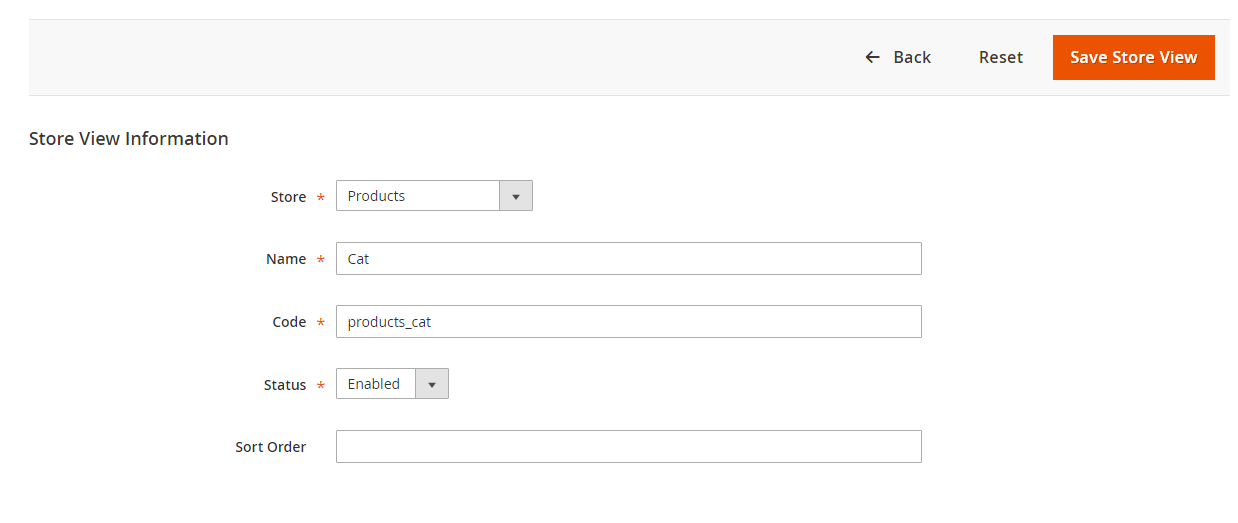
Admin sidebar, choose Stores > Configuration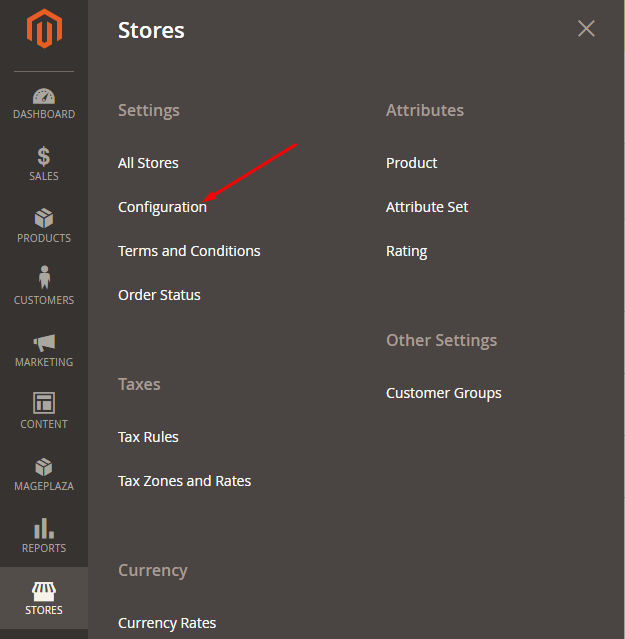
Store View field, choose the website that you just built.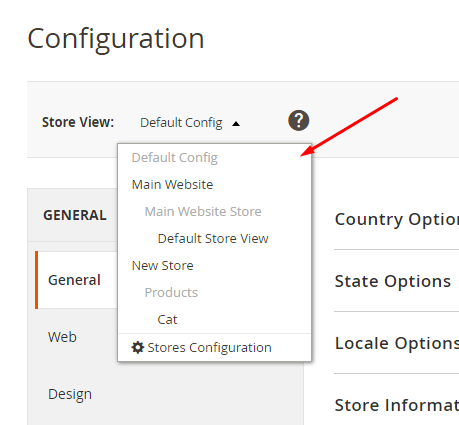
Web table option, expand the Base URLs and Base URLs(Secure) section.Base URLs field, type your store’ URL by using one of the ways below:Use Default check box if you want to use your main store URLBase URL field, type your store URL and add the “/” at the end of the URL.Base URLs (Secure) section, do the same Base URLsSave Config to complete.Related posts:
There are a lot of methods to configure the server to run the exact store but the two most popular methods:
.htaccess and index.php files from your Magento settings to the document root of your new domainindex.php file that you just copied and edit the last lines of the file as below:Notes: Convert new store to the code that you wrote down when you built the new website atop.
Replace:
$bootstrap = \Magento\Framework\App\Bootstrap::create(BP, $_SERVER);


/** @var \Magento\Framework\App\Http $app */
$app = bootstrap->createApplication('Magento\Framework\App\Http');


$bootstrap->run($app);
With:
require __DIR__ . '/app/bootstrap.php';
$params = $_SERVER;
$params[\Magento\Store\Model\StoreManager::PARAM_RUN_CODE] = 'newstore';
$params[\Magento\Store\Model\StoreManager::PARAM_RUN_TYPE] = 'website';
$bootstrap = \Magento\Framework\App\Bootstrap::create(BP, $params);
/** @var \Magento\Framework\App\Http $app */
$app = $bootstrap->createApplication('Magento\Framework\App\Http');
$bootstrap->run($app);
ln -s /home/example/example.com/html/app/ app
ln -s /home/example/example.com/html/lib/ lib

ln -s /home/example/example.com/html/pub/ pub
ln -s /home/example/example.com/html/var/ var
Notes: This method is only used for Magento version 1.4.0.1 and higher versions
.htaccess file in the document root of your Magento settings and type the below just above the line RewriteEngine On:
.*newstore.* with the domain name of your new store, keeping the dots and asterisks.Newstore specifies the domain name of your new store, and websitecode identifies the store code generated in MagentoSetEnvIf Host .*newstore.* MAGE_RUN_CODE=newstore
SetEnvIf Host .*newstore.* MAGE_RUN_TYPE=website or store
Related posts:

Jacker is the Chief Technology Officer (CTO) at Mageplaza, bringing over 10 years of experience in Magento, Shopify, and other eCommerce platforms. With deep technical expertise, he has led numerous successful projects, optimizing and scaling online stores for global brands. Beyond his work in eCommerce development, he is passionate about running and swimming.
Related Post

Change Store Email Addresses - Mageplaza

Change Welcome Message - Mageplaza
Customize the welcome message on your store's homepage to provide a personalized touch for your customers. Improve the user experience with our step-by-step guide.

Configure Magento 2 Contact Form & Email: Detailed Guides - Mageplaza
Configure the email address for your Magento 2 store's contact form and ensure that your customers can easily get in touch with you with this informative guide

How to Install Magento 2 with Sample Data - Mageplaza
How to install Magento 2 with Sample Data. In this topic we will discuss about How to Install Magento 2 Step by Step in Manage Store topic

6 Steps To Stop Brute Force Attacks - Mageplaza
How To Stop Brute Force Attacks in Magento 1, 2. In this topic we will discuss about How To Stop Brute Force Attacks in Manage Store topic

How to set Locale, Language, and Country in Magento 2 - Mageplaza
Setup Locale State Country in Magento 2 provides setup your store information on Locale Options that determines the timezone, language, country and the days.
Change Store Email Addresses - Mageplaza
Change Welcome Message - Mageplaza
Customize the welcome message on your store's homepage to provide a personalized touch for your customers. Improve the user experience with our step-by-step guide.
Configure Magento 2 Contact Form & Email: Detailed Guides - Mageplaza
Configure the email address for your Magento 2 store's contact form and ensure that your customers can easily get in touch with you with this informative guide
How to Install Magento 2 with Sample Data - Mageplaza
How to install Magento 2 with Sample Data. In this topic we will discuss about How to Install Magento 2 Step by Step in Manage Store topic
6 Steps To Stop Brute Force Attacks - Mageplaza
How To Stop Brute Force Attacks in Magento 1, 2. In this topic we will discuss about How To Stop Brute Force Attacks in Manage Store topic
How to set Locale, Language, and Country in Magento 2 - Mageplaza
Setup Locale State Country in Magento 2 provides setup your store information on Locale Options that determines the timezone, language, country and the days.