

Change Store Email Addresses - Mageplaza
3 mins read
|
04-02-2016

Vinh Jacker | 03-14-2025
Shipping costs in an online store aren’t always the same. They can change depending on the product’s weight, size, price, or even where the customer lives. Magento 2 helps you handle this with the Table Rates Shipping method. With it, you can set up flexible rules—for example, charge more for heavier items, or apply different rates for certain regions.
All these rules are stored in a table file (CSV), which you can easily upload to your store. When a shopper checks their cart, Magento will automatically show the right shipping cost. This makes the process clear for customers, saves your team time, and creates a smoother buying experience. In this guide, we’ll show you step by step how to configure Table Rates in Magento 2.
💡 Key Takeaways
In Magento 2, Table Rate Shipping is a default method that calculates shipping costs based on a set of predefined rules stored in a table (CSV file). These rules can be applied under different conditions, such as:
For example, you might:
This flexibility makes Table Rate Shipping more powerful than other default shipping methods. Here’s how it compares:
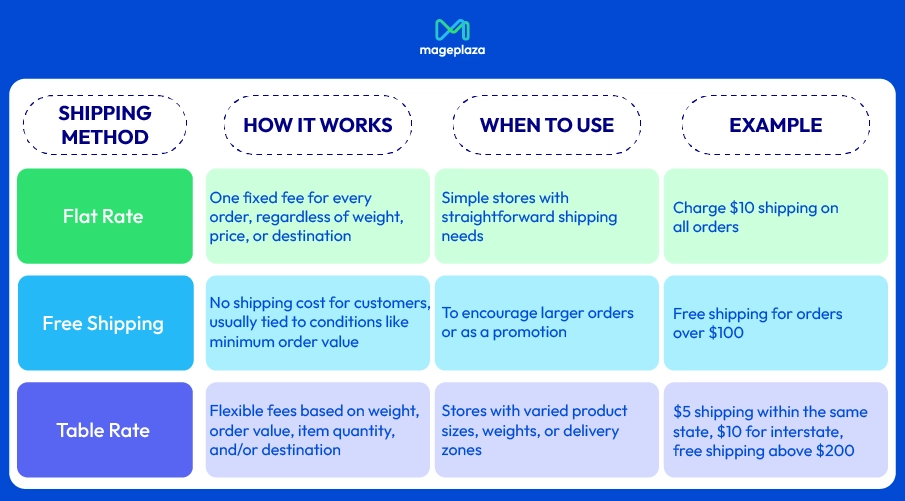
With this approach, Table Rate Shipping helps you create more accurate and customer-friendly policies while keeping control over your shipping expenses.
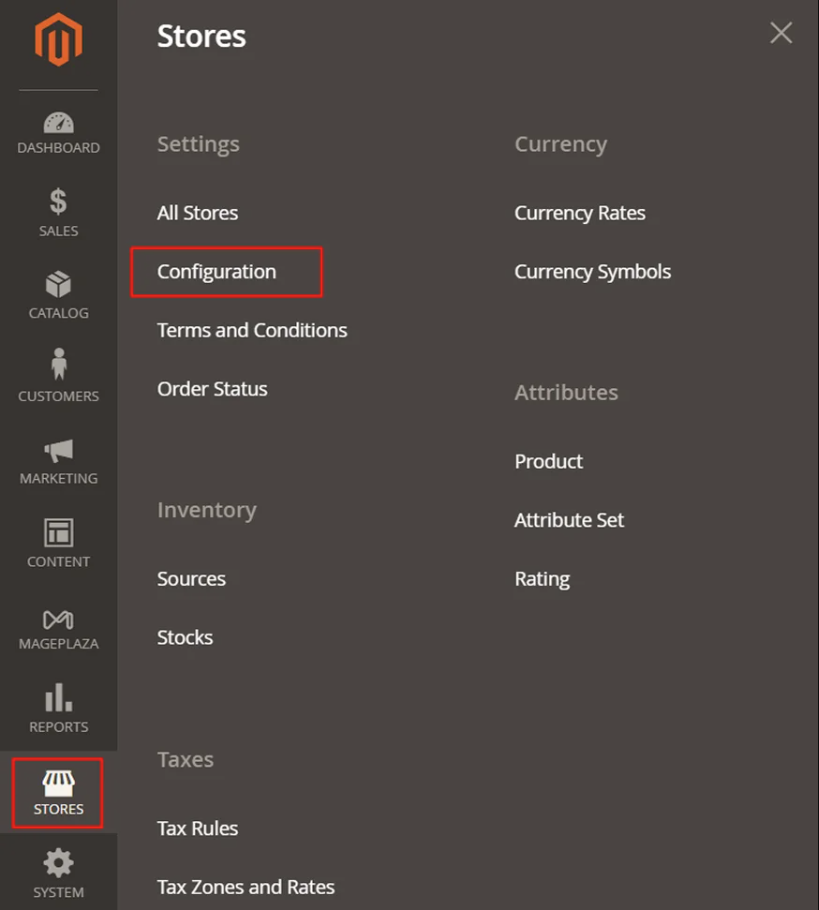
Stores > Settings > Configuration.Sales, select Delivery Methods.Table Rates section,
Enable the shipping method by choosing Yes for that.Title for the table rate shipping on the checkout page. You can use the default value - “Best Way” for the table rate title.Conditions by the calculating methods: Weight v. Destination, Price v. Destination, or # of Items v. Destination.Include Virtual Products in Price Calculation field.
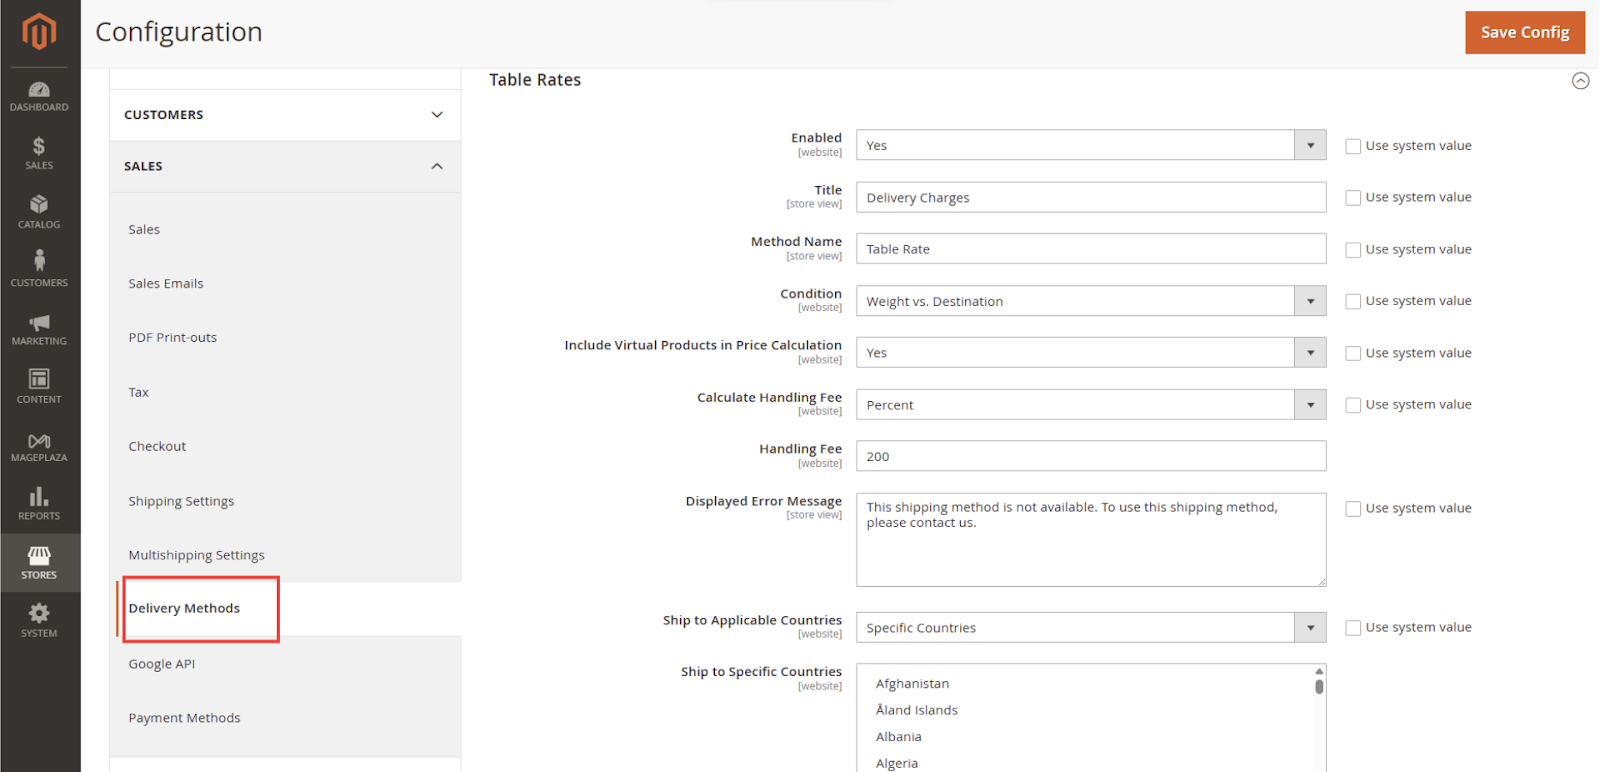
Calculate Handling Fee to fixed or percent, and then enter the number you want to set in the Handling Fee field.Displayed Error Message field, enter the message you want customers to see when Table Rate Shipping is not available at checkout.Ship to Applicable Countries to one of two options:
Sort Order on the Shipping Method on the checkout page.Save Config to complete.📌 Note: Before making the changes listed below, if needed, clear the box that says "Use system value".
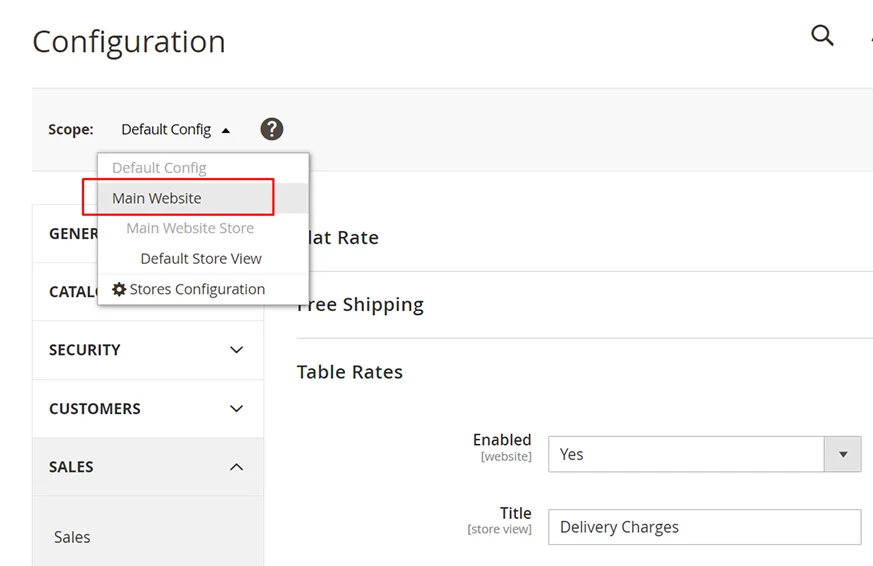
In the upper-left corner, select the Scope where the configuration is active, you can choose Main Website or any website you need.
Then, the Import and Export option will appear, and the Use as Default checkbox will be next to each field in the Table Rate Shipping section.
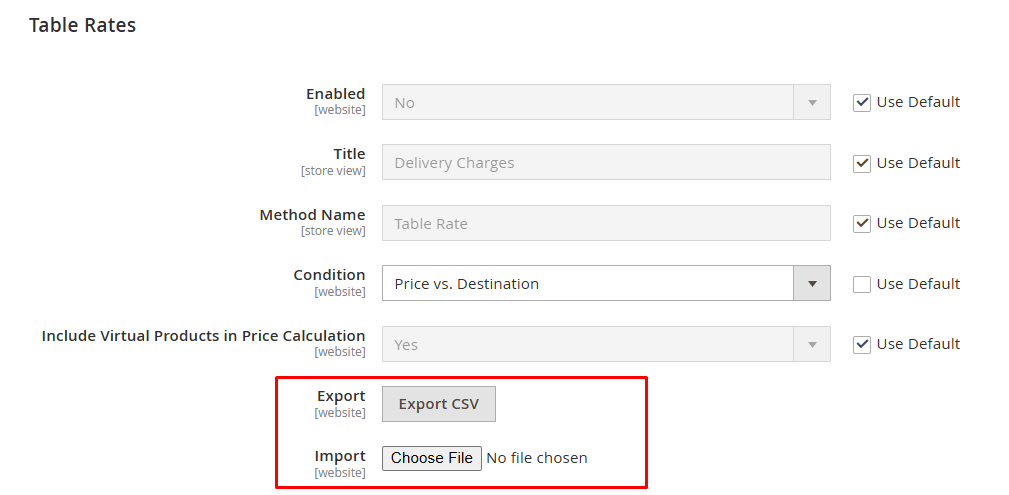
Export CSV button and you will receive a Table Rates CSV Data file with the name tablerate.csv on your computer.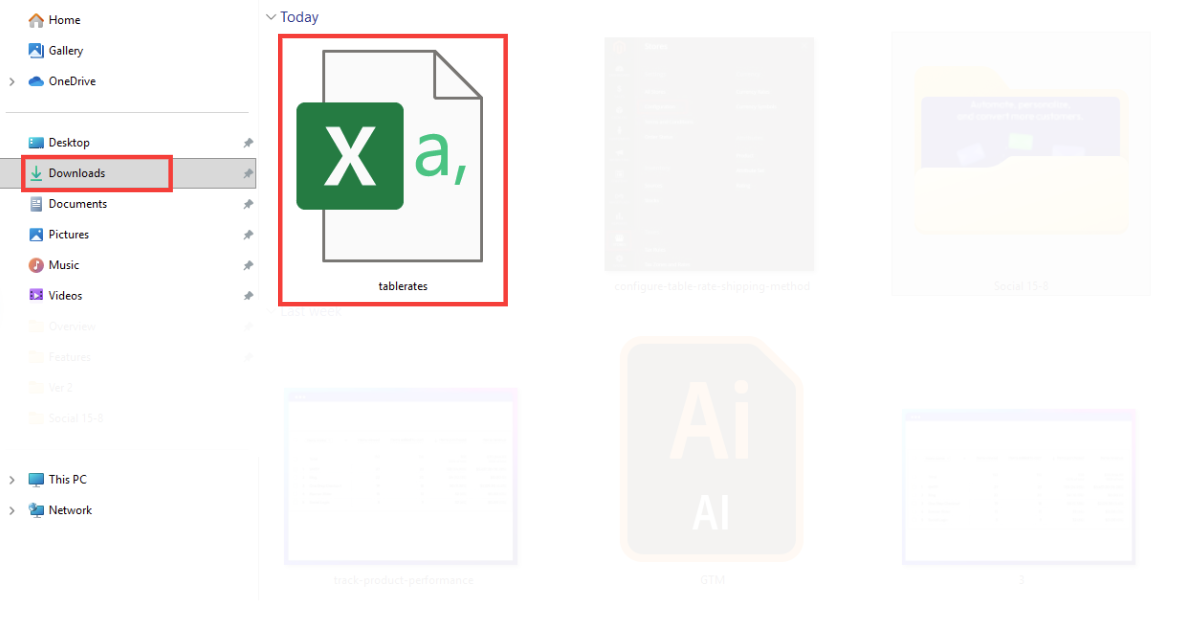
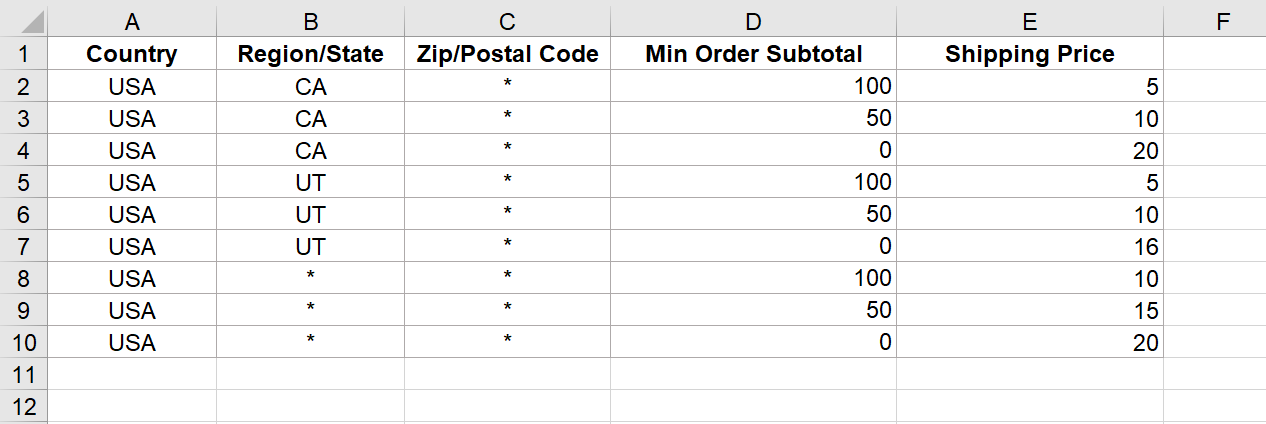
Here’s an example of how shipping rates can be set up in the CSV file. In the table below, orders sent to California (CA) and Utah (UT) have lower rates than the rest of the country, and prices decrease as the order subtotal increases.
📌 Note:
Country column must contain a valid three-character code for each row.Import the “tablerate.csv” file by tapping the Choose File button and then upload the file from your computer.Save Config to complete.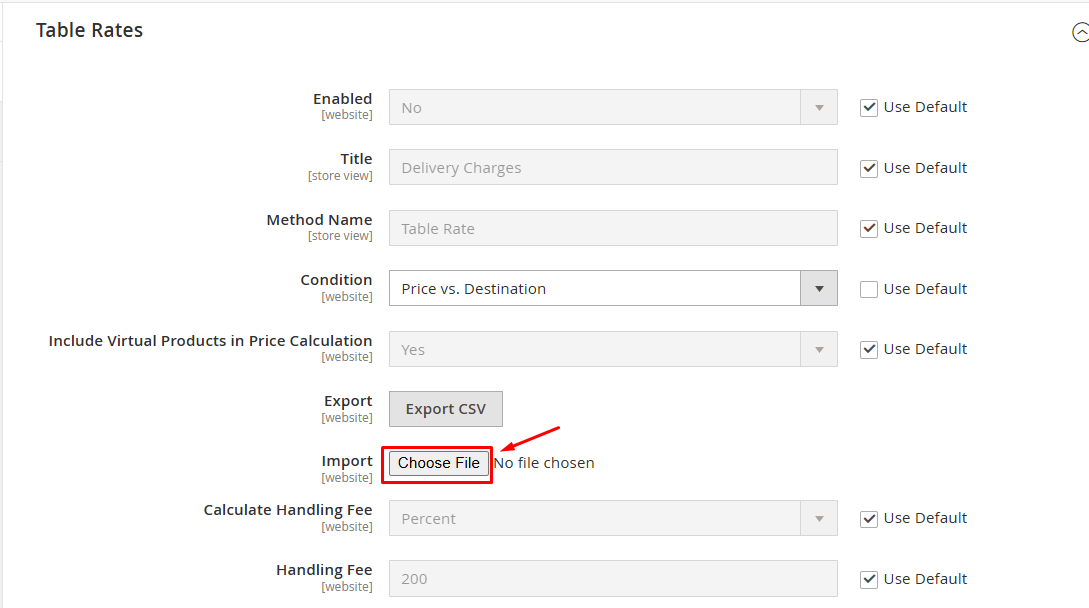
💡 Pro Tip:
After importing your CSV file, it’s important to test the setup to make sure the rates work as expected.
Table Rates shipping method from the available shipping methods.💡 Pro Tip:
To see how Table Rates work for customers at checkout, here are some simple real-world use cases:
| Example | Use Case | CSV Data | Resulting Shipping Options |
|---|---|---|---|
| Change shipping rates based on subtotal & destination region | Set different shipping prices depending on order subtotal tiers & shipping region |
- USA,UT,,100,5.00 - USA,UT,,50,7.50 - USA,UT,,0,10.00 - USA,NY,,200,5.00 - USA,NY,,100,10.00 - USA,NY,,0,20.00 |
- Orders to UT over $100 cost $5 shipping - Orders to UT $50-$99.99 cost $7.50 shipping - Orders to UT under $50 cost $10 shipping - Orders to NY over $200 cost $5 shipping - Orders to NY $100-$199.99 cost $10.00 shipping - Orders to NY under $100 cost $20 shipping |
| Rates based on weight tiers & destination | Charge different shipping prices by order weight ranges & shipping destination |
- USA,,,10,5.00 - USA,,,20,7.50 - USA,,,30,10.00 - USA,CA,,,7.00 - USA,UT,,,8.00 - USA,,,*,9.00 |
- Orders to USA under 10 lbs cost $5 shipping - Orders to USA 10-20 lbs cost $7.50 shipping - Orders to USA over 20 lbs cost $10 shipping - Orders to California, USA cost $7 shipping - Orders to Utah, USA cost $8 shipping - Orders to the rest of USA cost $9 shipping |
| Restrict free shipping to specific regions | Provide free shipping only to certain areas |
- CAN,AB,,30,0.00 - CAN,BC,,30,0.00 - CAN,,,30,5.00 |
- Orders over $30 to Alberta, Canada: Free shipping - Orders over $30 to British Columbia, Canada: Free shipping - Orders over $30 to the rest of Canada: $5 shipping |
Magento 2 table rates example
The default Table Rates method in Magento 2 is a good starting point if you want to set up flexible shipping fees without coding. However, as your store grows, you may find some limitations:
💡 Tip: If you need more flexibility, such as combining multiple conditions, applying rules to certain products or customer groups, or managing shipping settings more easily, consider using the Table Rate Shipping extension to fill in the gaps.
1. How can I configure table rates for different store views or websites in Magento 2?
Magento 2 allows you to set different table rates for each store view or website. You can specify unique CSV files for each store view by changing the configuration scope to the desired store view before uploading the rates.
2. What should I do if my shipping rates aren’t showing at checkout?
Run this quick check:
System > Cache Management), then test again.3. Can I set different table rates for different countries?
Yes, Magento 2 allows you to set table rates specific to regions or countries. Check the Magento table rates CSV examples and use cases we mentioned earlier for a deeper understanding on how it works to set up multiple table rates.
4. Is it possible to set shipping rates based on product categories?
No, the default Magento 2 Table Rates method doesn’t support category-specific rates. However, you can achieve this through third-party extensions or custom development.
5. What are the maximum file size limits for table rates CSV files in Magento 2?
While there is no strict limit, larger CSV files with thousands of entries may affect performance. It’s important to keep the file size manageable to ensure smooth operation.
6. Can I add multiple delivery methods?
Yes, Magento 2 allows you to set up multiple shipping methods so you can offer many delivery options to meet your customer needs.
7. Can Magento 2 table rates calculate prices based on the number of items and destination?
The Magento 2 table rate enables shipping cost calculations based on the number of items in each order and their destination. This system ensures that every customer receives a shipping quote suitable to their order’s characteristics. Therefore, you can improve overall pricing accuracy and customer satisfaction.
8. What happens if I receive an error message after setting up my shipping rates?
If an error message appears after configuring your shipping fees, it indicates there might be issues with the entered absolute value data or other aspects of the configuration steps. You need to double-check all the details you’ve entered.
Table Rate Shipping in Magento 2 is a practical way to give customers clear and flexible shipping options. By displaying rates in a simple table format, you make it easier for shoppers to compare choices and select the method that suits them best. This not only improves the checkout experience but also reduces hesitation that can lead to cart abandonment.
Related Topics

Jacker is the Chief Technology Officer (CTO) at Mageplaza, bringing over 10 years of experience in Magento, Shopify, and other eCommerce platforms. With deep technical expertise, he has led numerous successful projects, optimizing and scaling online stores for global brands. Beyond his work in eCommerce development, he is passionate about running and swimming.
Related Post

Change Store Email Addresses - Mageplaza

Change Welcome Message - Mageplaza
Customize the welcome message on your store's homepage to provide a personalized touch for your customers. Improve the user experience with our step-by-step guide.

Configure Magento 2 Contact Form & Email: Detailed Guides - Mageplaza
Configure the email address for your Magento 2 store's contact form and ensure that your customers can easily get in touch with you with this informative guide

How to Install Magento 2 with Sample Data - Mageplaza
How to install Magento 2 with Sample Data. In this topic we will discuss about How to Install Magento 2 Step by Step in Manage Store topic

6 Steps To Stop Brute Force Attacks - Mageplaza
How To Stop Brute Force Attacks in Magento 1, 2. In this topic we will discuss about How To Stop Brute Force Attacks in Manage Store topic

How to set Locale, Language, and Country in Magento 2 - Mageplaza
Setup Locale State Country in Magento 2 provides setup your store information on Locale Options that determines the timezone, language, country and the days.
Change Store Email Addresses - Mageplaza
Change Welcome Message - Mageplaza
Customize the welcome message on your store's homepage to provide a personalized touch for your customers. Improve the user experience with our step-by-step guide.
Configure Magento 2 Contact Form & Email: Detailed Guides - Mageplaza
Configure the email address for your Magento 2 store's contact form and ensure that your customers can easily get in touch with you with this informative guide
How to Install Magento 2 with Sample Data - Mageplaza
How to install Magento 2 with Sample Data. In this topic we will discuss about How to Install Magento 2 Step by Step in Manage Store topic
6 Steps To Stop Brute Force Attacks - Mageplaza
How To Stop Brute Force Attacks in Magento 1, 2. In this topic we will discuss about How To Stop Brute Force Attacks in Manage Store topic
How to set Locale, Language, and Country in Magento 2 - Mageplaza
Setup Locale State Country in Magento 2 provides setup your store information on Locale Options that determines the timezone, language, country and the days.